Map editor
The Map editor tab is where you prepare a map for your robots. From one place you can:
- Create stations and paths: the points robots drive to and the routes they follow between them.
- Add zones, such as charging, resting or forbidden zones.
- Add or remove obstacles on the map itself.
- Send the finished map to your robots.
This page describes the editor itself: its toolbars and layers, and how to move, delete, save and send what you create.
To open it, go to Maps inside your team and select the Map editor tab.
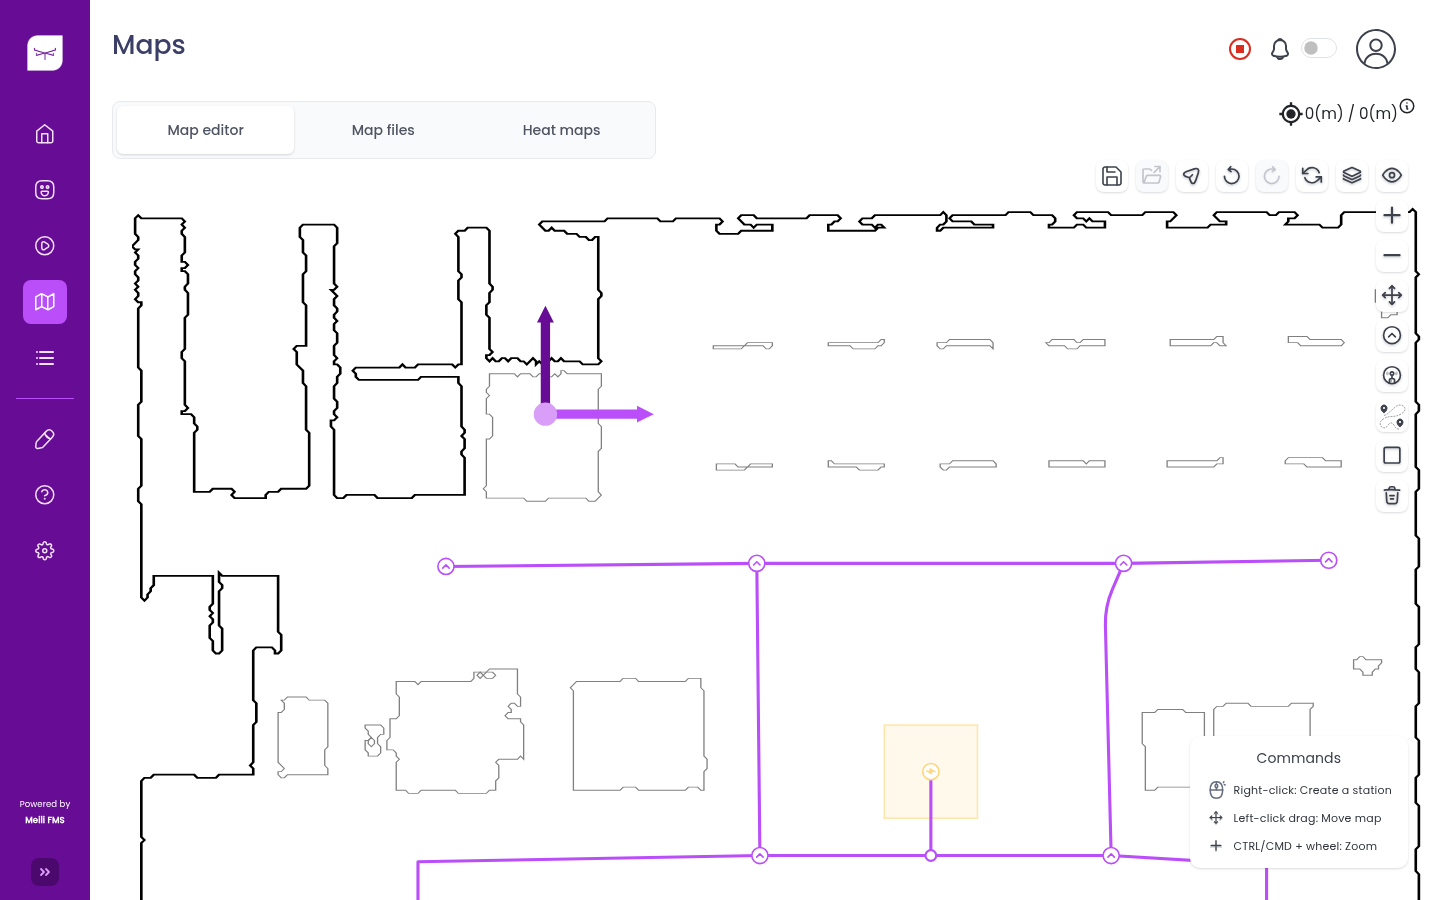
The Commands box in the bottom right corner lists the mouse and keyboard shortcuts for the tool you are using. It changes as you switch tools.
Toolbars
Top toolbar
| Button | What it does |
|---|---|
| Save | Saves your changes, saves a map configuration or saves your view preferences. See Save, load and reset. |
| Load map | Loads a saved map configuration. |
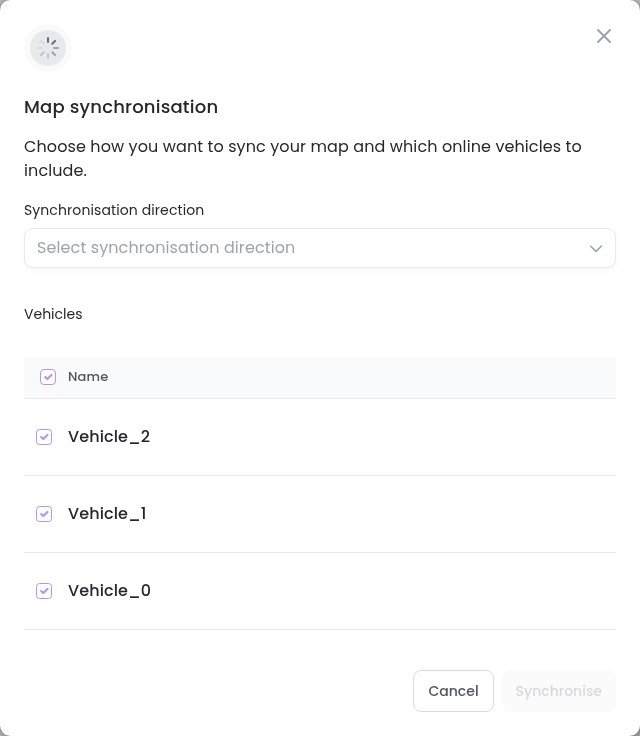
| Map synchronisation | Sends the map to your robots, or gets it from them. See Send the map to robots. |
| Undo / Redo | Undoes or redoes your last change to stations, paths and zones. |
| Reset | Removes all stations, paths and zones, or only some of them. See Save, load and reset. |
| Layers | Chooses which map is shown: Original map (the map as recorded by the robot) or SVG map (a cleaned-up drawing of it). See Layers. |
| Elements (eye icon) | Shows or hides Station names, Paths, Tag zone names, the Navigation area and the Origin of coordinates. |
If your site has more than one floor, a dropdown on the left of the toolbar lets you switch floors. The position of your mouse pointer on the map, in metres, is shown above the toolbar.
Side toolbar
| Button | What it does |
|---|---|
| Zoom in / Zoom out | Zooms the map. You can also hold Ctrl (Cmd on Mac) and scroll. |
| Enable draggable points | Lets you move stations, paths, zones and devices. See Move stations, paths and zones. |
| Create station | Creates a Quick station or an Advanced station. See Stations. |
| Create device | Places one of your team’s devices on the map. |
| Advanced path | Creates a path between two stations from a form. See Advanced path. |
| Add zones on map | Draws a zone with the Line tool or the Rectangle tool. When only the original map is shown, this button becomes Add obstacles on map. |
| Delete selection | Deletes several stations, paths and zones at once. See Delete stations, paths and zones. |
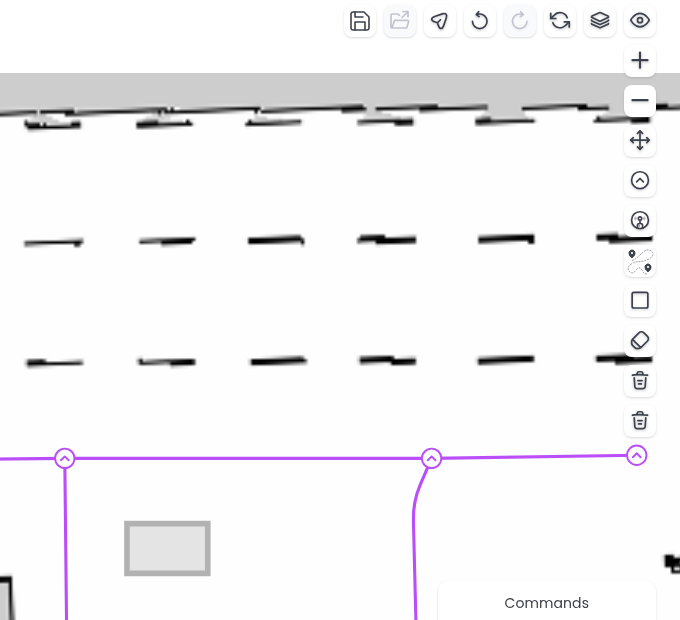
| Eraser and Select an obstacle and delete | Only shown when only the original map is shown. See Obstacles. |
Layers
Use Layers in the top toolbar to choose which map you see:
- SVG map shows a clean drawing of the map. Use it to work on stations, paths and zones.
- Original map shows the map exactly as the robot recorded it. Select it on its own to edit obstacles. Zones are hidden in this view.
Stations and paths
Stations are the points robots drive to, and paths are the routes they follow between them. The quickest way to create them is to right-click on the map to place a station, then keep clicking to draw paths and add more stations. See Stations and paths for all the ways to create and edit them.
Zones
Zones are areas of the map with special rules, such as where robots charge, rest or must not enter. To add one:
- Make sure the SVG map layer is shown.
- Click Add zones on map in the side toolbar and choose the Rectangle tool or the Line tool. The Add new zone dialog opens.
- Choose the Type, fill its settings and click
Create zone. - Draw the zone. With the rectangle tool, click and drag. With the line tool, click to add corners and click the first corner again to close the zone.
To change a zone, click it. Each zone type has its own page with its settings and behaviour. See Zones.
Obstacles
You can add obstacles that robots must avoid, or remove ones that are no longer there, by editing the original map.
- In Layers, select Original map only. The side toolbar shows the obstacle tools.
- To add an obstacle, click Add obstacles on map, choose the Rectangle tool or the Line tool, and draw it on the map.
- To remove part of the map, click Eraser and drag over it. Scroll to change the size of the eraser.
- To remove an obstacle you have just drawn, click it, then click Select an obstacle and delete.
- Click Save in the top toolbar and choose Save current changes.
Move stations, paths and zones
- Click Enable draggable points in the side toolbar.
- Drag a station, a path waypoint, a zone or a device to its new place. Connected paths follow the station.
- To rotate a station, click it and drag its rotation handle. Hold Shift to snap the rotation to fixed angles.
Each change is saved as soon as you release the mouse. Click Disable draggable points when you are done.
Delete stations, paths and zones
To delete one item, open its settings and delete it there (see Station settings and Path settings). To delete several at once:
- Click Delete selection in the side toolbar.
- Click the stations, paths and zones you want to delete, or drag over an area to select everything in it. Click an item again to deselect it.
- Click
Delete selectionat the bottom of the map.
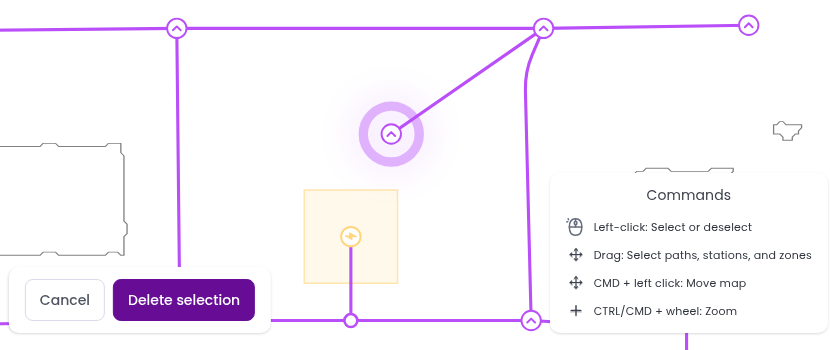
The items are deleted straight away. Use Undo in the top toolbar if you deleted something by mistake.
Save, load and reset
Stations, paths and zones are saved as you create, move or delete them. The Save menu in the top toolbar offers three more options:
- Save current changes: saves the obstacles you added or erased, and which layers are shown.
- Save as new map configuration: saves a named copy of the current stations, paths and zones. You can keep up to 10 configurations per map, for example one for day shifts and one for night shifts.
- Save map preferences: remembers which elements (station names, paths and so on) are shown, so the map opens the same way next time.
To go back to a saved configuration, click Load map and choose it. The page reloads with that configuration. Click the bin icon next to a configuration to delete it.
Reset removes items from the map:
- Reset all: removes all stations, paths and zones.
- Reset zones: removes all zones. If only the original map is shown, it removes the obstacles you added instead and restores the original map.
- Reset paths and stations: removes all stations and paths.
Resetting deletes items for everyone in the team. Save a map configuration first if you might want them back.
Send the map to robots
Robots must be connected through the Meili SDK to receive map updates.
- Click Map synchronisation in the top toolbar.
- Choose a Synchronisation direction:
- Push to vehicles: sends the map from Meili to the robots.
- Pull from vehicles: gets the map from the robots into Meili.
- Push and pull (full synchronisation): does both.
- Select the robots to include. All connected robots are selected by default.
- Click
Synchronise.