Step-by-Step Guide: How to Make a Robot Change Floors#
This tutorial explains how to configure and run a vehicle to change floors using Meili FMS.
Prerequisites#
- Maps are added to the team — see the Maps documentation
- Vehicles are connected — see the Vehicles documentation
- Elevator is connected and added to the map — see the OPC UA device tutorial
- Vehicle Map IDs table is defined — see the OPC UA device tutorial
The goal is to configure the system so that selecting a station on a different floor commands the robot to move there.
Meili FMS will handle the full workflow, including calling the elevator, docking/undocking the robot, and transporting it to the desired floor.
1. Add a Transition Zone#
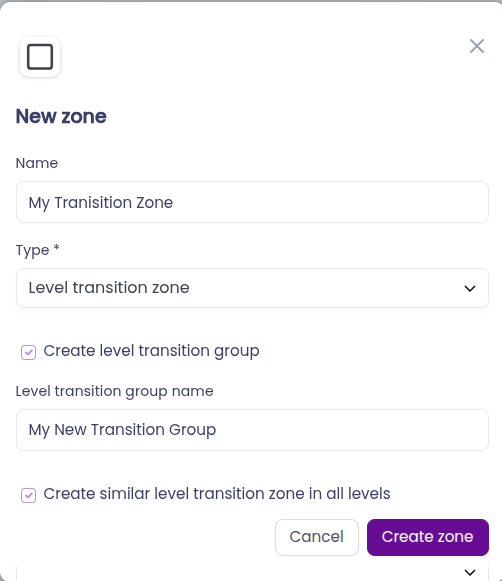
Create a transition zone on any level, in this tutorial, the zone is configured as follows:
| Field | Value / Description |
|---|---|
| Name | “My Transition Zone” |
| Type | Level transition type |
| Create Level Transition Group | Checked - this is the first zone in a new group |
| Level Transition Group Name | “My New Transition Group” |
| Create Similar Transition Zone on All Levels | Checked - automatically adds the same zone to all other levels |
| Level Transition Group | (left empty - we are creating a new group) |
| Entry / Exit Preset | (left empty - presets will be defined later) |
2. Connect Zones to the Existing Network#
After clicking Create and specifying the zone’s location and size, the new transition zones appear on the maps.
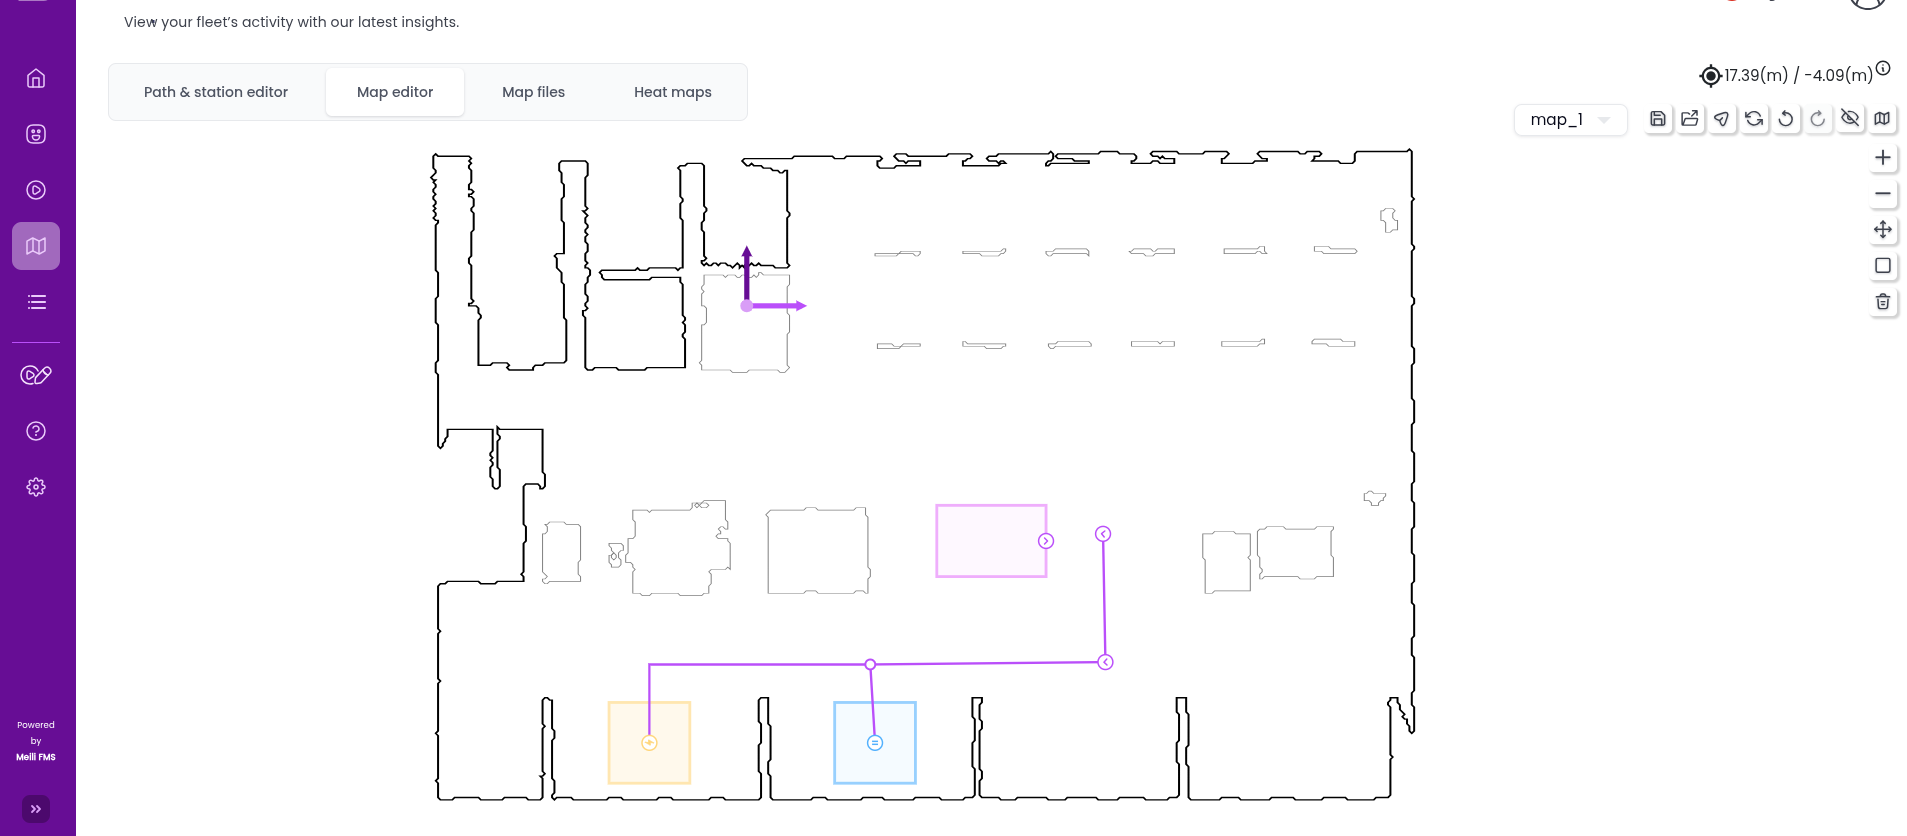
Docking and undocking stations must be connected to the navigation network by the user, unless Free Roaming mode is enabled.
3. Define Entry and Exit Presets#
For details about action and mission presets, see Mission and Actions documentation.
In this example, the required actions are:
- Move to the elevator (transition zone) — handled by the robot via a standard mission
- Call the elevator — part of Entry Preset (Level 1)
- Dock — part of Entry Preset (Level 1)
- Move the elevator to the destination floor — part of Exit Preset (Level 2)
- Undock — part of Exit Preset (Level 2)
- Change the robot’s floor — part of Exit Preset (Level 2) using the
Update Robot Mapaction
Note: Docking and undocking in this example are placeholders without real logic.
Presets Required#
Entry Preset (Level 1):
- Call elevator and open the door
- Dock
Exit Preset (Level 2):
- Call elevator and open the door
- Undock
- Send
Update Robot Mapto the robot
Presets are easiest to create in the Mission Presets tab:
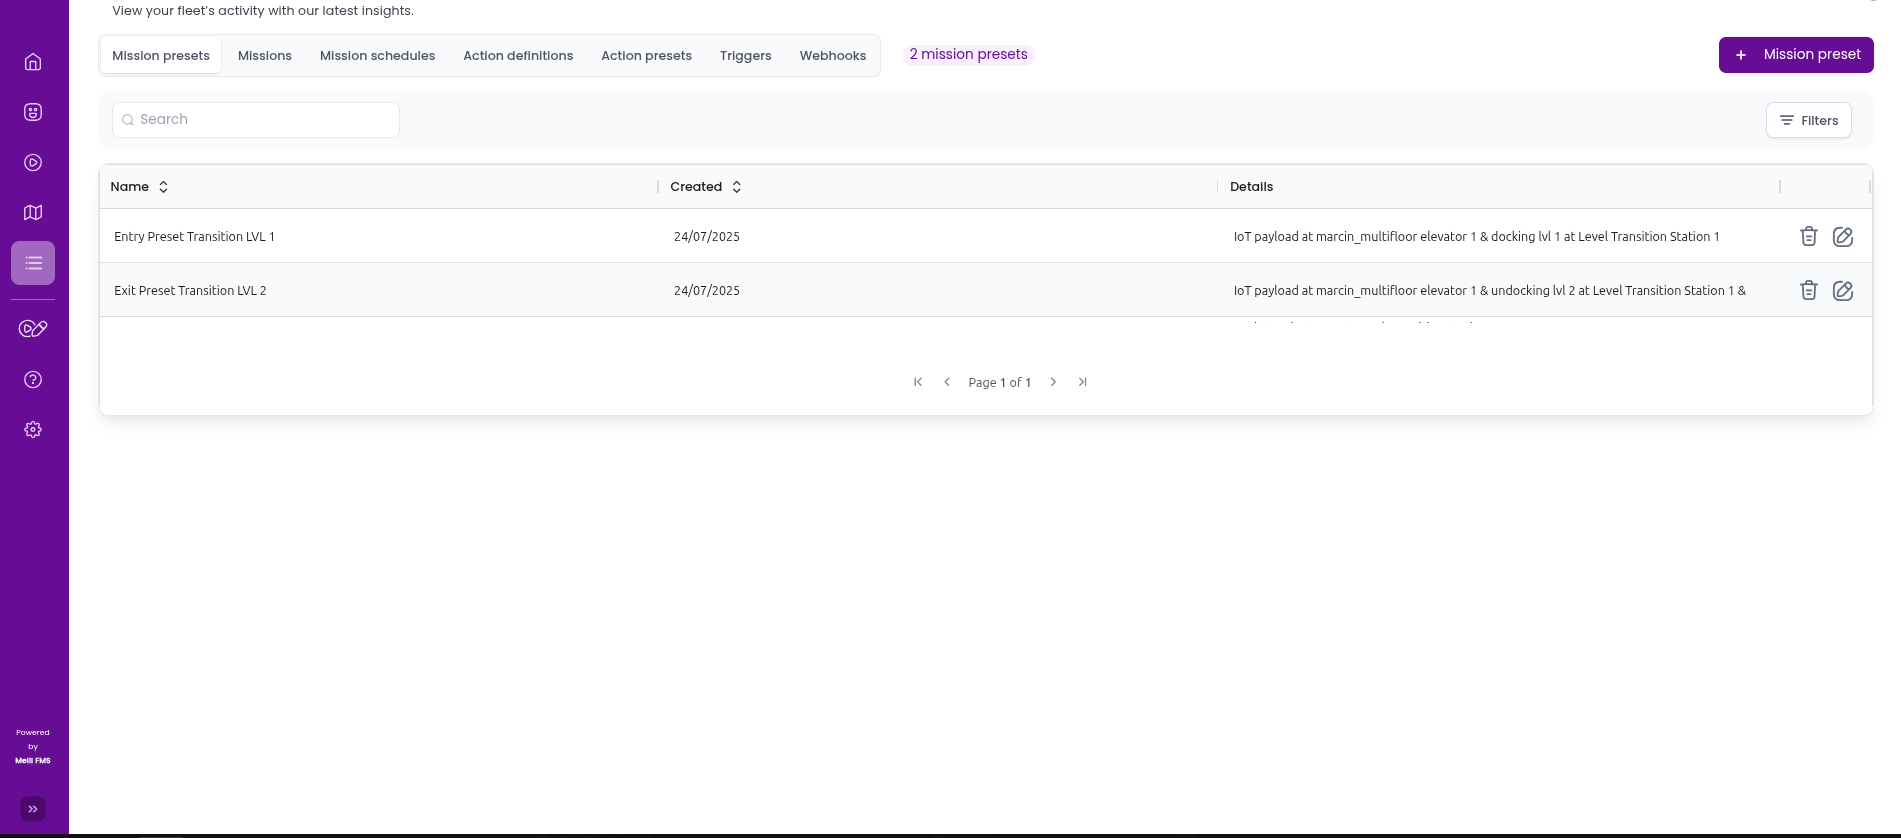
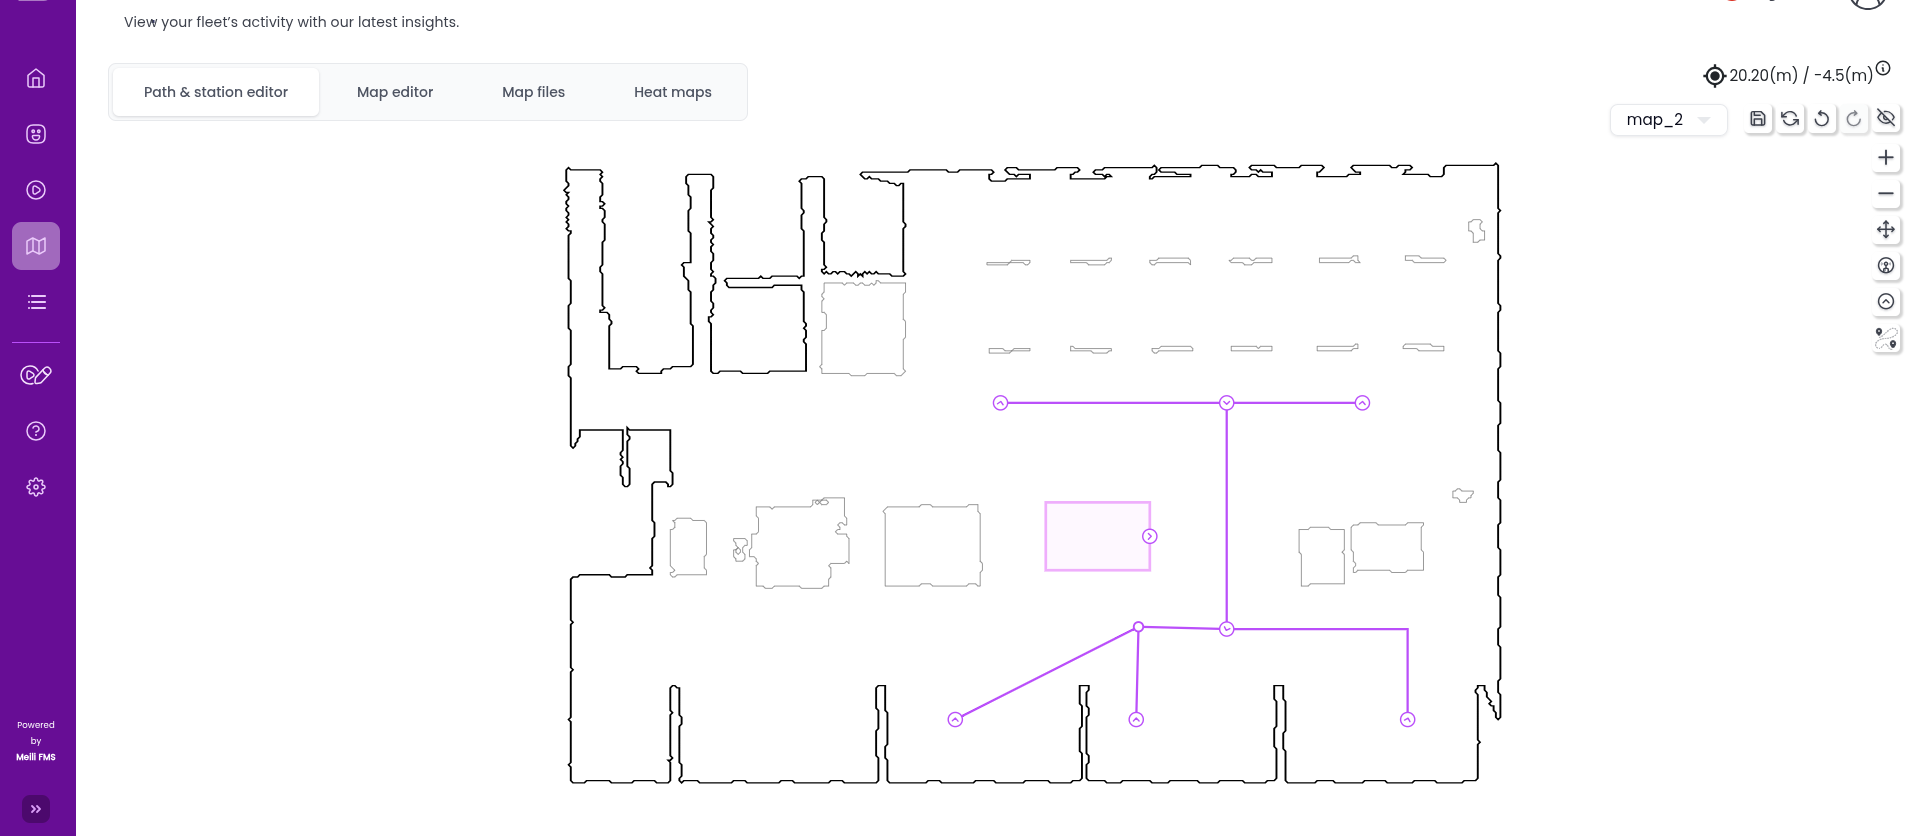
Once created, presets can be assigned to zones in the Maps tab by selecting the zone and choosing the appropriate entry and exit presets.
4. Move the Robot#
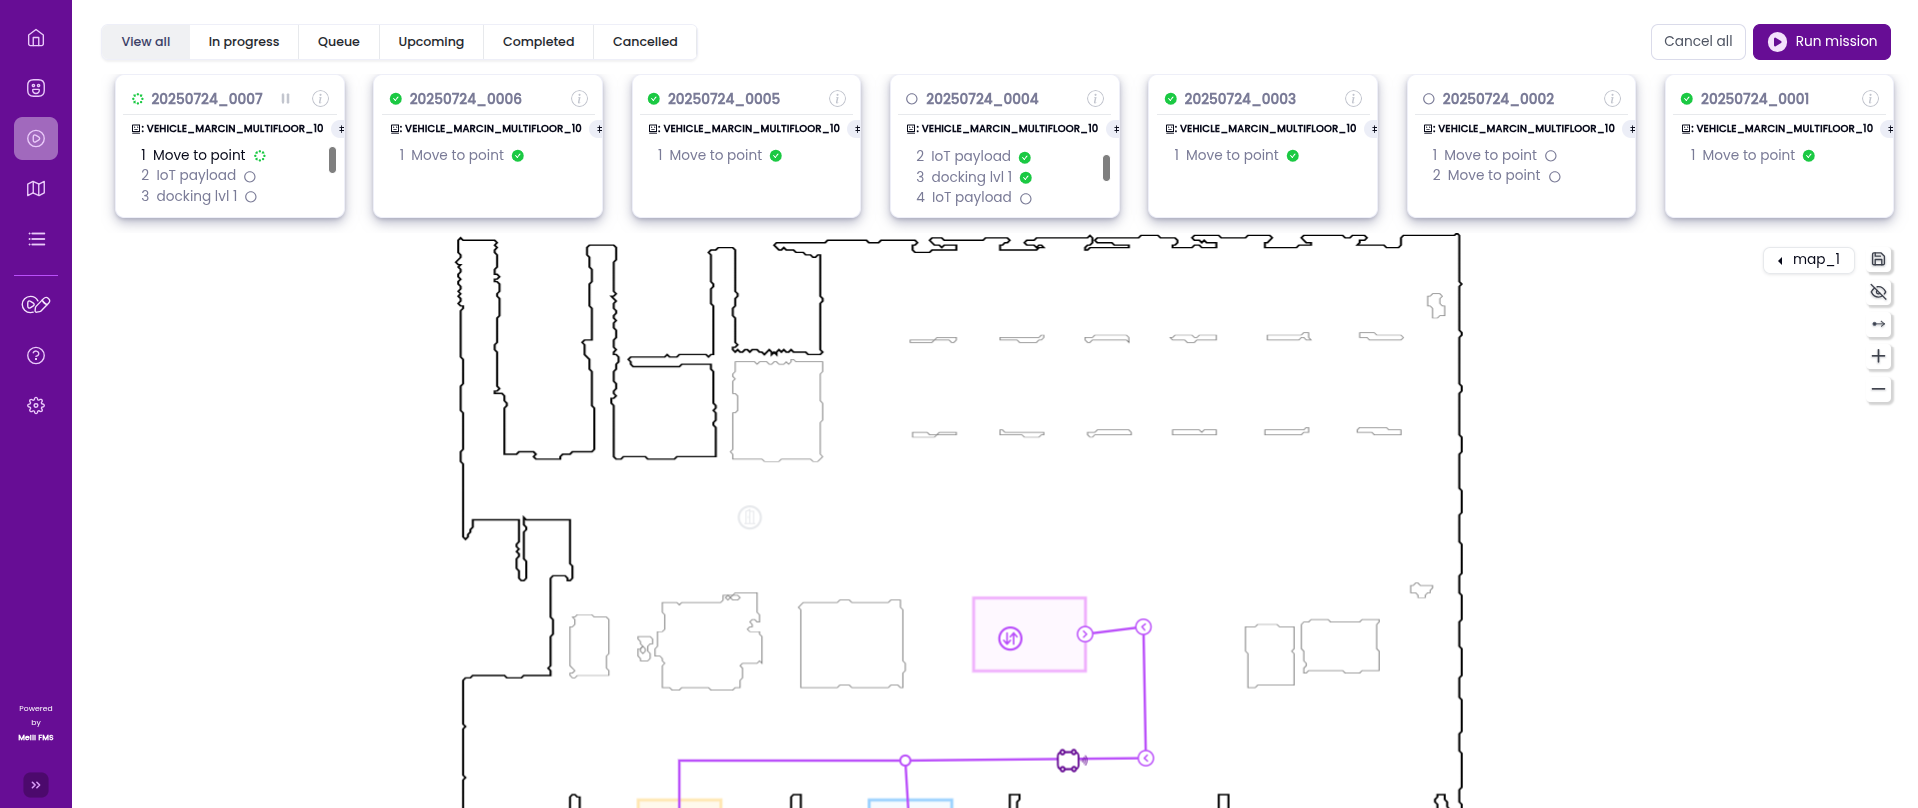
Everything is now configured! When the robot is located on Level 1, you can select any station on Level 2, then click the robot to send it there.
Robot moves to the transition zone on Level 1:
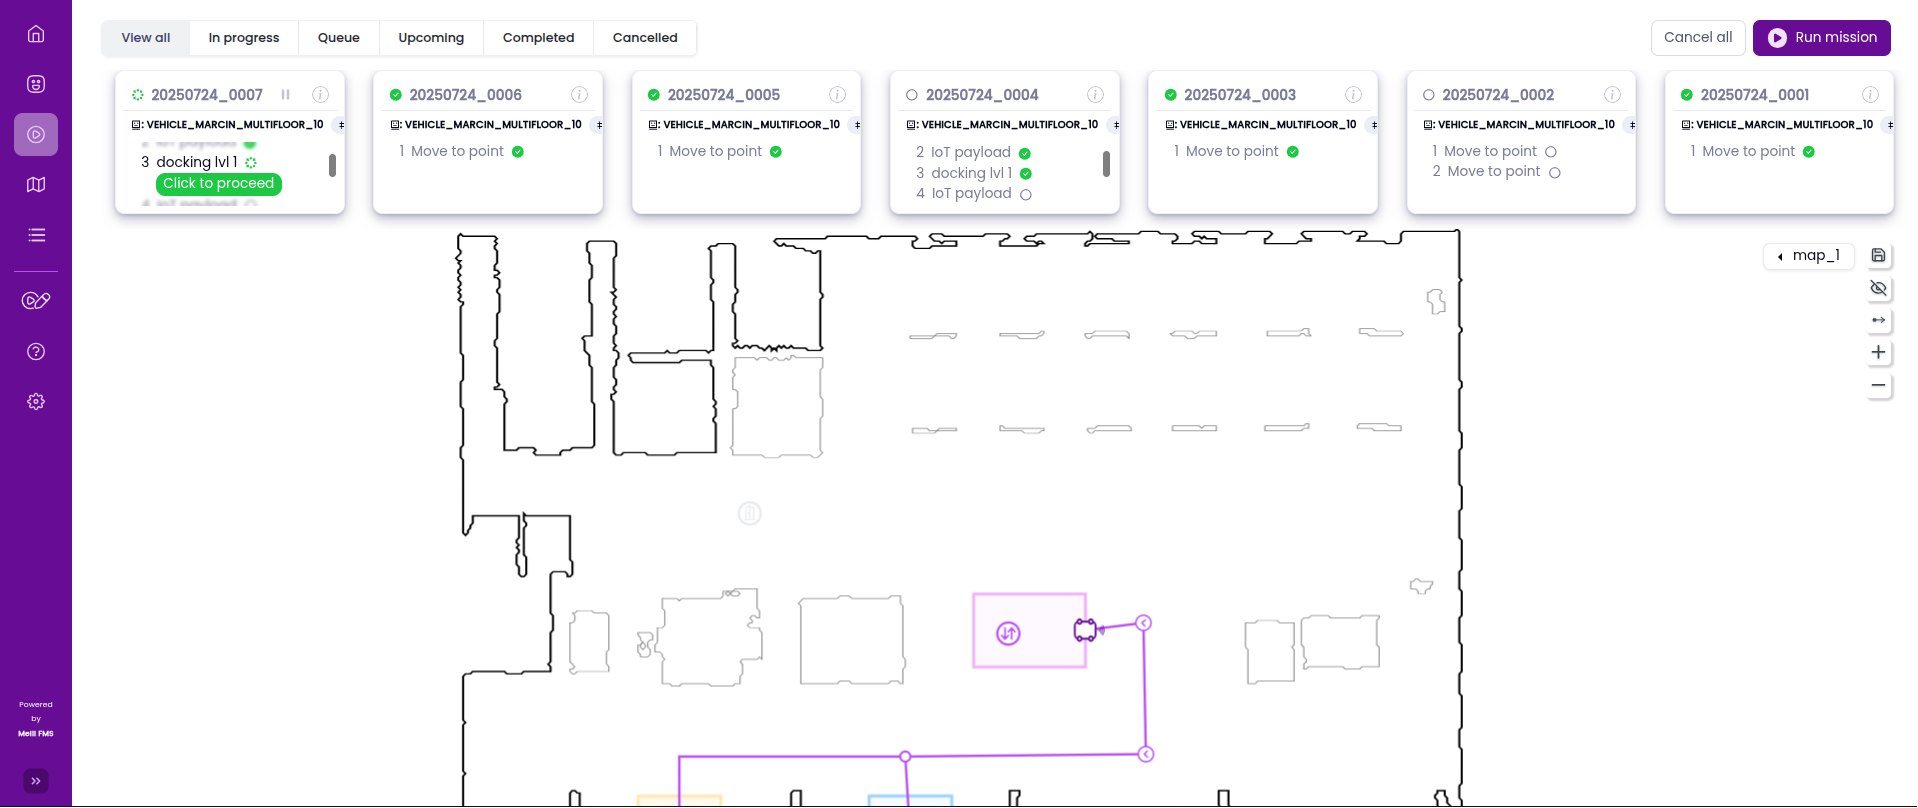
Entry Preset actions are executed:
Robot moves to the target station on Level 2:
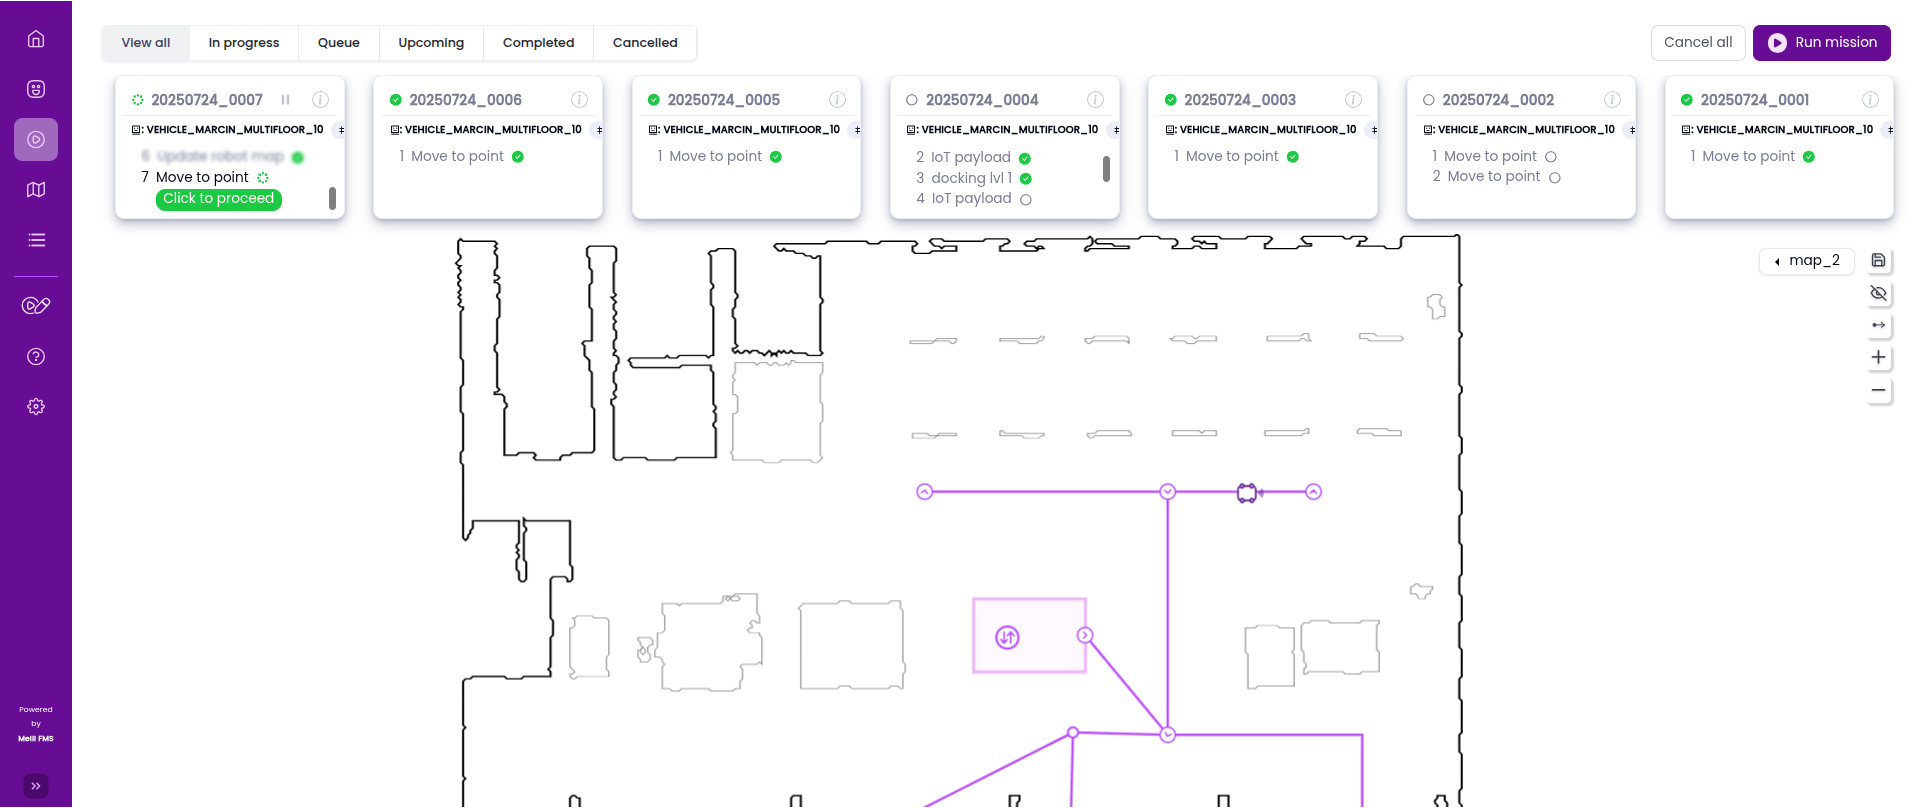
Note: Some or all of these steps can be automated.
To enable automatic execution, ensure that Auto-confirmation is turned on.