Missions #
Warning In order to send out a mission, the Meili Agent needs to be installed. Go to Installing Meili Agent for the installation guidelines.
Also, you need to have your map ready with added obstacles, points, and paths. If you missed this step, go to Editing a Map.
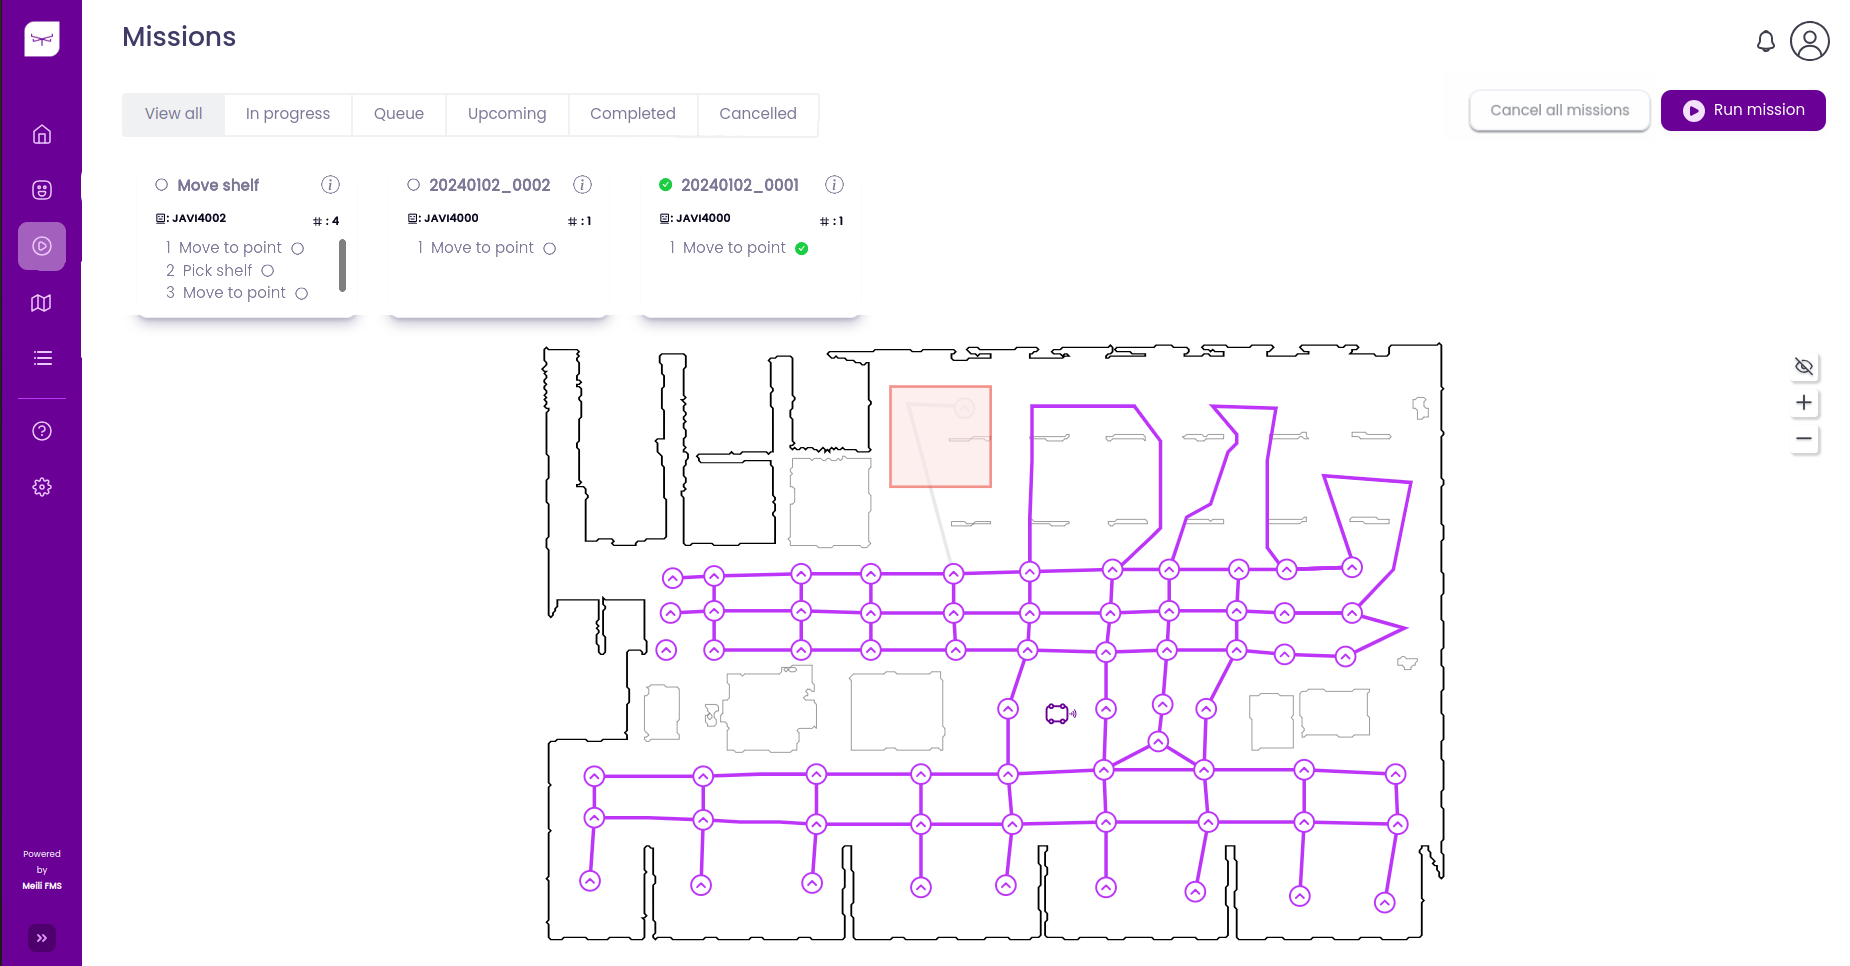
Once the Meili Agent is up and running and the maps are ready, you can actually see your robots live on the map on the ‘Missions’ page.
Congratulations, you are now ready to send out a mission!
Basic Missions #
From the map view, you can send out a “Move to point” mission by first clicking the station you want to send the robot to and then selecting the robot you want to move to that point.
Missions Overview #
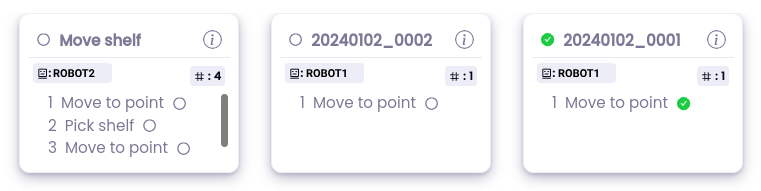
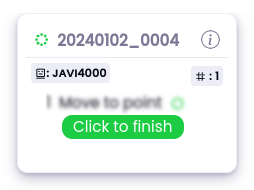
On the top of the page, you can see different cards with short information about the missions and their status. More details can be found by clicking the info button on each card. Missions can also be filtered by their status.
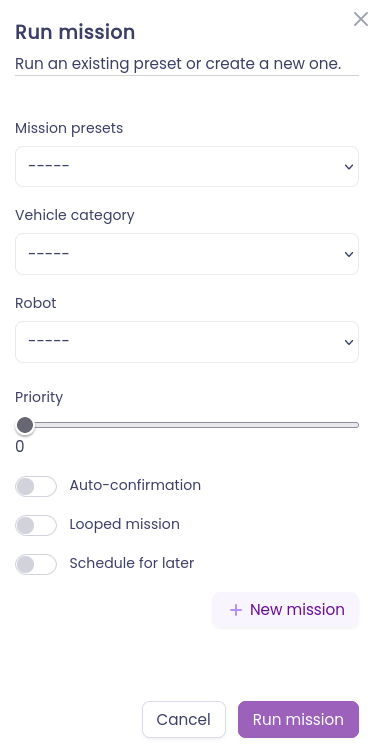
Run Mission #
On the top right corner, you can find the “Run mission” button. When clicking it, a menu appears, from there, you can run an existing mission preset or create a new one (To create a new mission check Create New Mission.).
To run an existing mission preset, from the drop down menu “Mission presets”, select the mission you want to run, the target robot and configure the other needed parameters. Then click the “Run mission” button.
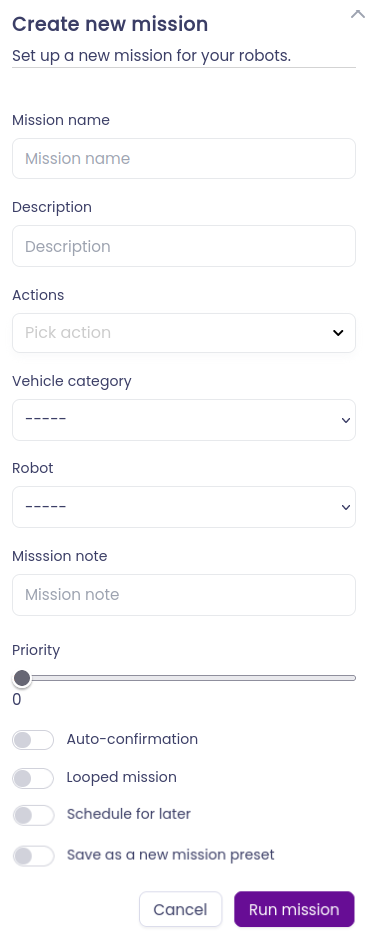
Create a New Mission #
To create a new mission, click the “New mission” button. The menu, will change, showing now different fields to fill in:
-
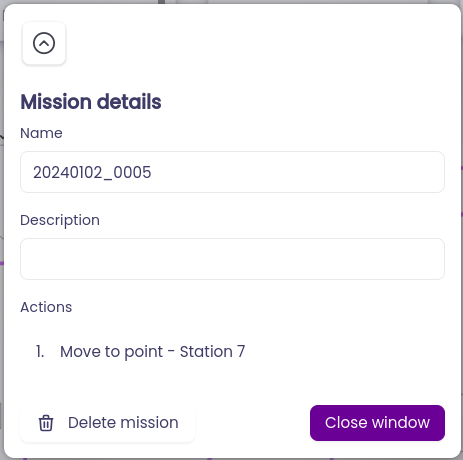
Mission name - name of the mission
-
Description - description of the mission
-
Actions - actions to be performed by the robot. The different actions can be selected from the drop down menu. When picking one, it will be added to the list of actions. Actions will be executed in order of addition. The target station and its floor must be selected. Extra parameters might be required depending on the action type.

-
Autogenerated movement #
The autogenerate movement is the setting that allows users to simplify missions/presets by autogenerating the move to point actions when required. It has 3 options:
- Everywhere - Which creates a move action for the robot whenever the system tracks an action has a different position (station) from the previous ones.
- Nowhere - Leaves the mission just as is.
- Zone presets - Only generates move actions whenever the robot passes through zones such as capacity/action/etc that require extra steps/logic.
-
Vehicle category (optional) - category of the vehicle that will be used for the mission. The category can be selected from the drop down menu.
-
Robot - robot that will be used for the mission. The robot can be selected from the drop down menu.
-
Mission note - note that will be added to the mission.
-
Priority - priority of the mission.
-
Auto-confirmation - if auto confirmation is marked, it is not required to manually confirm the mission termination in the UI (see Mission Confirmation for more information).
-
Looped mission - if checked, the mission will be re-executed after completion.
-
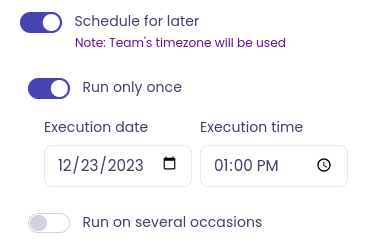
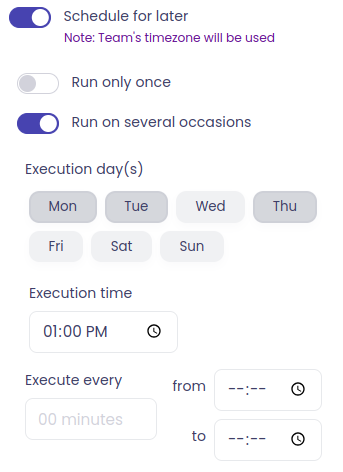
Schedule for later - if checked, the mission will be scheduled for later execution. Two new options will appear:
- Run only once - if checked, the mission will be executed only once at the selected date and time.
- Run on several occasions - if checked, the mission will be executed on several occasions. Week days, times and repetition interval can be selected.
- Run only once - if checked, the mission will be executed only once at the selected date and time.
-
Save as a new mission preset - if checked, the mission will be saved as a new mission preset. Saved mission presets can be checked in the Mission presets section inside Actions.
Mission Confirmation #
When the robot arrives at the destination location, the mission needs to be confirmed in the UI. To do so, click the “Click to finish” button. The mission will be marked as completed and the robot will be ready to receive the next mission.
If the “Auto-confirmation” option is marked, it is not required to manually confirm the mission.
Delete/stop a Mission #
To delete/stop a mission, click the info button on the mission card, then click the “Delete mission” button and confirm.
Cancel all Missions #
All missions can be canceled at once by clicking the “Cancel all missions” button next to the “Run mission” button.
Mission Timeouts #
The mission timeout behaviour is described in a dedicated page: