Dashboard #
The Dashboard is a user-friendly interface that provides an overview of your entire fleet. You can add charts and graphs, and customize the layout to display the information about your robots and operations that best fits your needs.
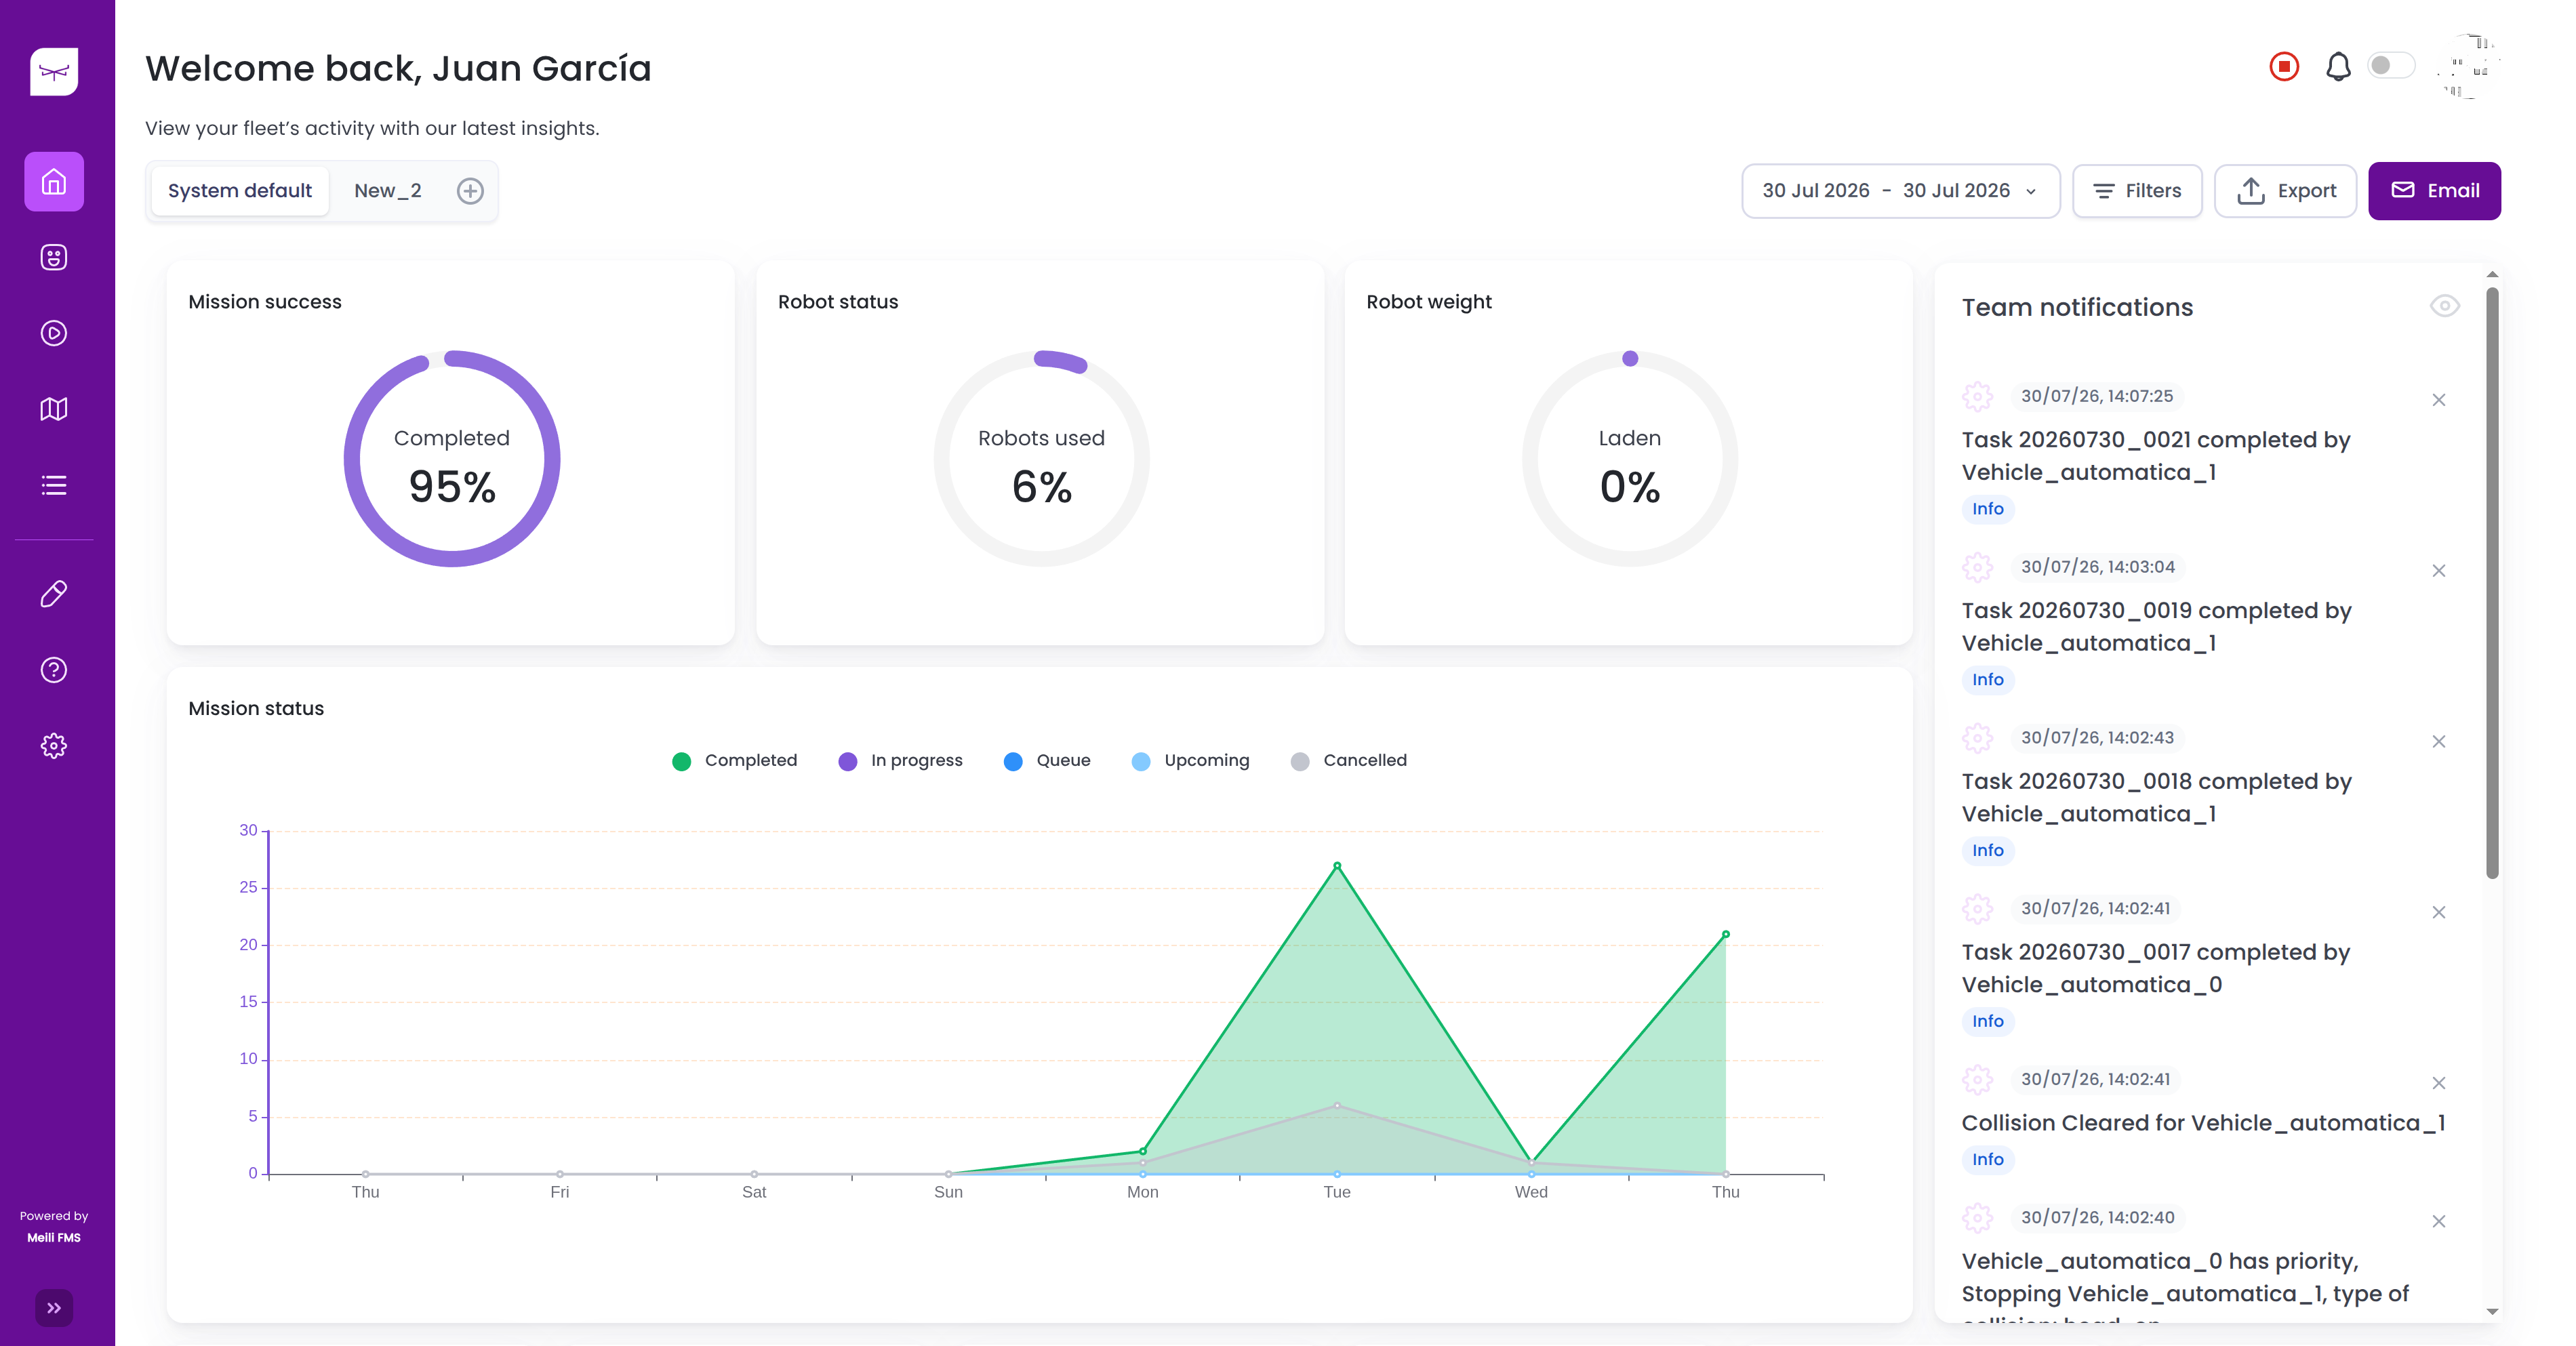
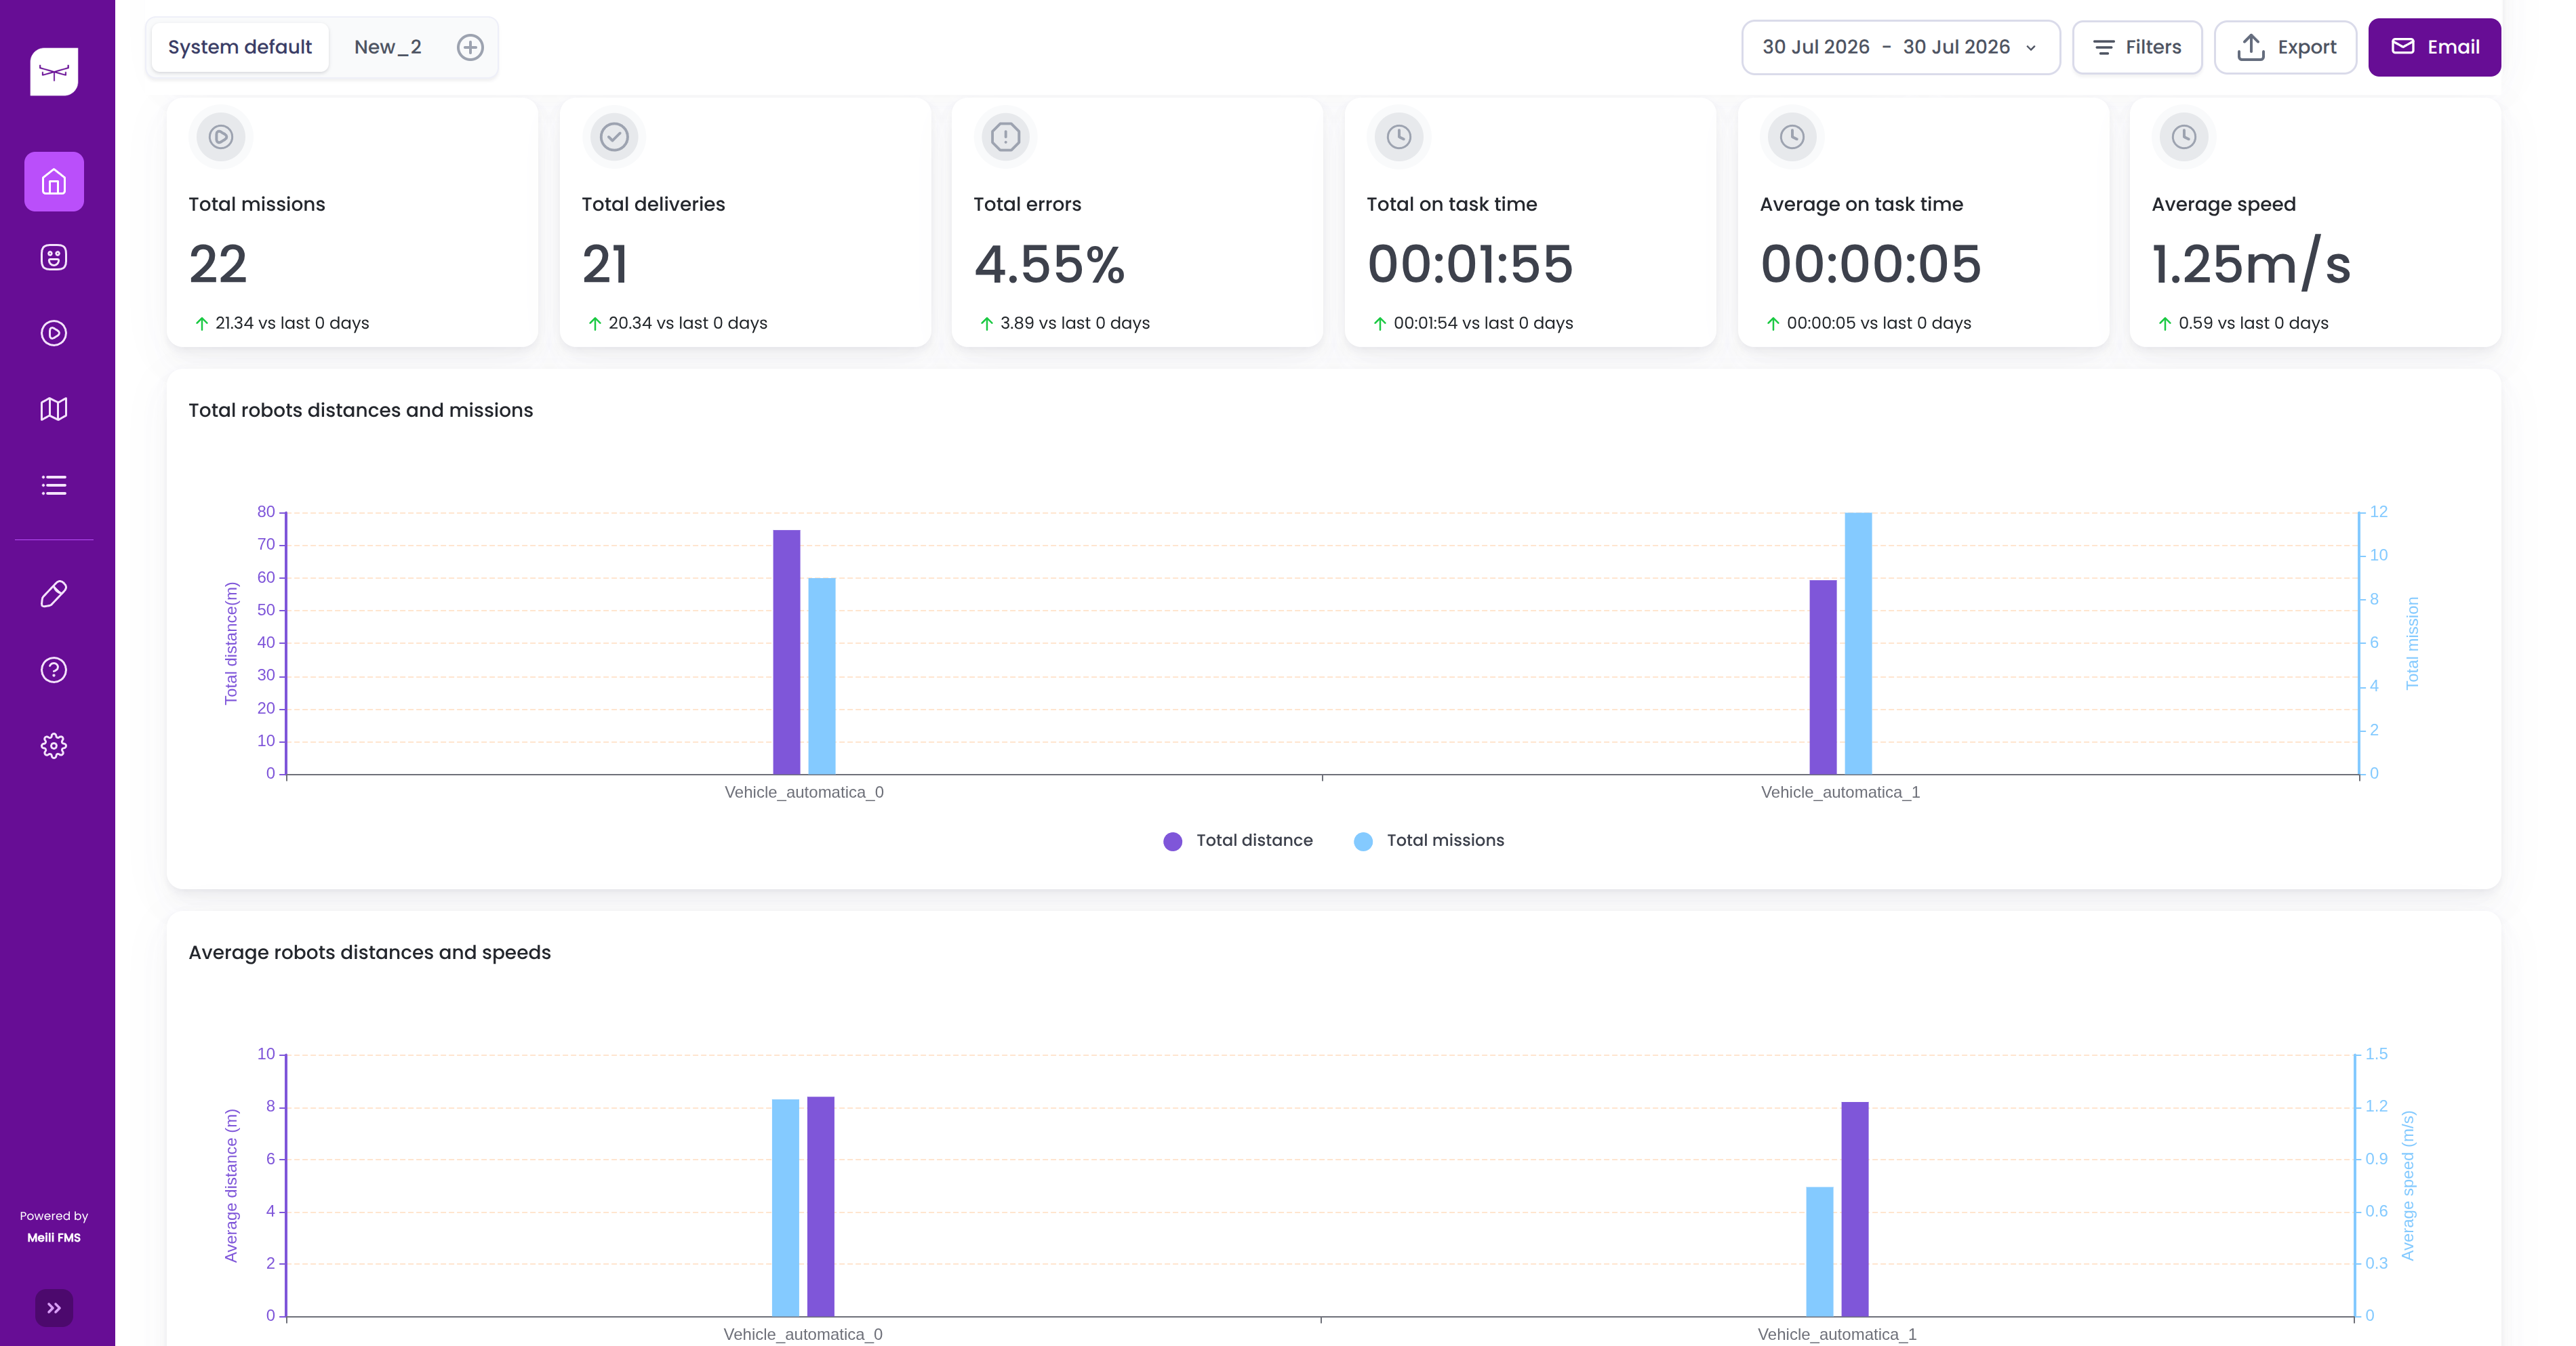
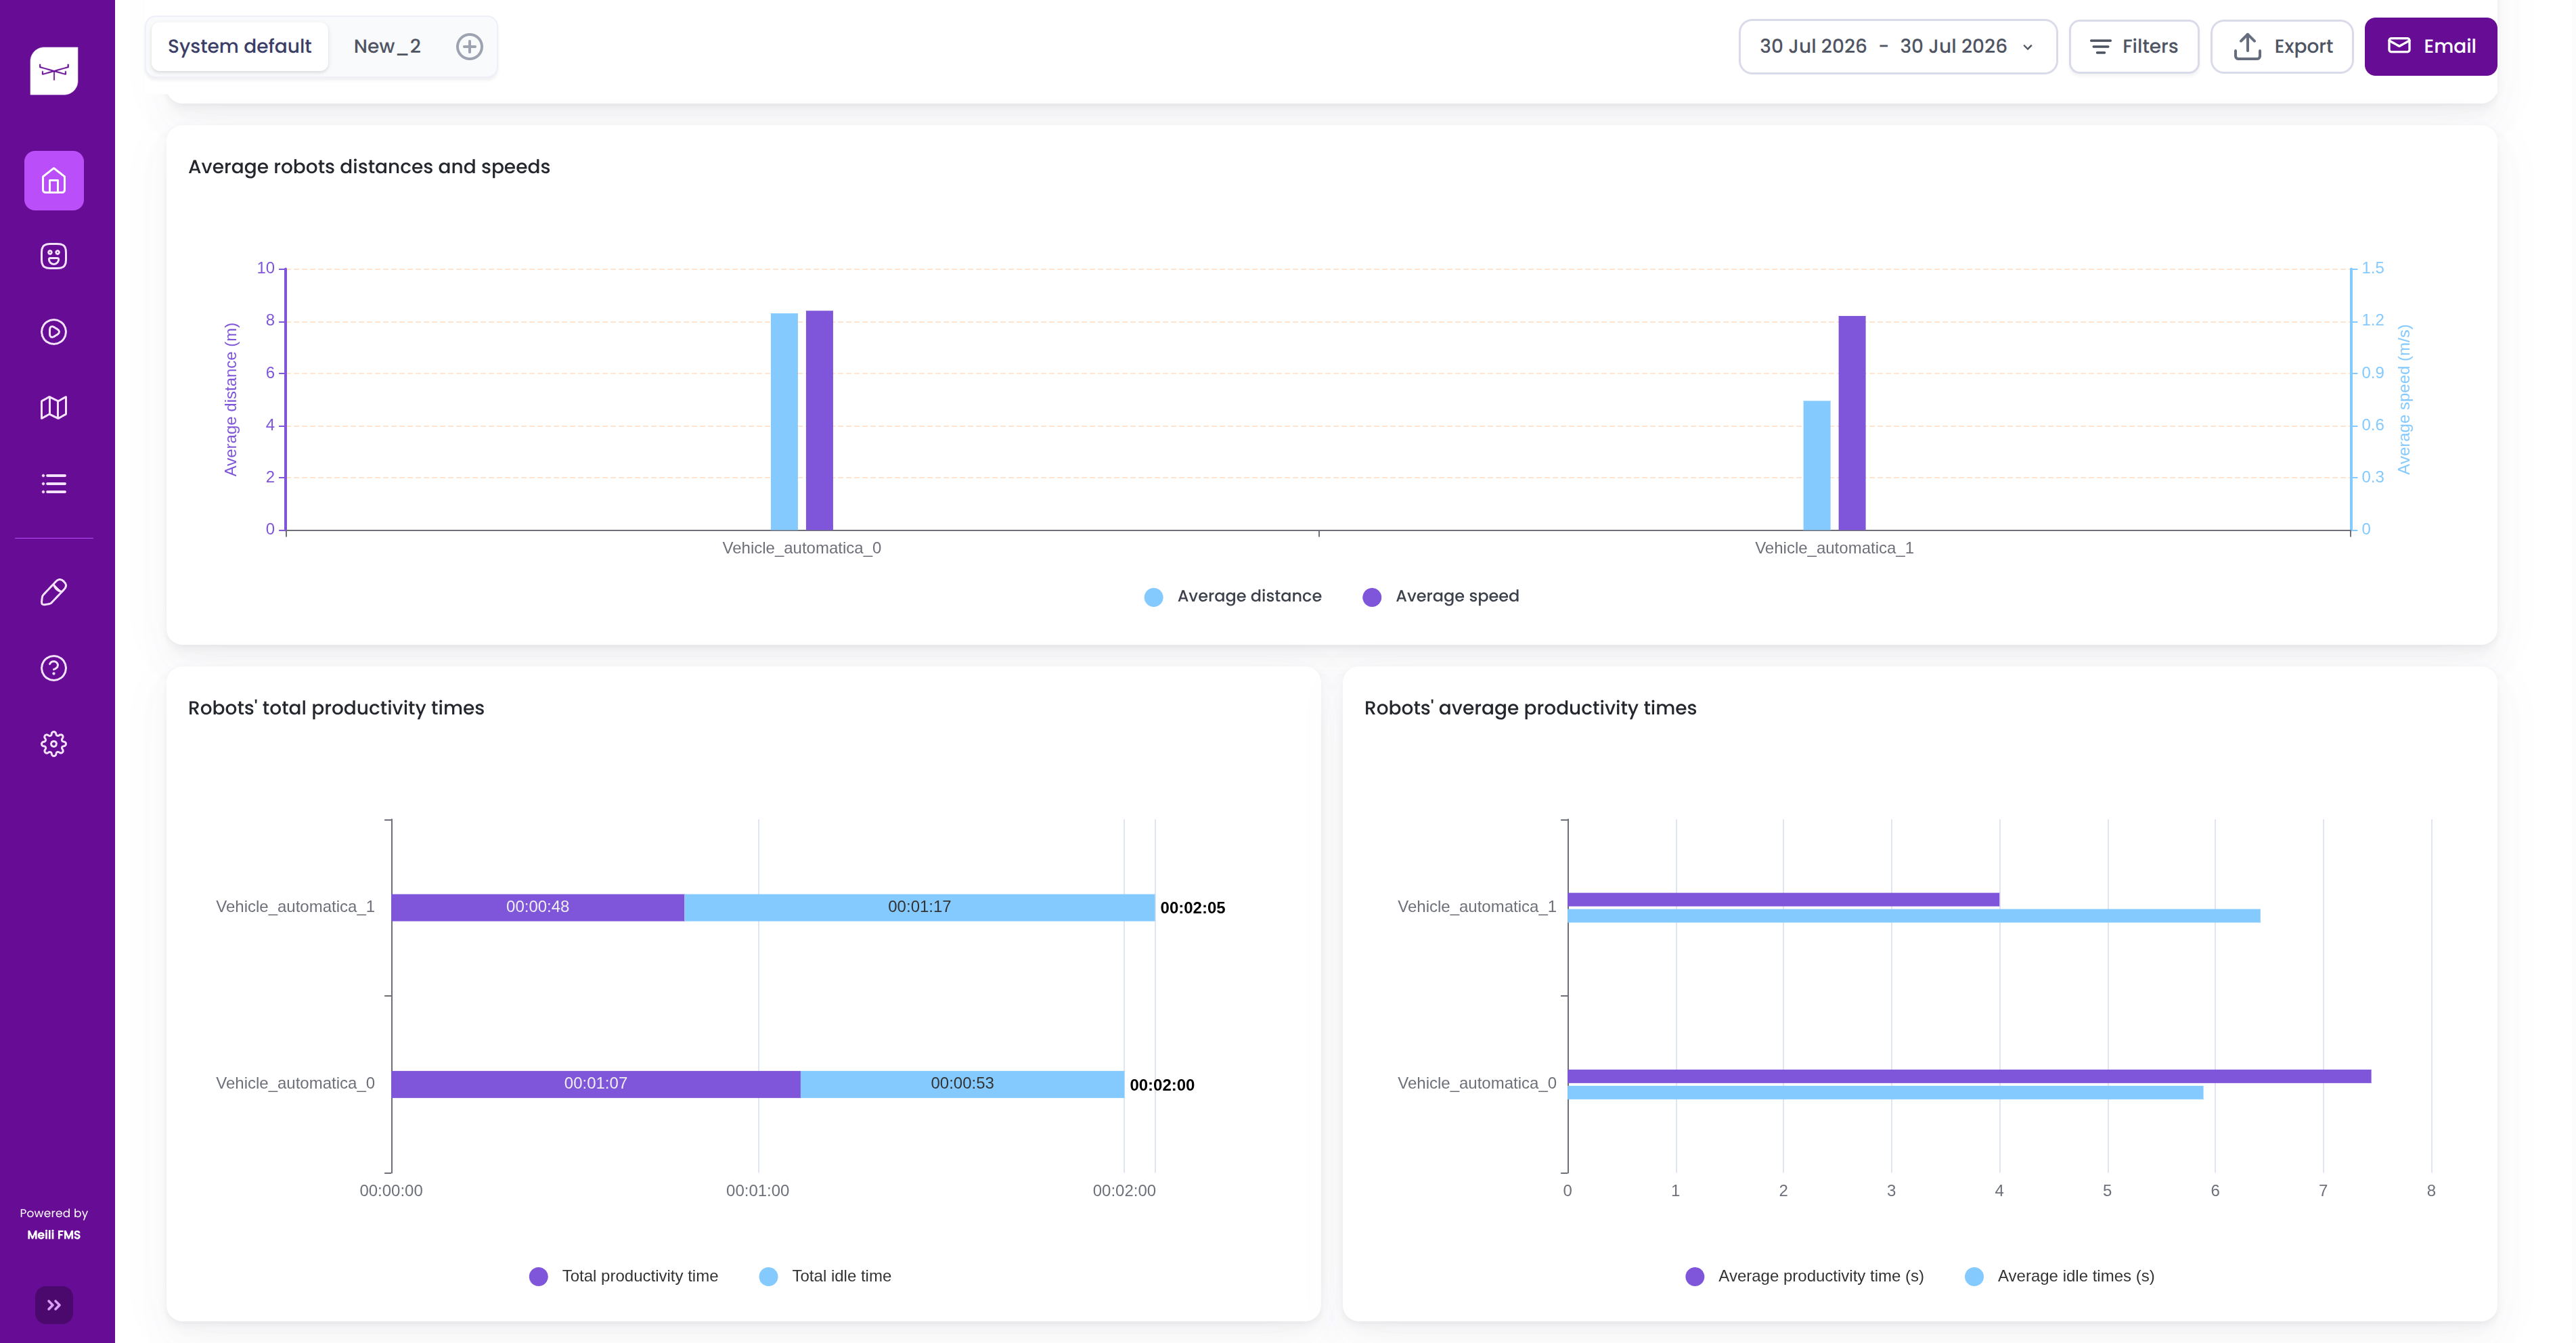
When you first open the Dashboard, the System Default dashboard is displayed. It provides the basic functionality to select a timeframe and view the following metrics:
- Mission success
- Robot status
- Robot weight
- Mission status
- Total missions
- Total deliveries
- Total errors
- Total on-task time
- Average on-task time
- Average speed
- Total robot distance and missions
- Average robot distance and speed
- Robots’ total productivity time
- Robots’ average productivity time
In the top-right corner of the default dashboard, you can export the displayed data as a CSV file for the selected timeframe.
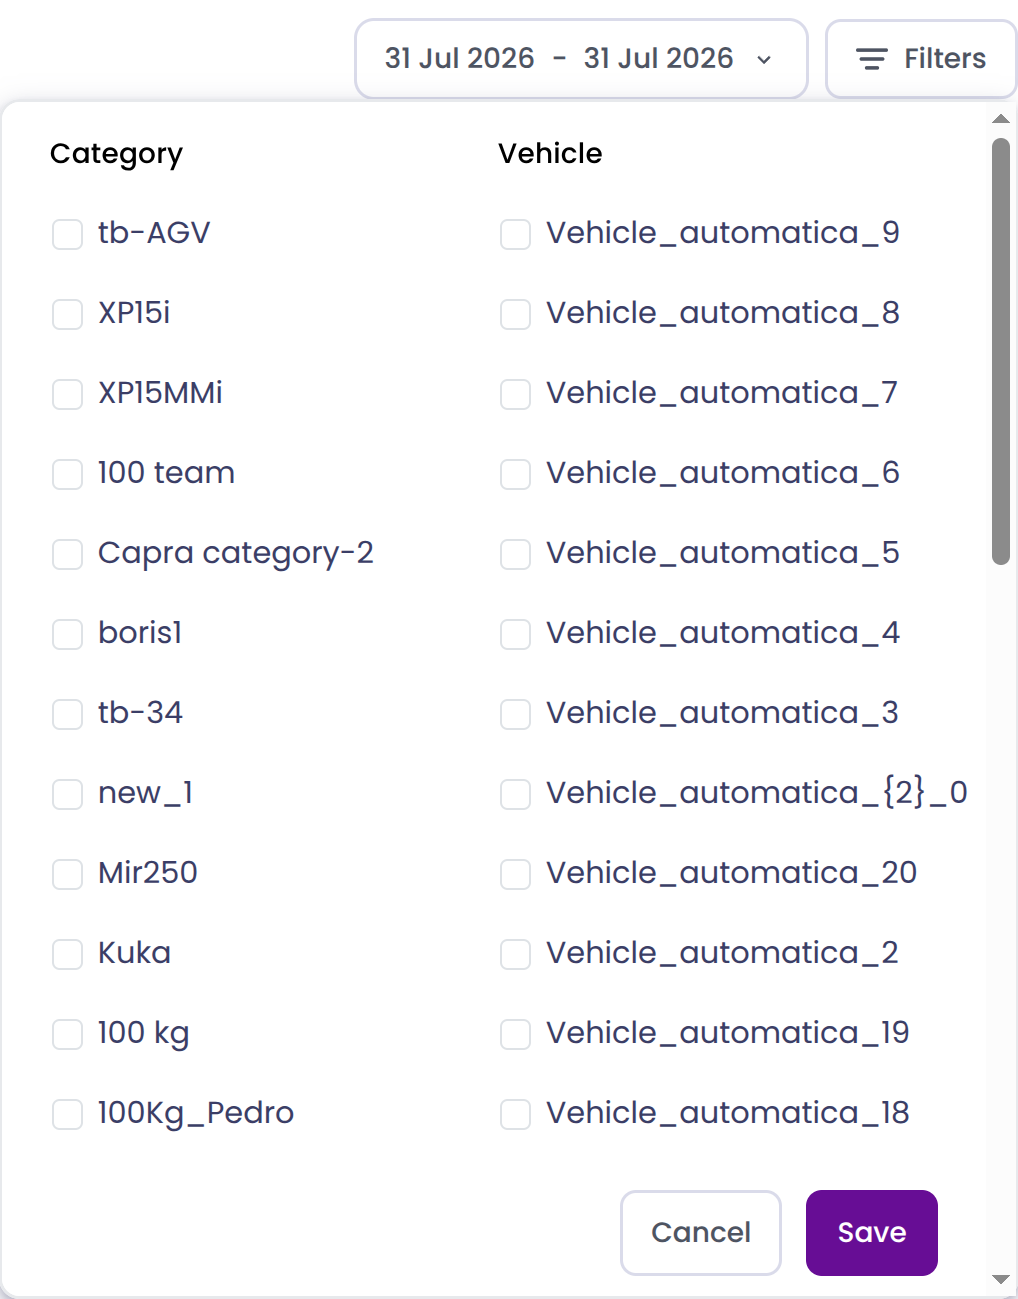
You can also filter the dashboard data by timeframe, vehicle, or vehicle category.
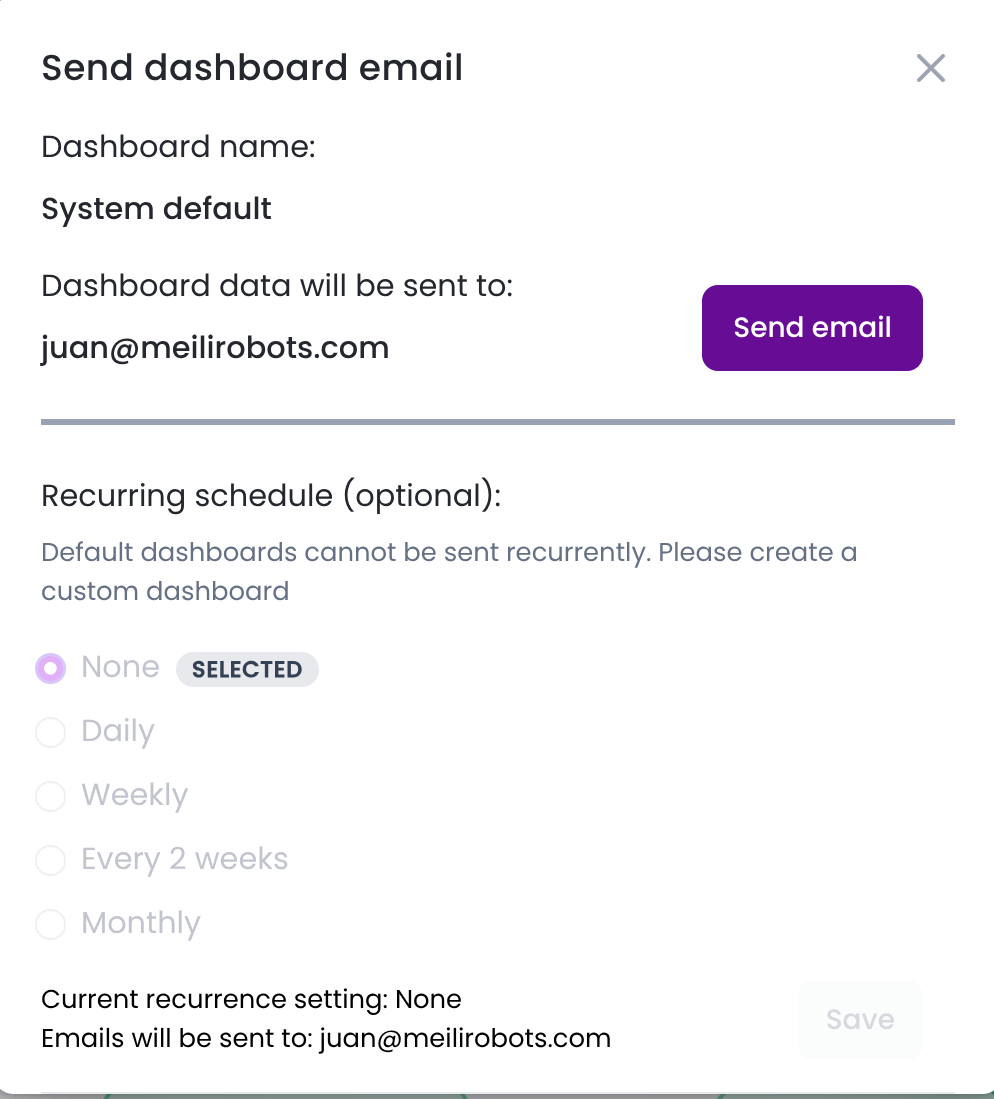
To share the dashboard data, click the Email button. This opens a dialog where you can either send the current dashboard (including any applied filters) immediately or configure a recurring schedule to receive periodic email reports at the selected frequency.
Editing the Dashboard #
To customize the dashboard, you first need to create a custom dashboard. Custom dashboards allow you to add, remove, and arrange the graphs that best suit your needs.
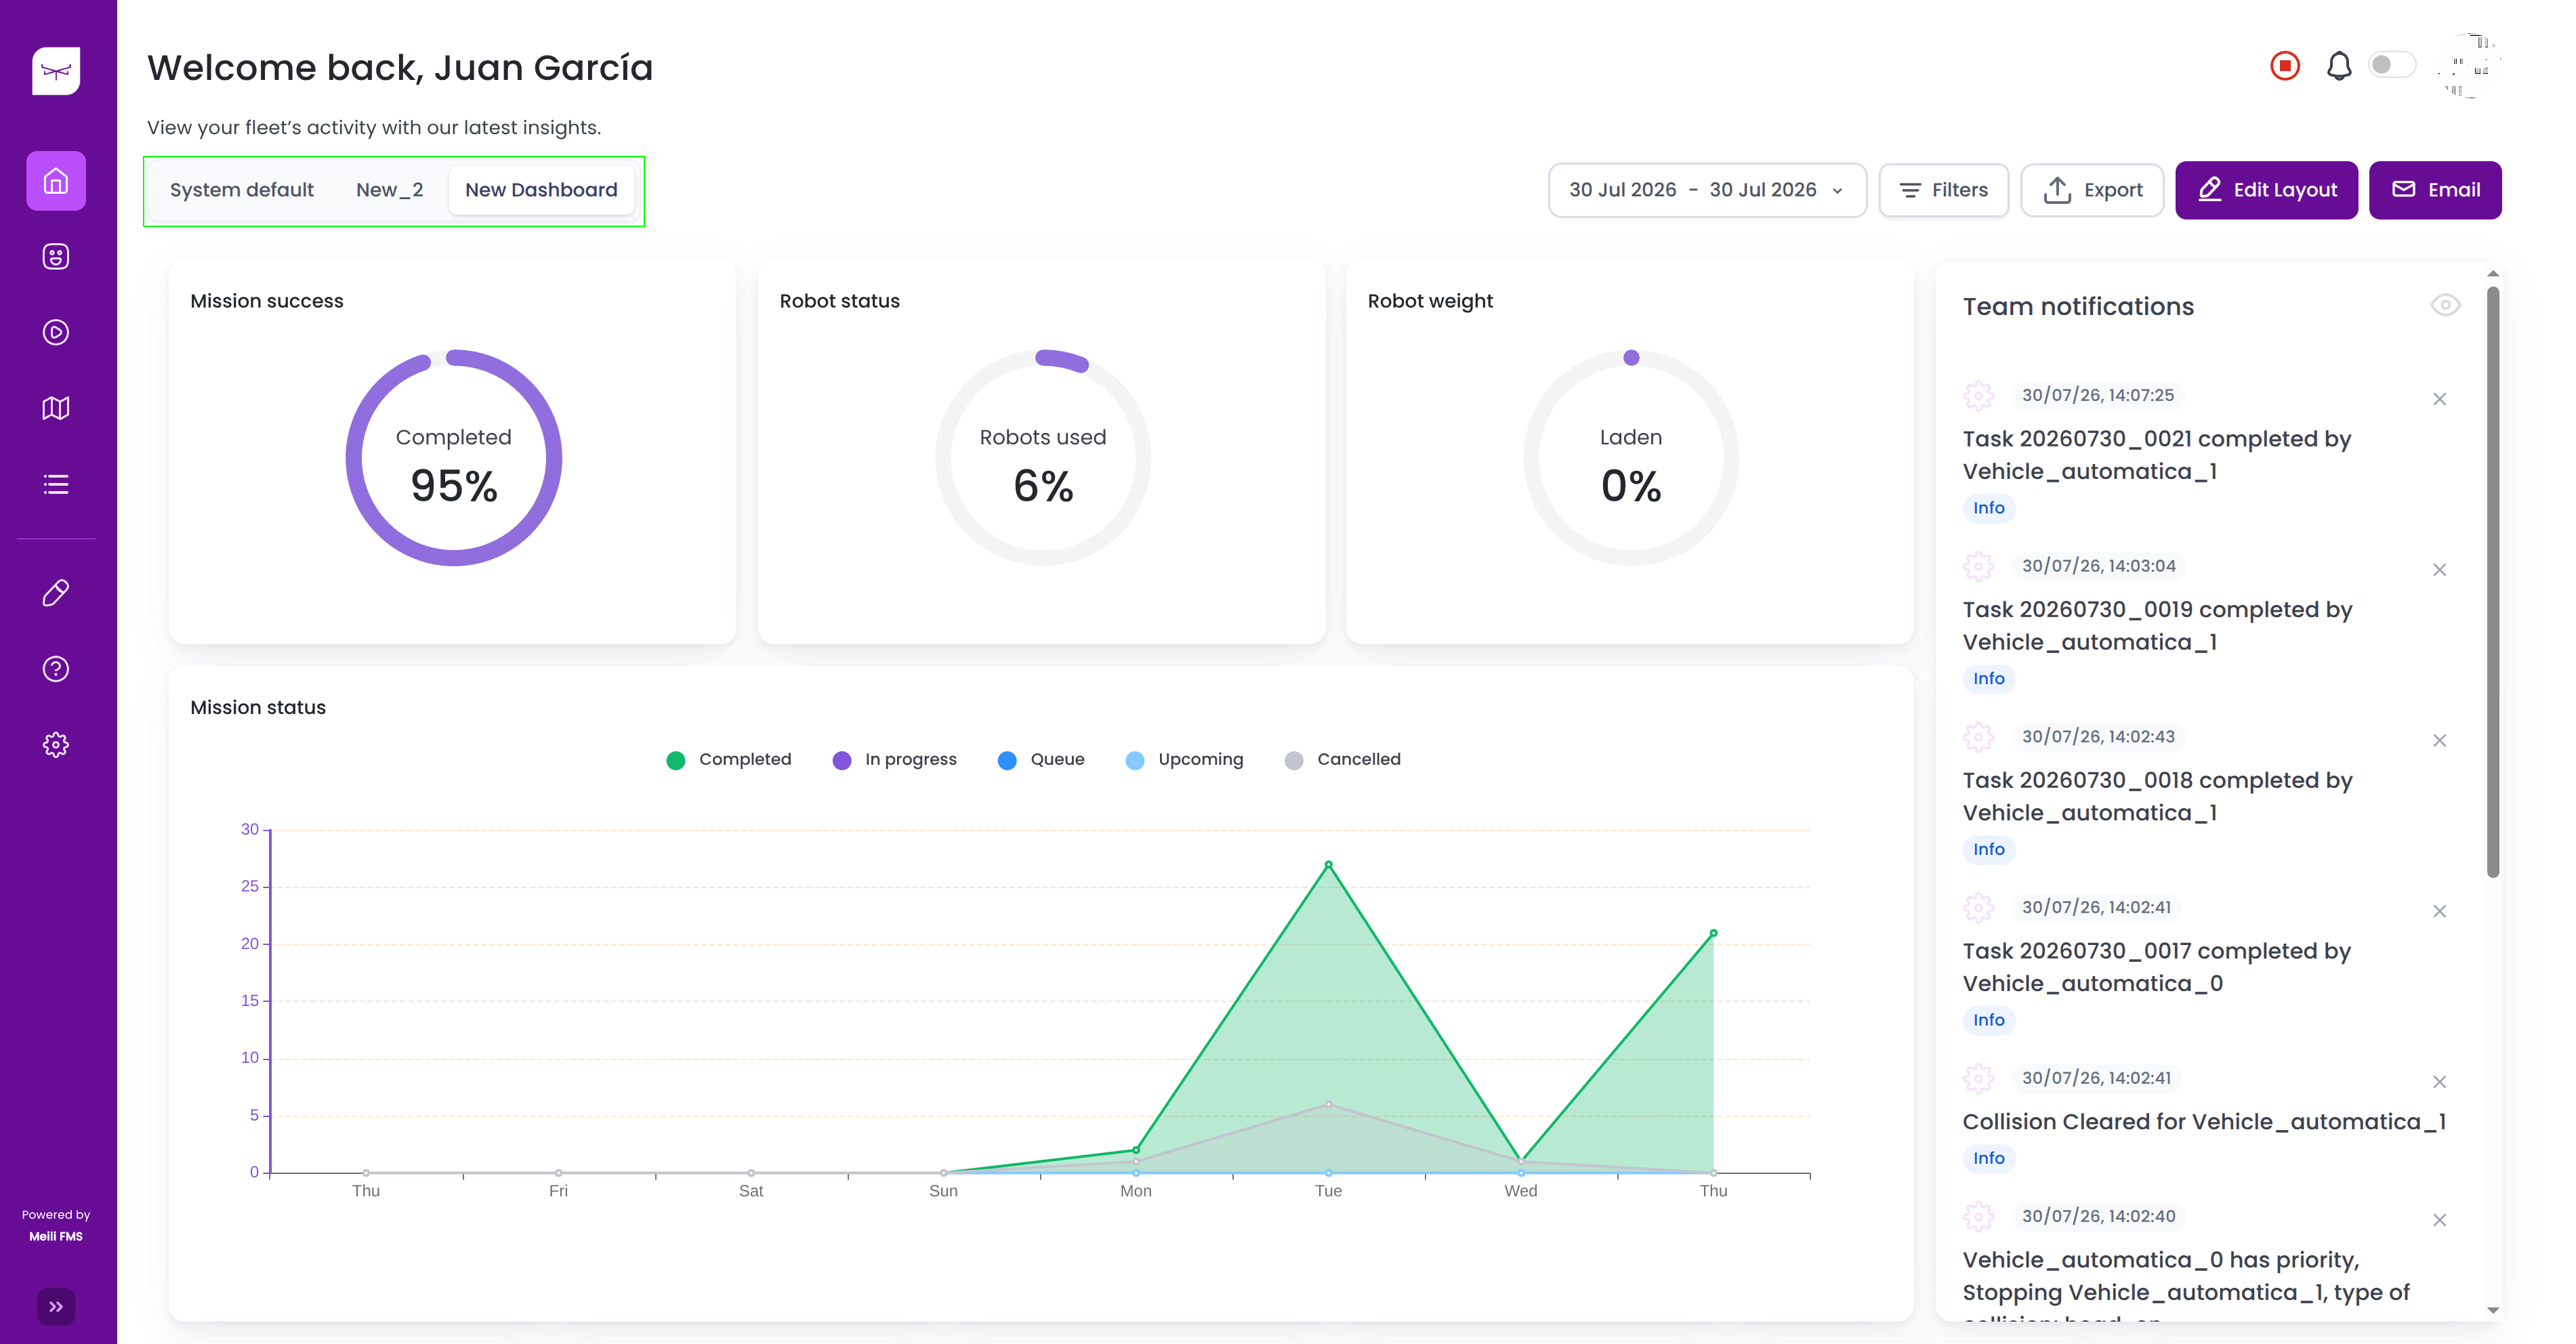
Click the ⊕ icon in the top-left corner of the System Default dashboard to create a new custom dashboard.
Creating a New Dashboard #
Step 1: Enter a name for the new dashboard.
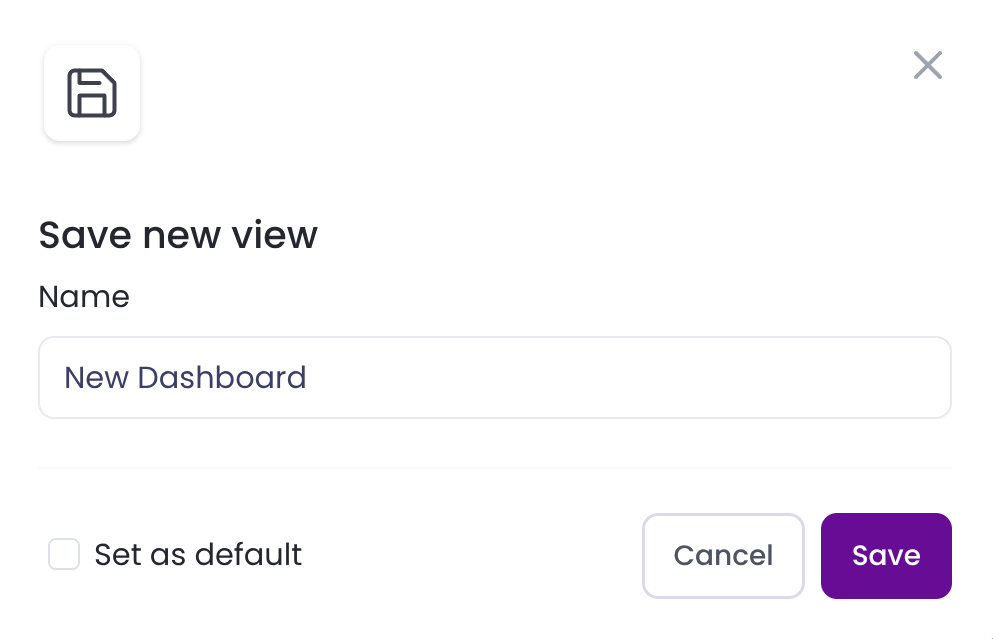
Optional: You can set the new dashboard as the default so that it is displayed instead of the System Default dashboard.
Step 2:
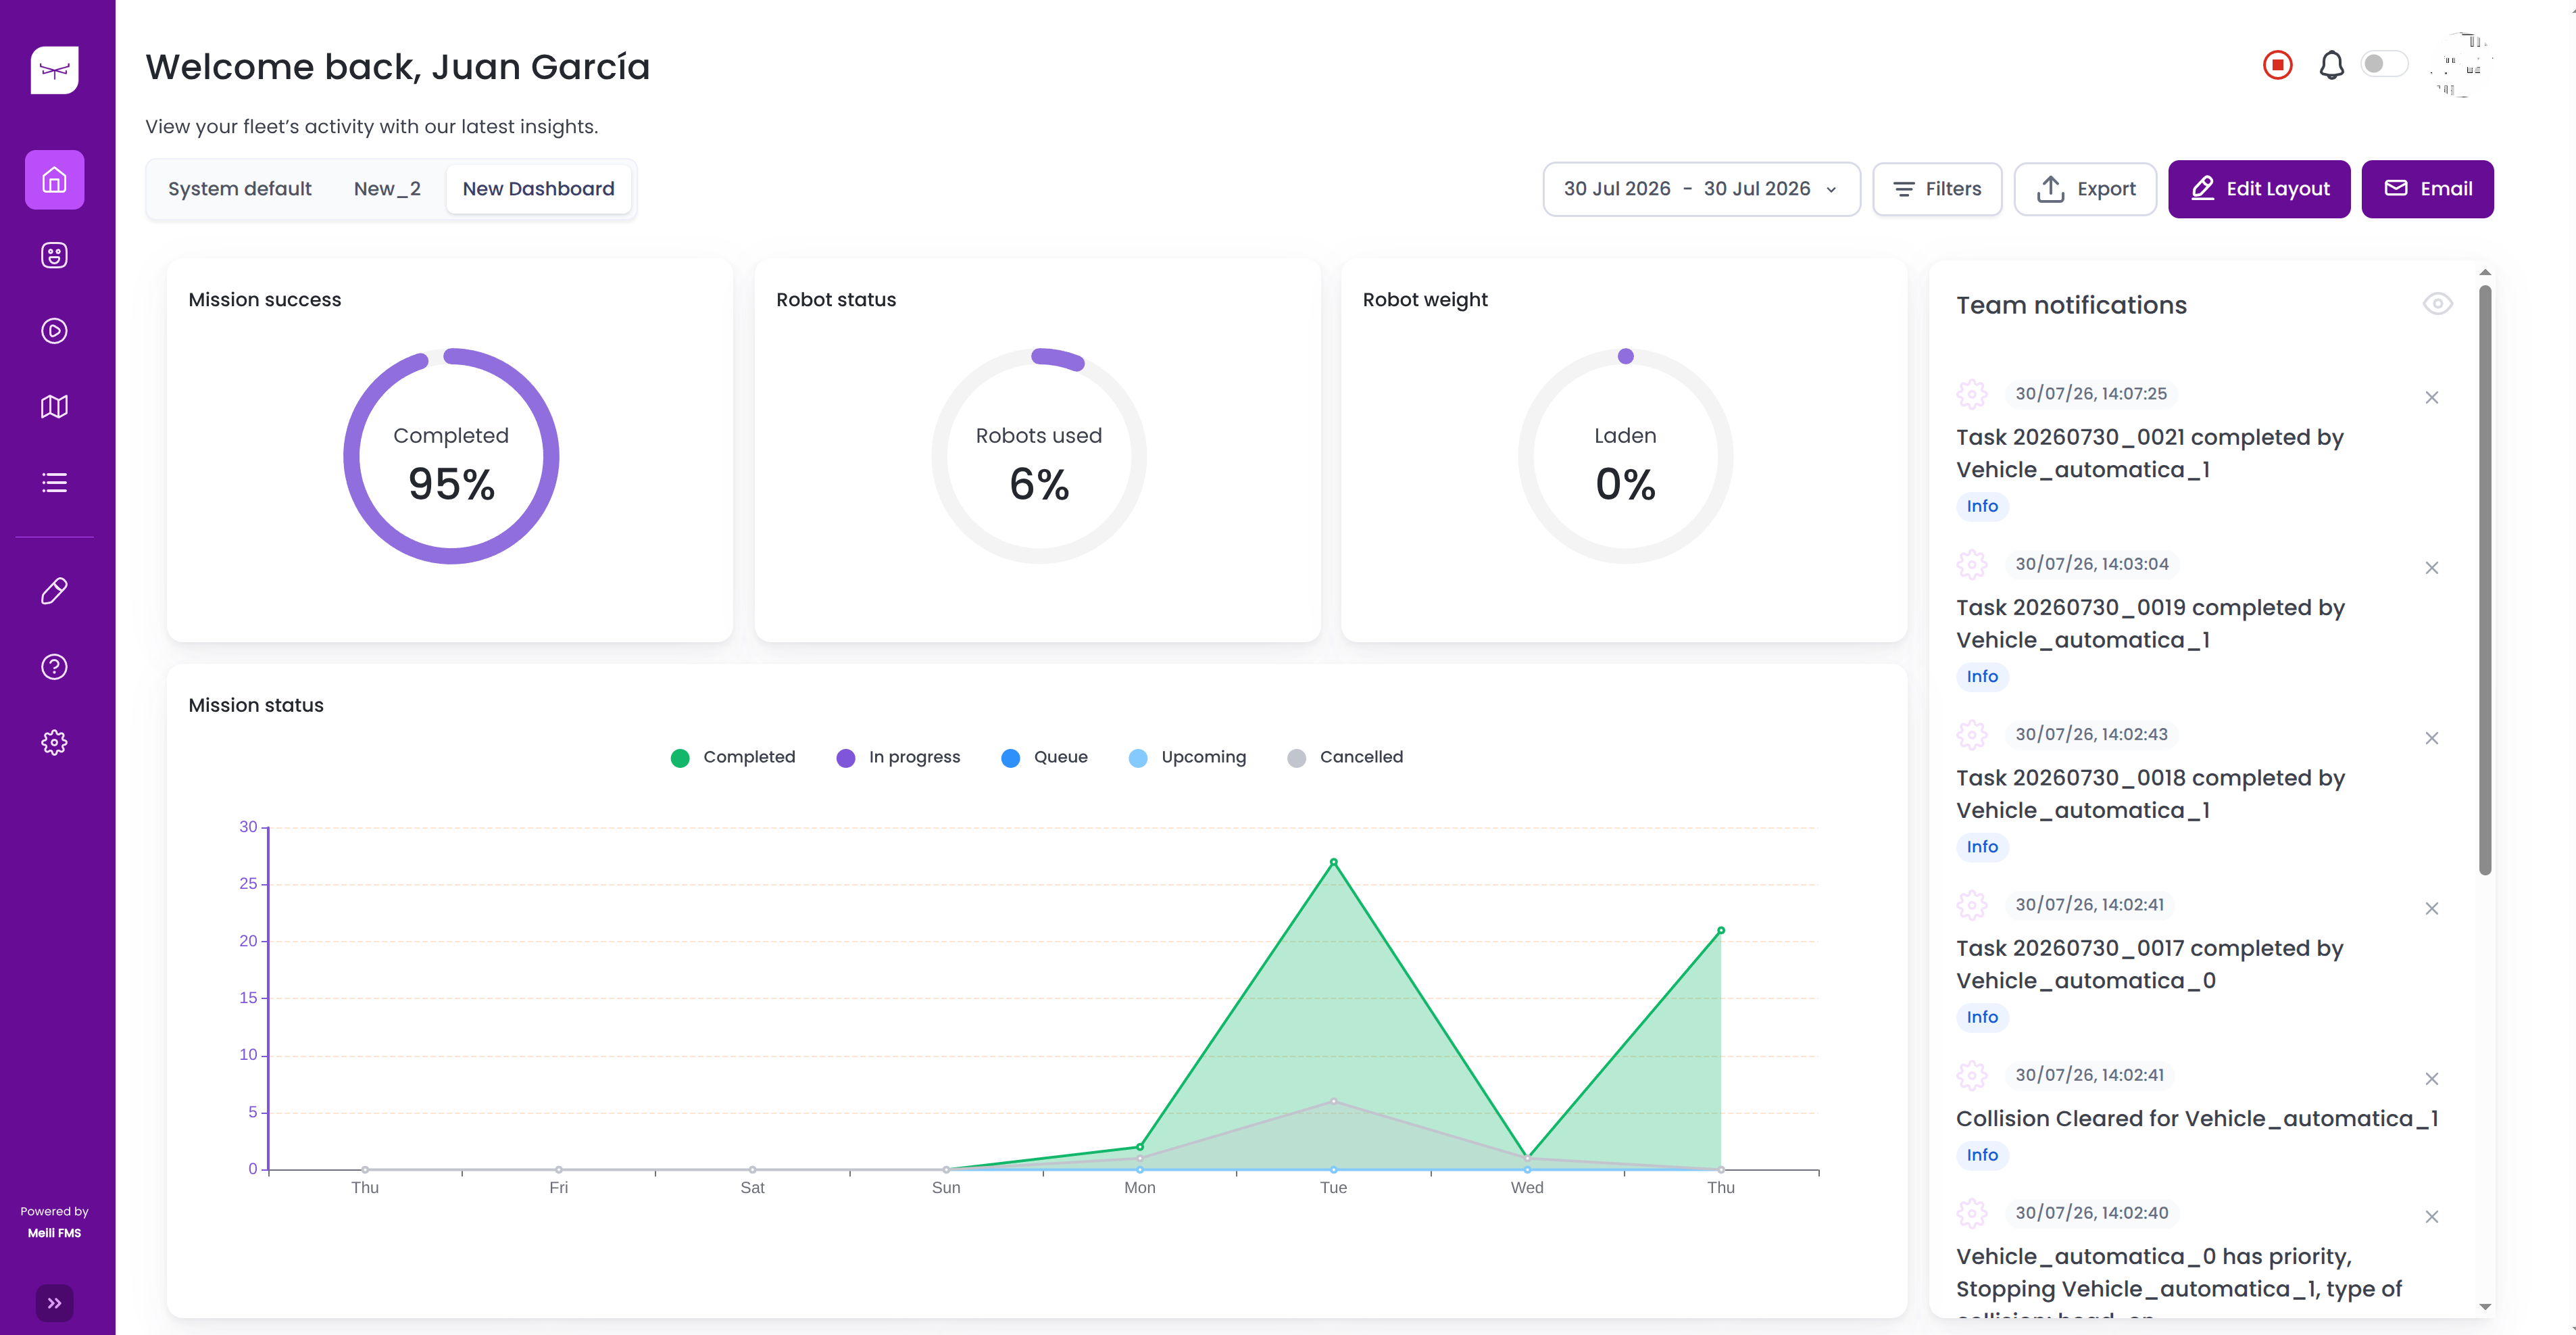
Click Edit layout to customize the dashboard. You can remove the default cards by clicking the bin icon on each graph.
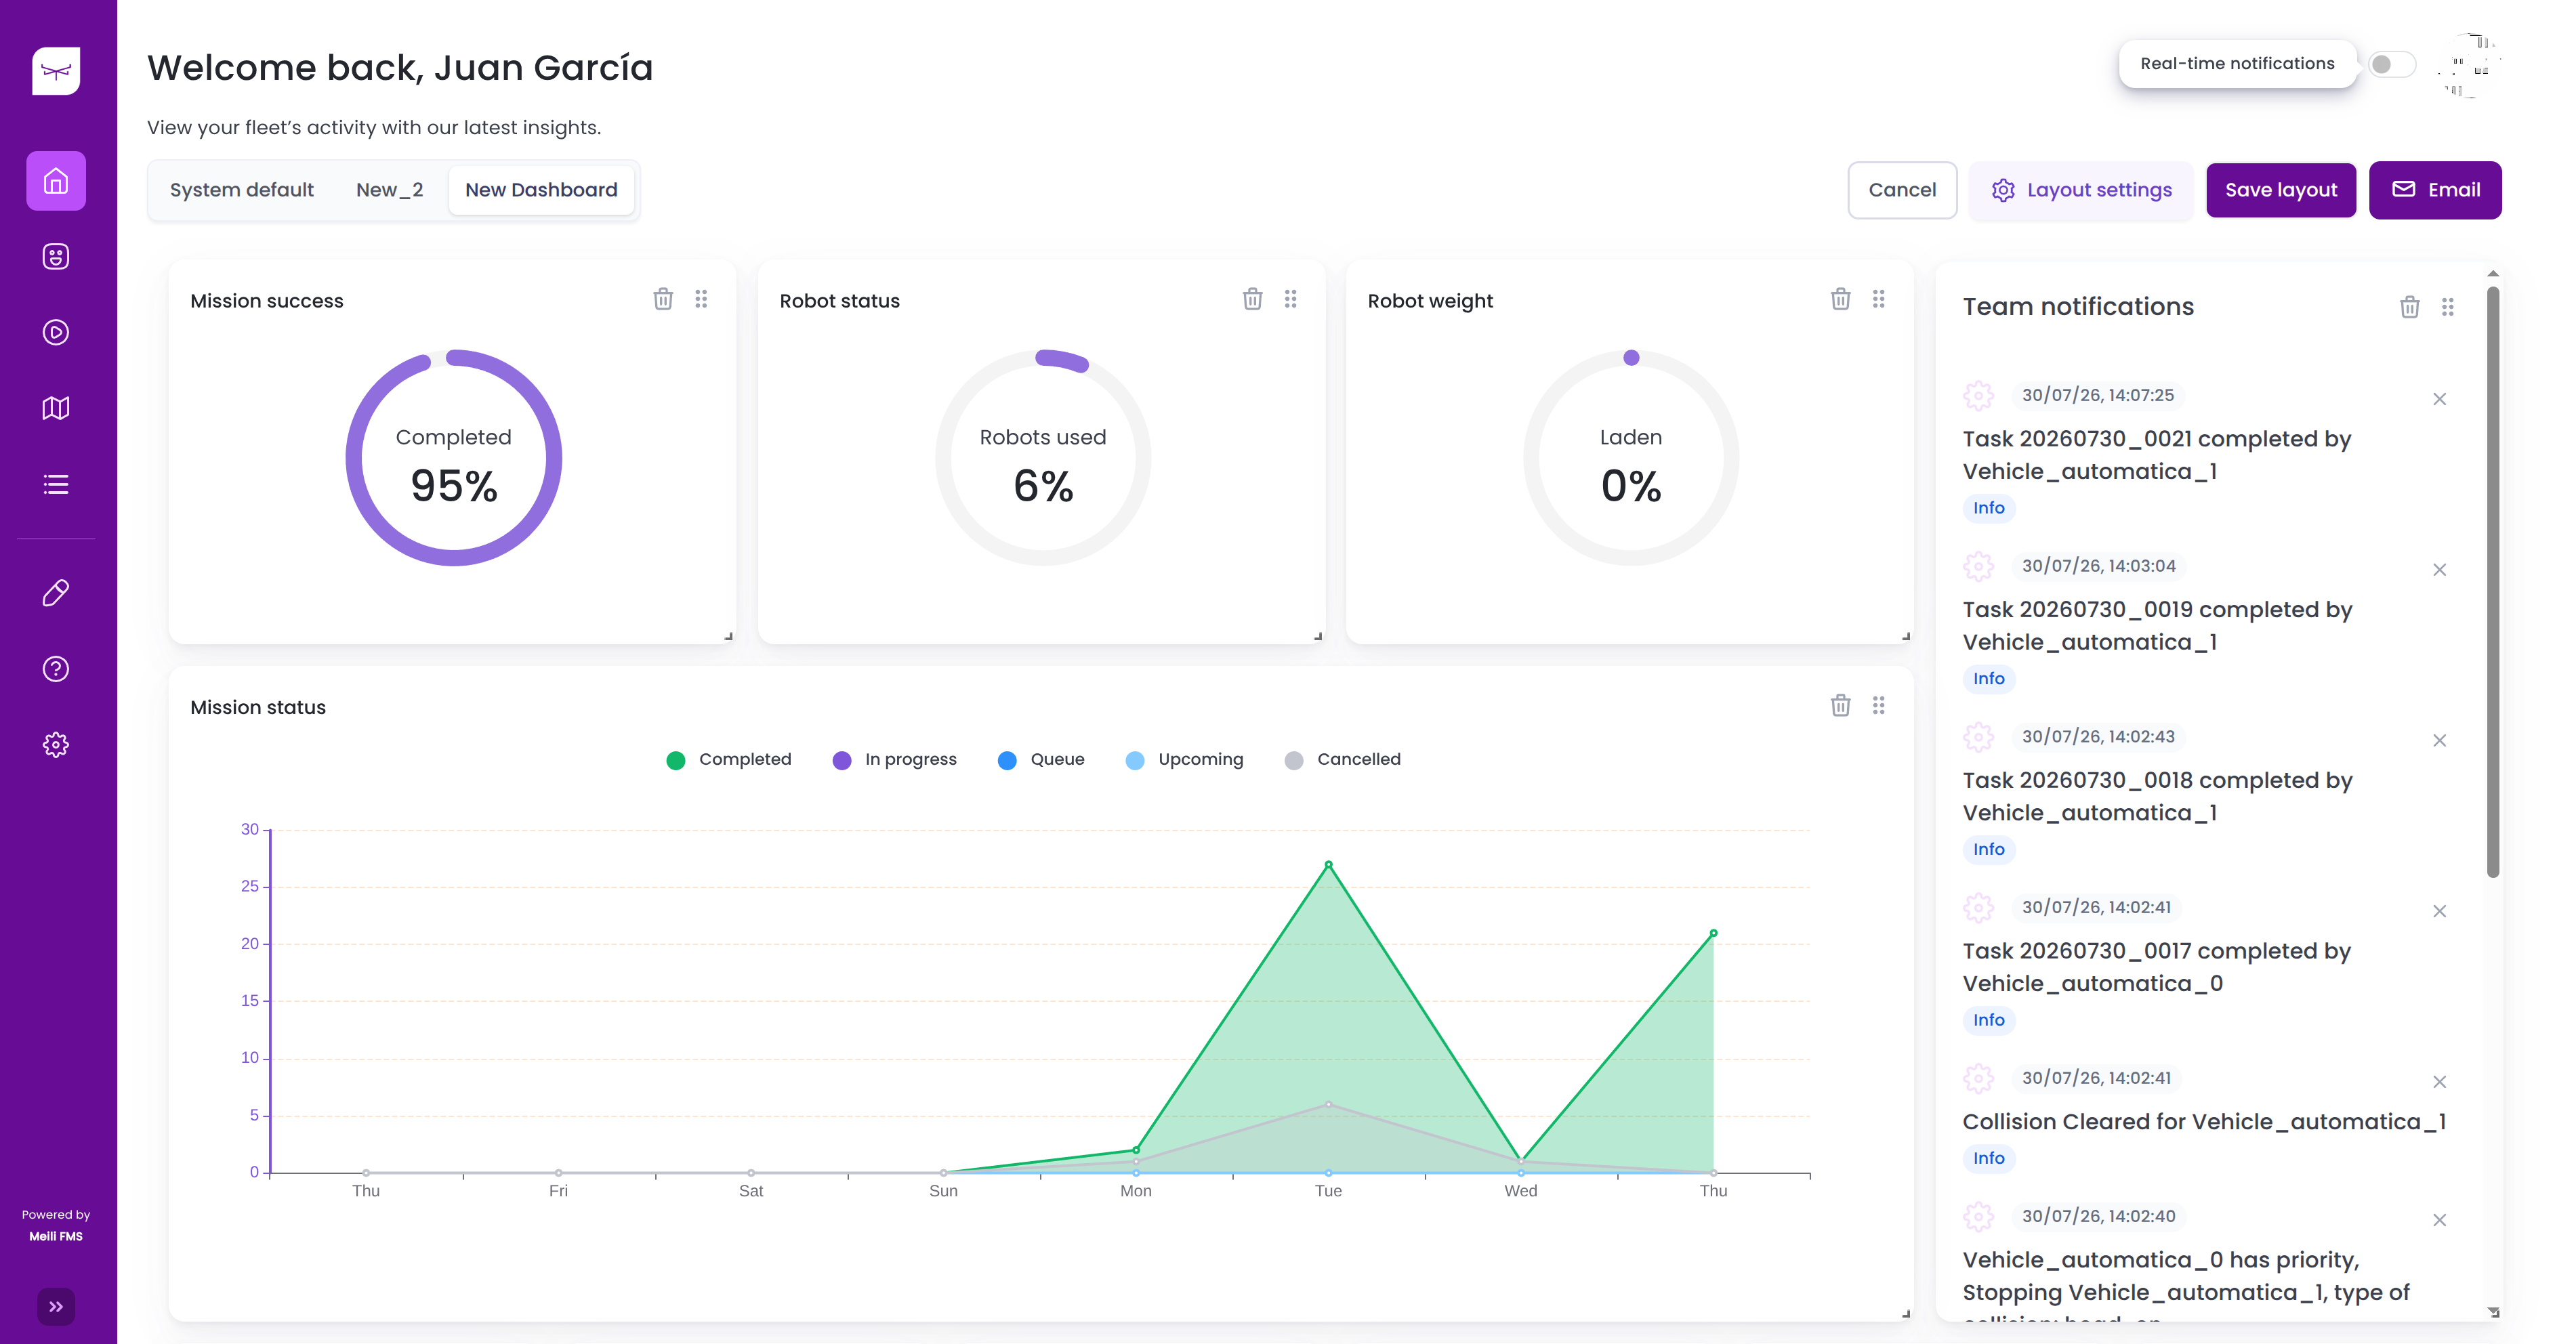
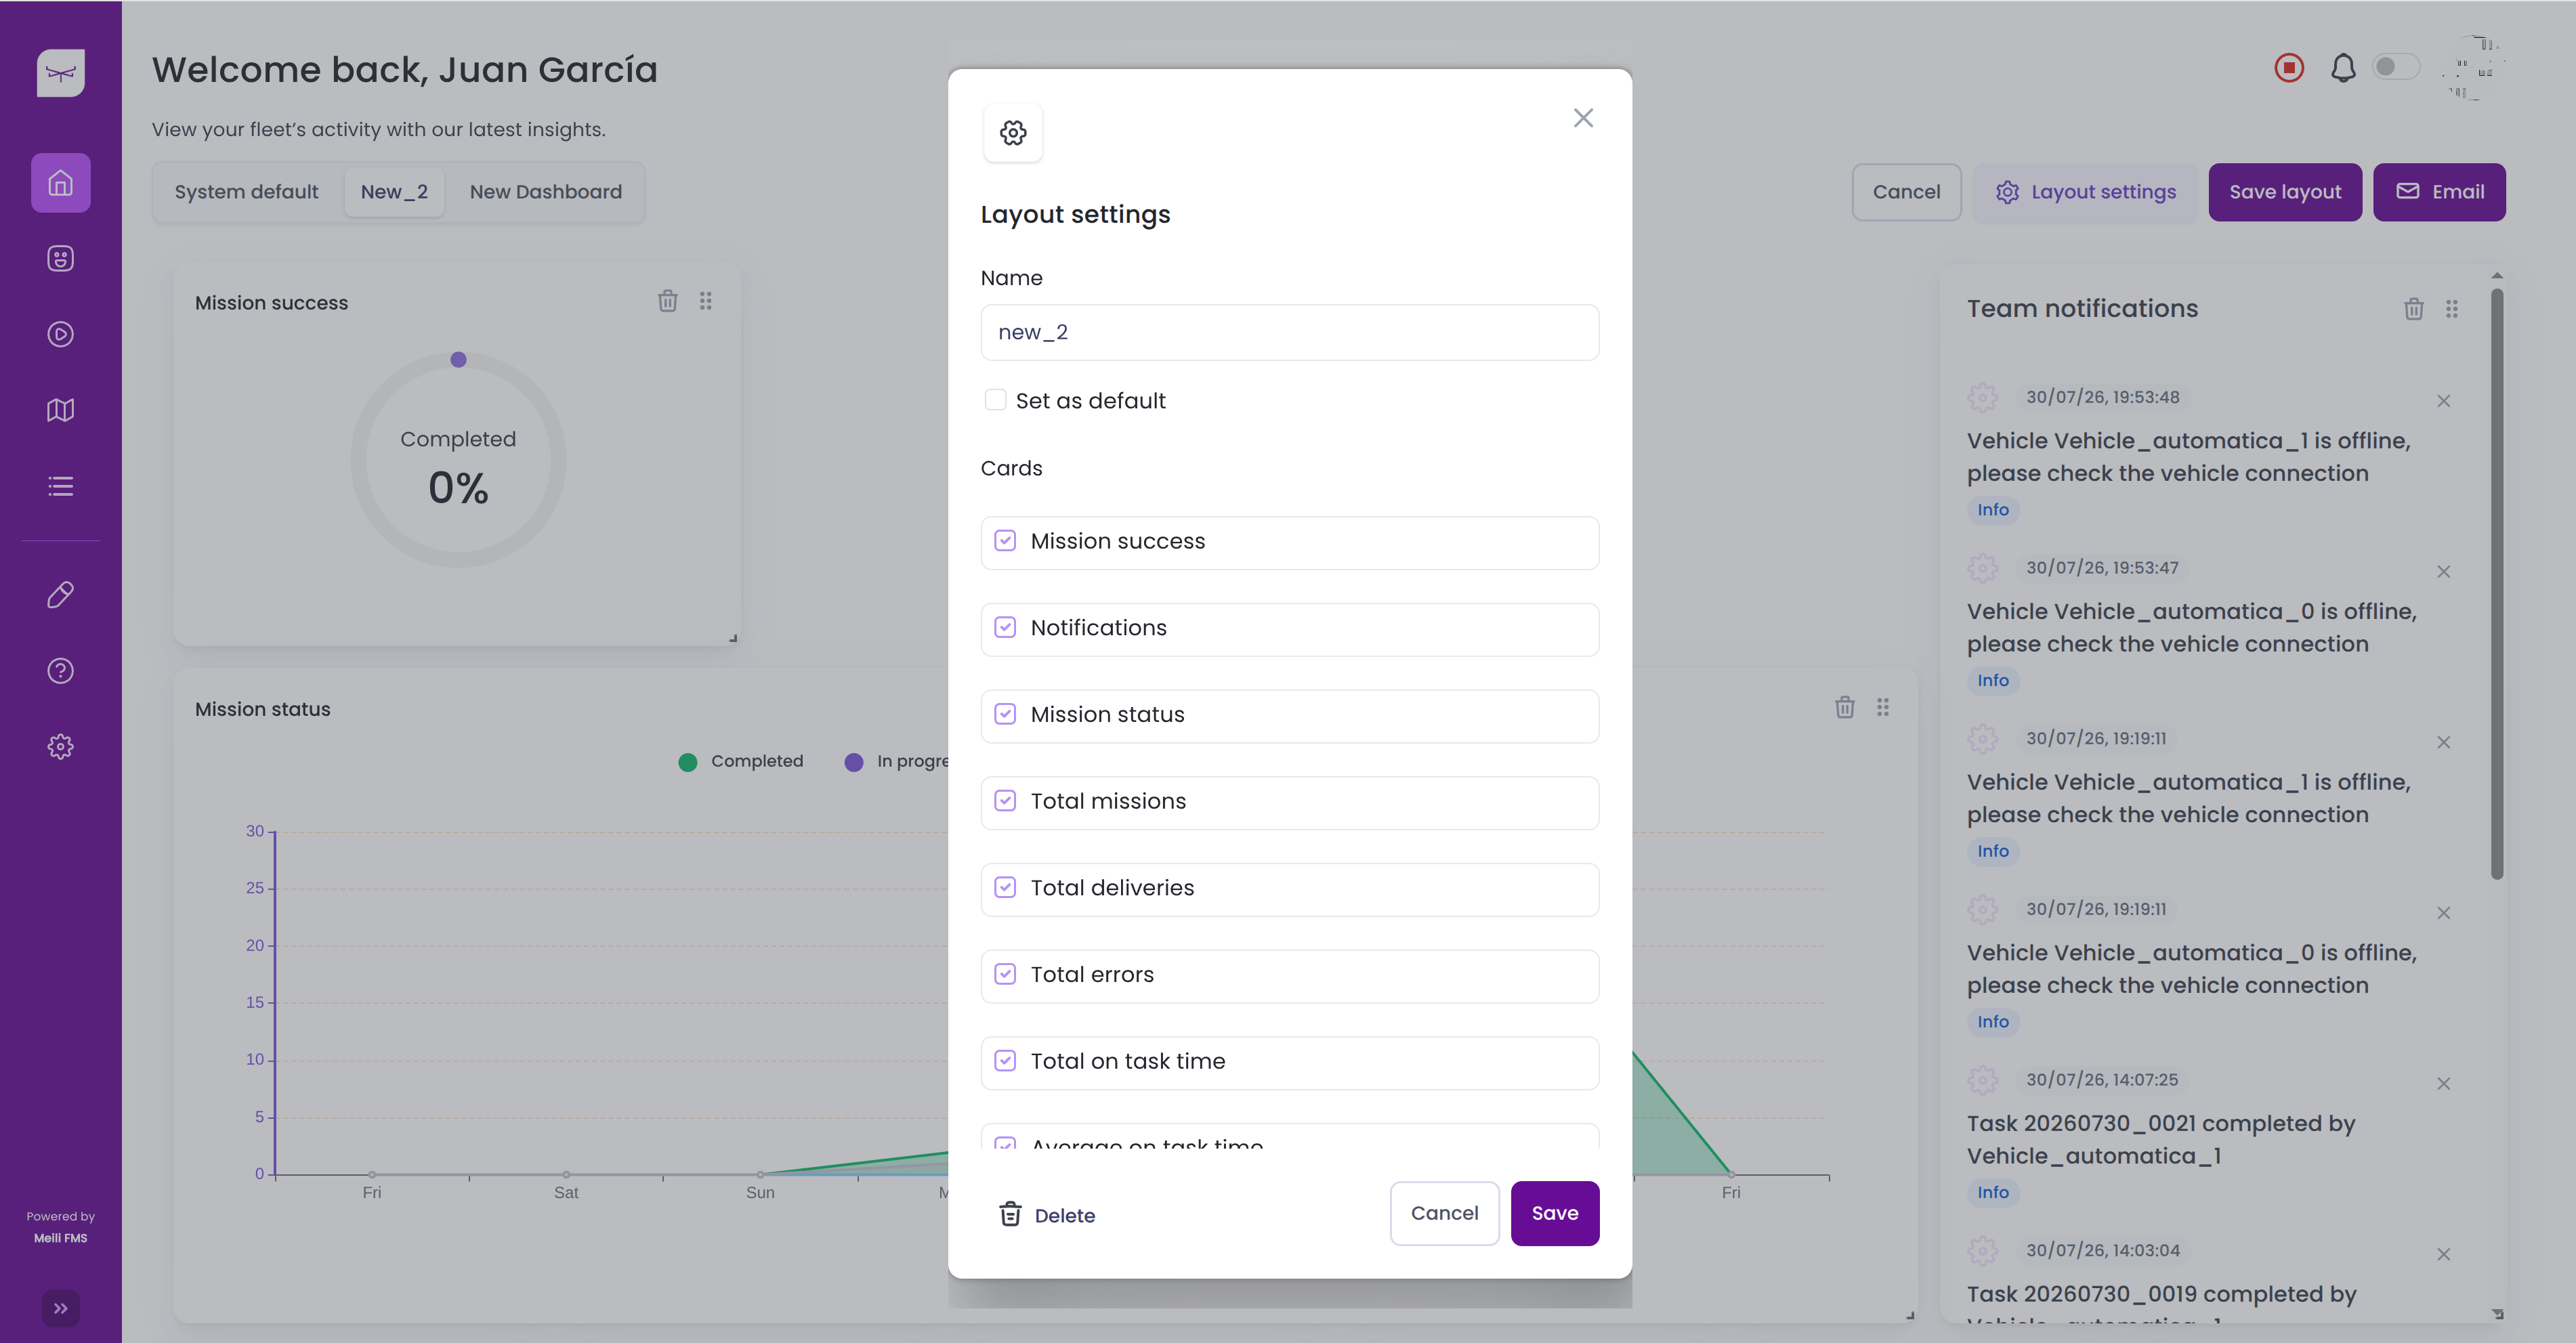
You can also click Layout settings to display a list of all available graphs and select the ones you want to include in the custom dashboard. Then, click on save.
After making your changes, click Save layout to apply them. Alternatively, click Cancel to discard your changes and restore the previous layout.
Your custom dashboards are displayed as tabs above the KPI cards.