OPC UA Devices (Adding an Elevator Tutorial)#
This tutorial explains how to connect an OPC UA device to Meili FMS.
While the example focuses on an elevator, the same steps apply to any other OPC UA-compatible device.
Introduction#
Meili FMS supports communication with devices that use the OPC UA protocol — including elevators and other automation equipment.
This tutorial demonstrates how to integrate an elevator, but the procedure is similar for any OPC UA device.
To enable communication between Meili FMS and OPC UA devices, you must deploy the Meili OPC–MQTT Bridge on the client site.
This bridge acts as a translator:
- It forwards data from the OPC UA device to the MQTT broker.
- It relays commands from the MQTT broker back to the OPC UA device.
💡 The OPC–MQTT Bridge is a Meili-provided component designed for on-site deployment.
For installation packages or configuration details, contact your Meili FMS integrator or Meili Support.
Related Tutorials and Guides#
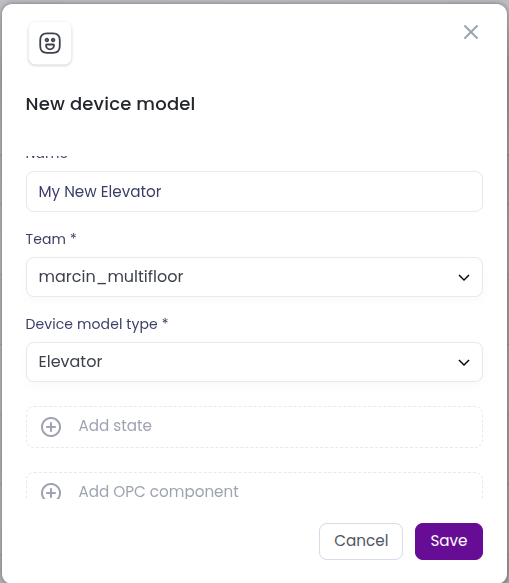
1. Add an Elevator as a New Device Model#
For additional information about adding a new device, refer to this page.
Create a new device entry for the elevator and define all required OPC UA nodes based on the device’s specific configuration.
The State field can be left empty.
A sample node definition is shown below:
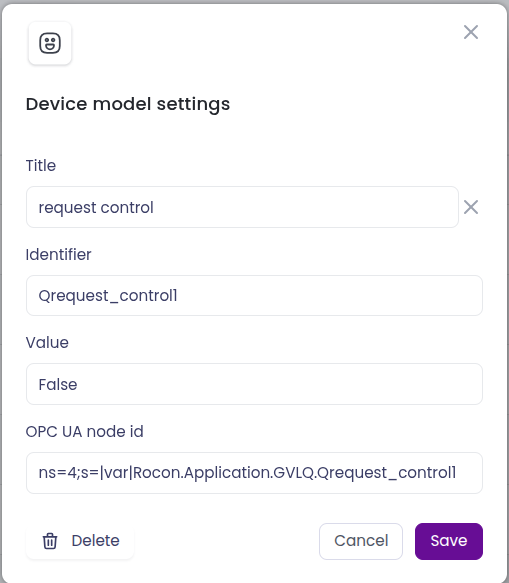
The following fields must be specified:
- Title – A human-readable name displayed in Meili FMS (user-defined).
- Identifier – A unique identifier used to distinguish the node (user-defined).
- Value – The default value of the node (user-defined, must match the node type).
- OPC UA Node ID – The node ID as defined by the device manufacturer.
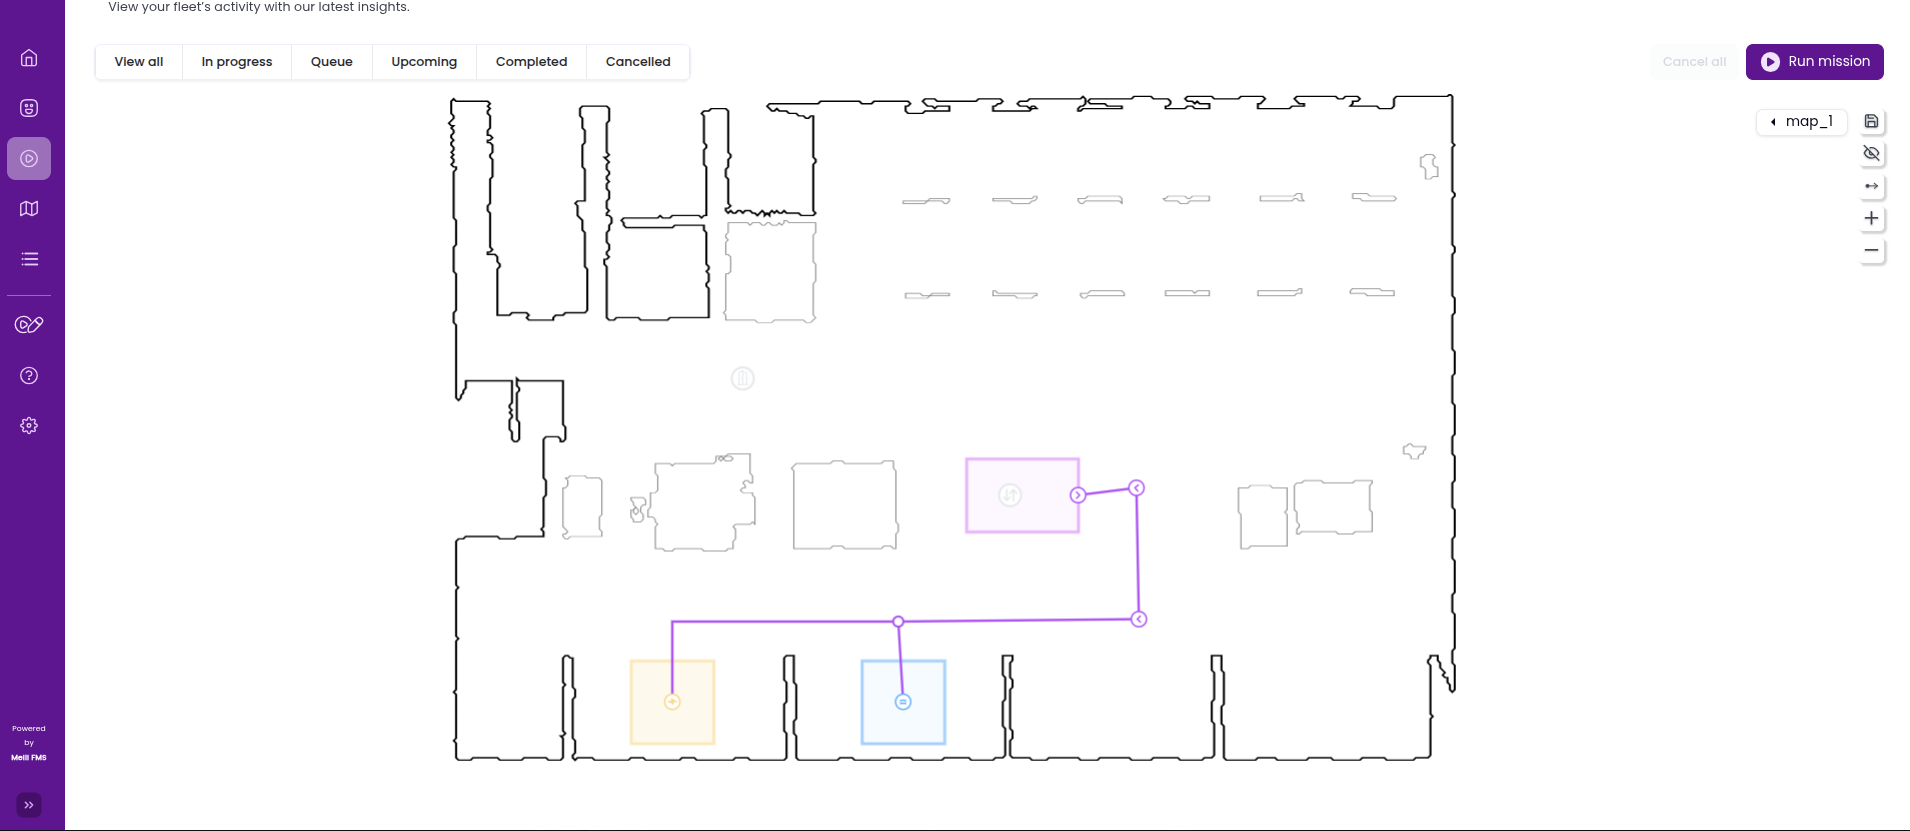
2. Add the Elevator to the Map#
⚠️ Important: This step should be performed only once. Icons on other floors will reference the same elevator device.
If the floors are not aligned (i.e., the elevator coordinates differ across floors), the icon position can be adjusted manually on each floor.
To add an elevator to the map, follow these steps:
Dashboard → Maps tab → Path & Station Editor subtab → Create Device
- For Device Model, select the elevator added in the previous step.
- You can manually enter the device coordinates, or leave them blank and click the desired map position after selecting Create.
- The Identifier must be a unique device ID across the entire team.
Once added, the elevator will appear on both the Map and Mission pages.
On the Mission page, the elevator icon will appear grey until it successfully connects to Meili FMS.

3. Add a New Fleet Setup#
This step is completed in the Organisation Settings section.
Navigate to Fleet Setups → Add Fleet Setup.
Fill in the following fields:
- Name – A user-defined name for the fleet or channel setup.
- Team – Select your team from the dropdown list. This defines which team the setup belongs to.
- Communication Protocol – Set this to
opc_ua. - Communication Format – Optional; for this tutorial, use
json. - Setup Type – Choose
Device modelfrom the dropdown list. - Device Models – (Visible once the setup type is selected) Choose the elevator model added in the previous steps.

4. Configure the Meili OPC–MQTT Bridge#
Once the elevator and fleet setup are created, configure the Meili OPC–MQTT Bridge.
Detailed setup instructions are included with the bridge package.
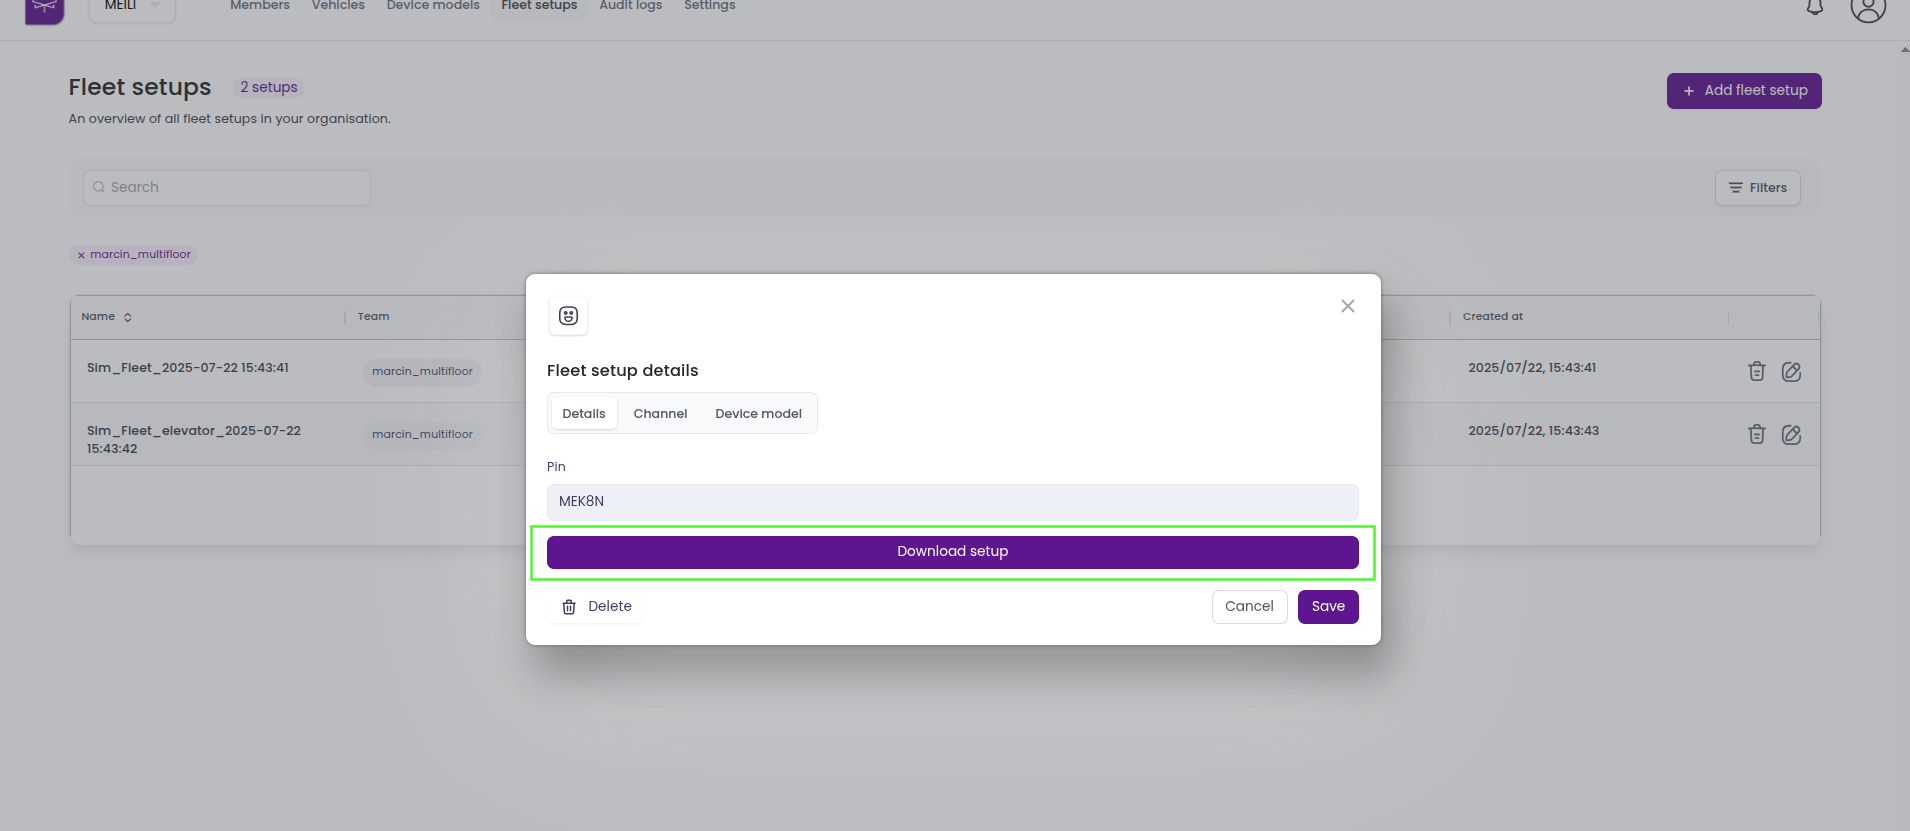
To export the bridge configuration:
- Go to the Fleet Setup tab in the organisation settings.
- Select the setup associated with the elevator.
- Click Download Setup — this will export the configuration as a
.jsonfile.
Next, place the downloaded file into the OPC–MQTT Bridge directory and rename it to devices.json.
Alternatively, copy the contents of the downloaded file and paste them into an existing
devices.jsonfile used by the bridge.
5. Run the OPC–MQTT Bridge#
After configuration is complete, launch the bridge on the client site.
If everything is set up correctly, the bridge will:
- Subscribe to all configured OPC UA devices.
- Connect to the Meili MQTT broker.
- Display the devices as online in the Devices tab.
6. Send a Request to the Elevator#
Meili FMS communicates with OPC UA devices using the read/write mechanism defined in the OPC UA protocol.
The system continuously monitors and updates the values of connected devices.
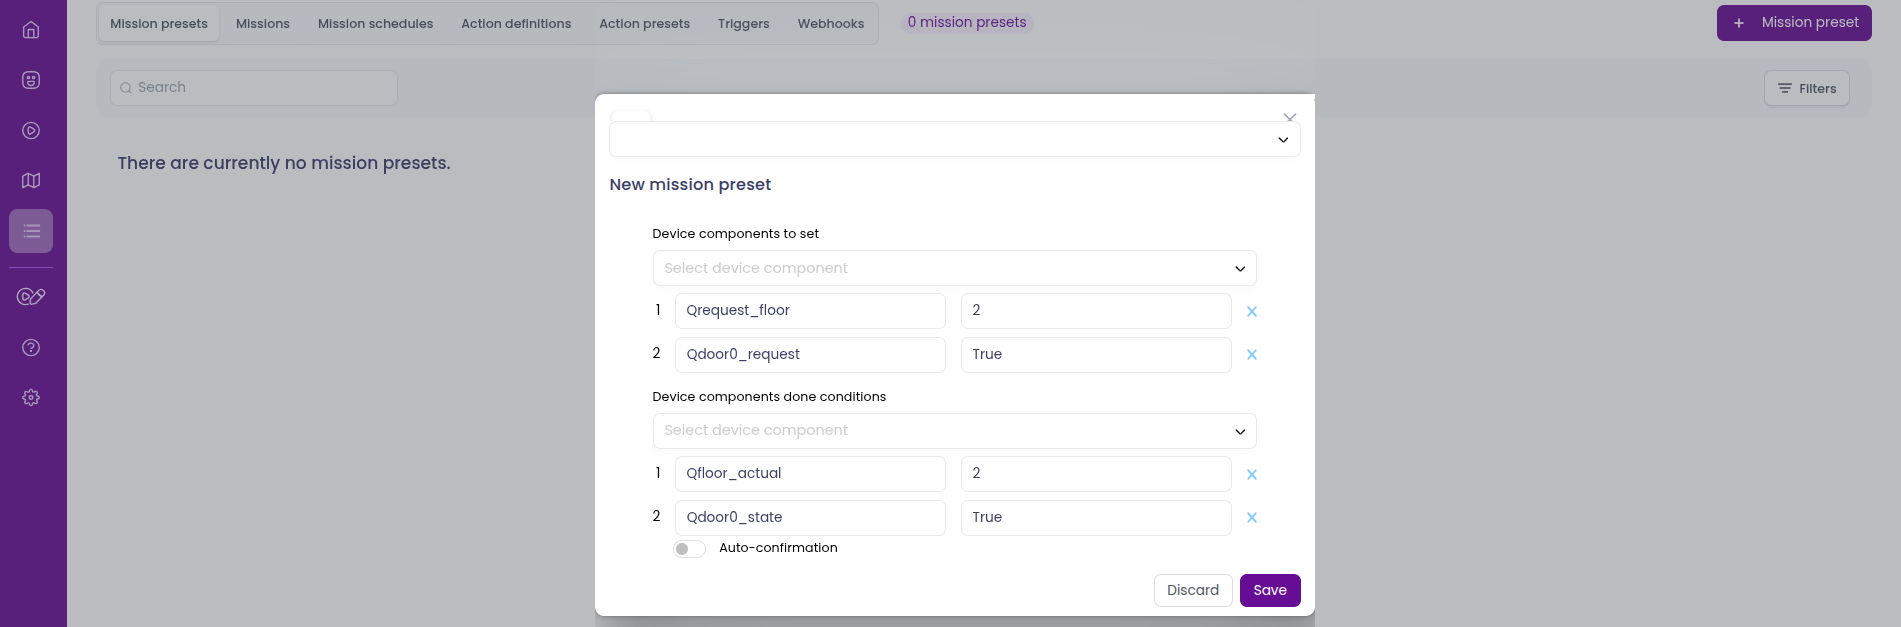
For each OPC UA task, the following parameters can be configured:
- Device Components to Set – OPC UA nodes and their target values that Meili FMS will write to the device.
- Device Components Done Conditions – OPC UA nodes and values that Meili FMS will monitor.
Once all defined conditions are met simultaneously, the task is marked as complete.
The image below shows a sample mission preset that sends the elevator to Floor 2 and opens Door 0.
The mission is confirmed as complete once the elevator reaches Level 2 and Door 0 is open.