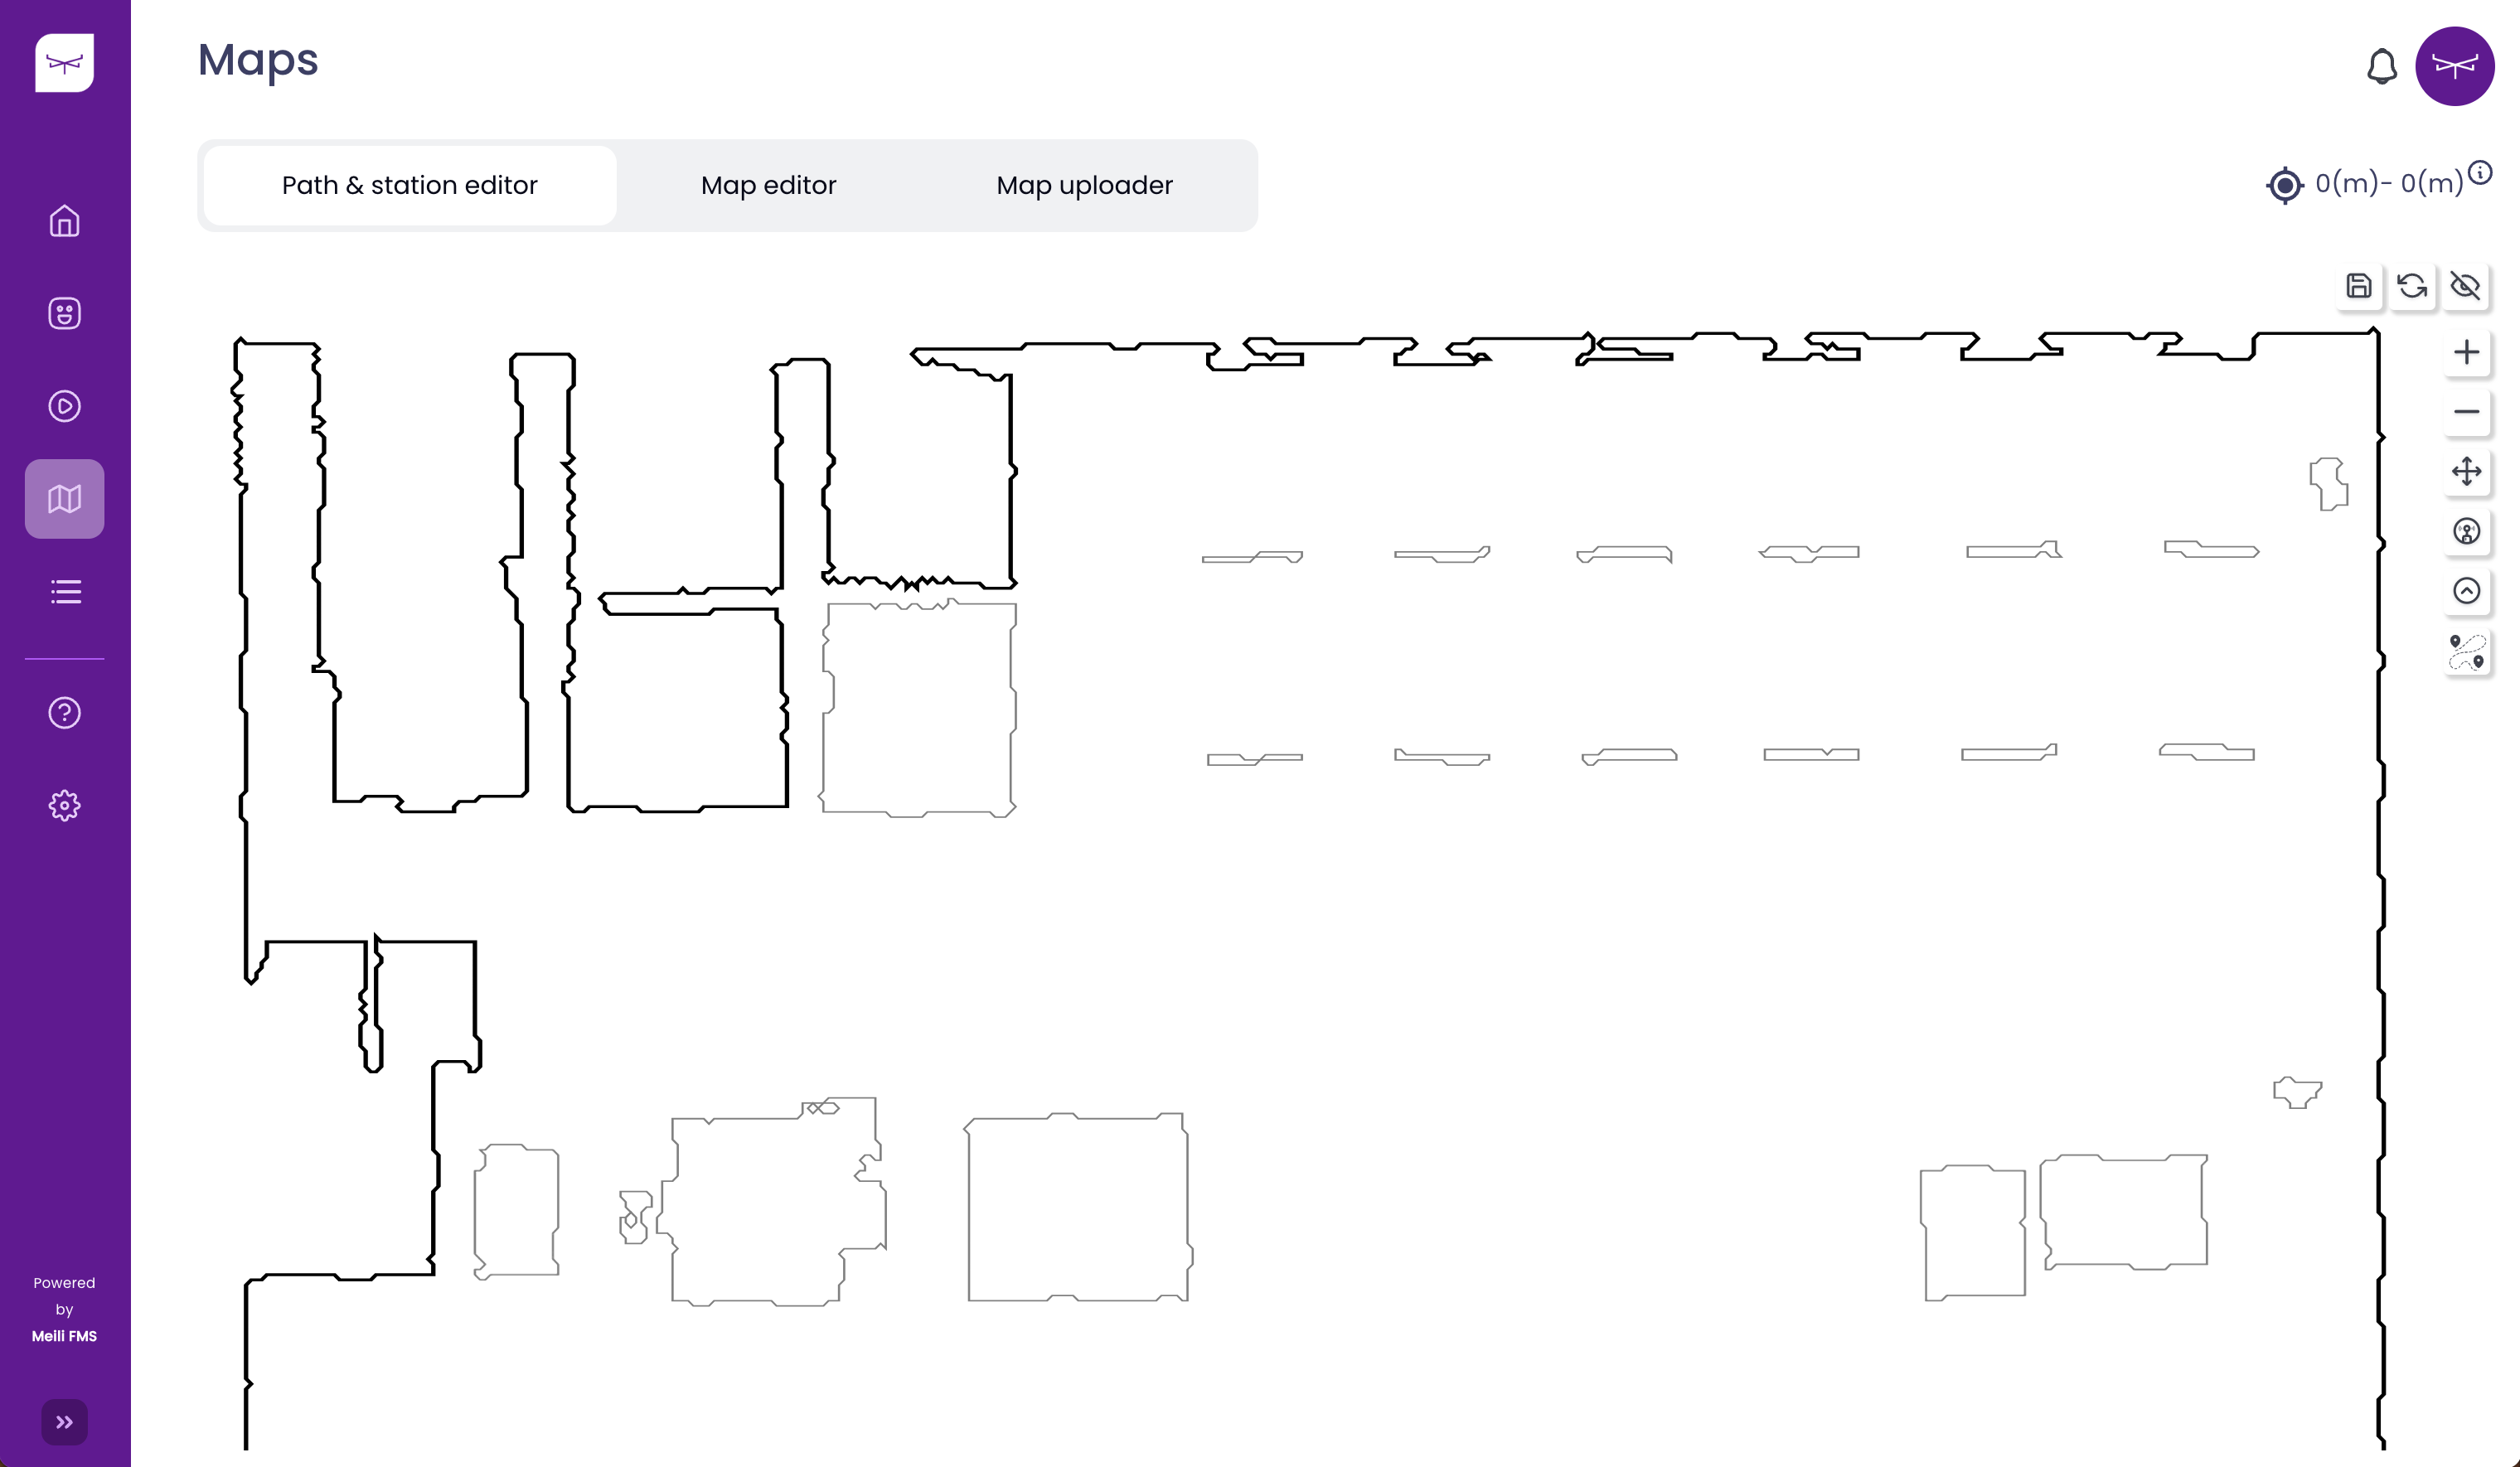
Path and station editor #
On this page, you can create stations and paths, which are the main elements used when assigning missions to mobile robots.
- Station → A point on the map defined by its X and Y coordinates and rotation angle. A station can be used as a destination or waypoint* when sending missions to robots.
- Path → A link between stations consisting of one or more waypoints that define the route mobile robots will follow to reach their destination.
Station Creation (Station Creation icon) #
Quick Station (Dragging and Dropping on the Map) #
-
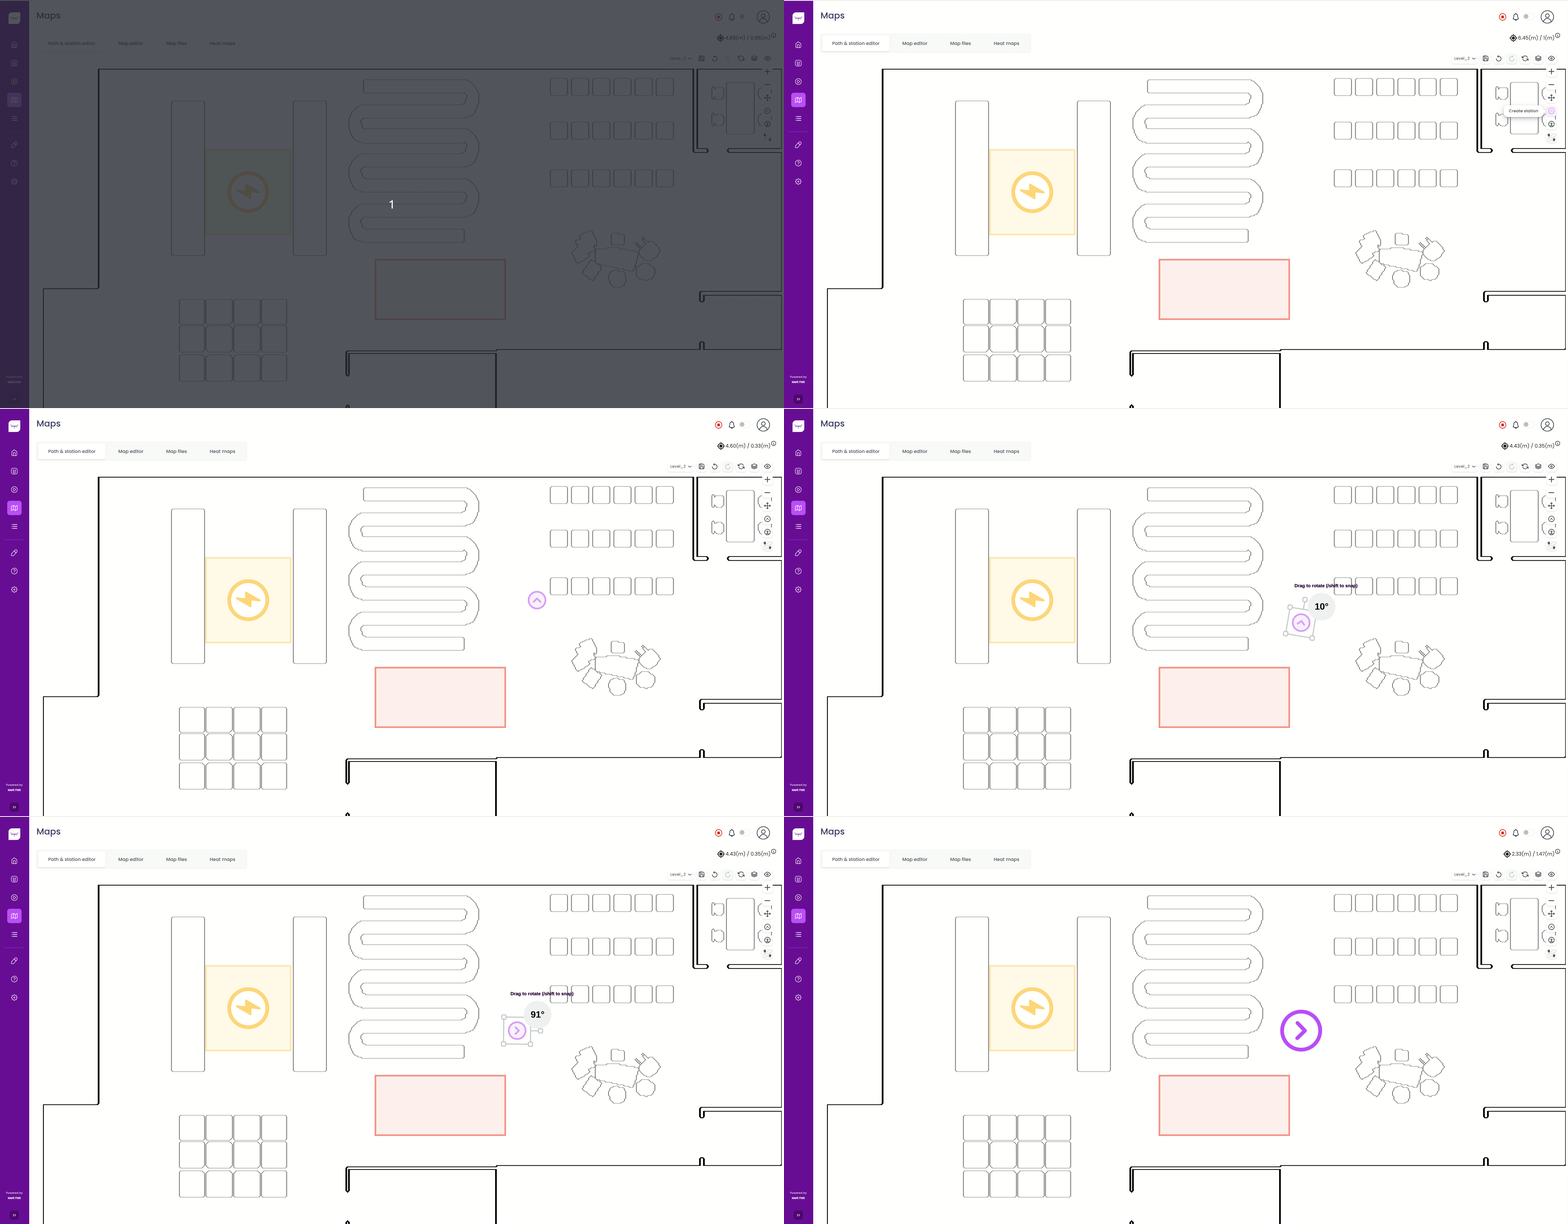
Select the Quick Station button in the toolbar.
-
Drop the station icon at the desired location, avoiding obstacles.
-
Drag the station icon by its anchor to set the desired rotation angle, then release it.
Note: When placing a station, you must click the Rotate button to confirm the placement, even if you don’t want to rotate the station. Simply clicking it without changing the orientation will still confirm the placement.
Advanced Station #
-
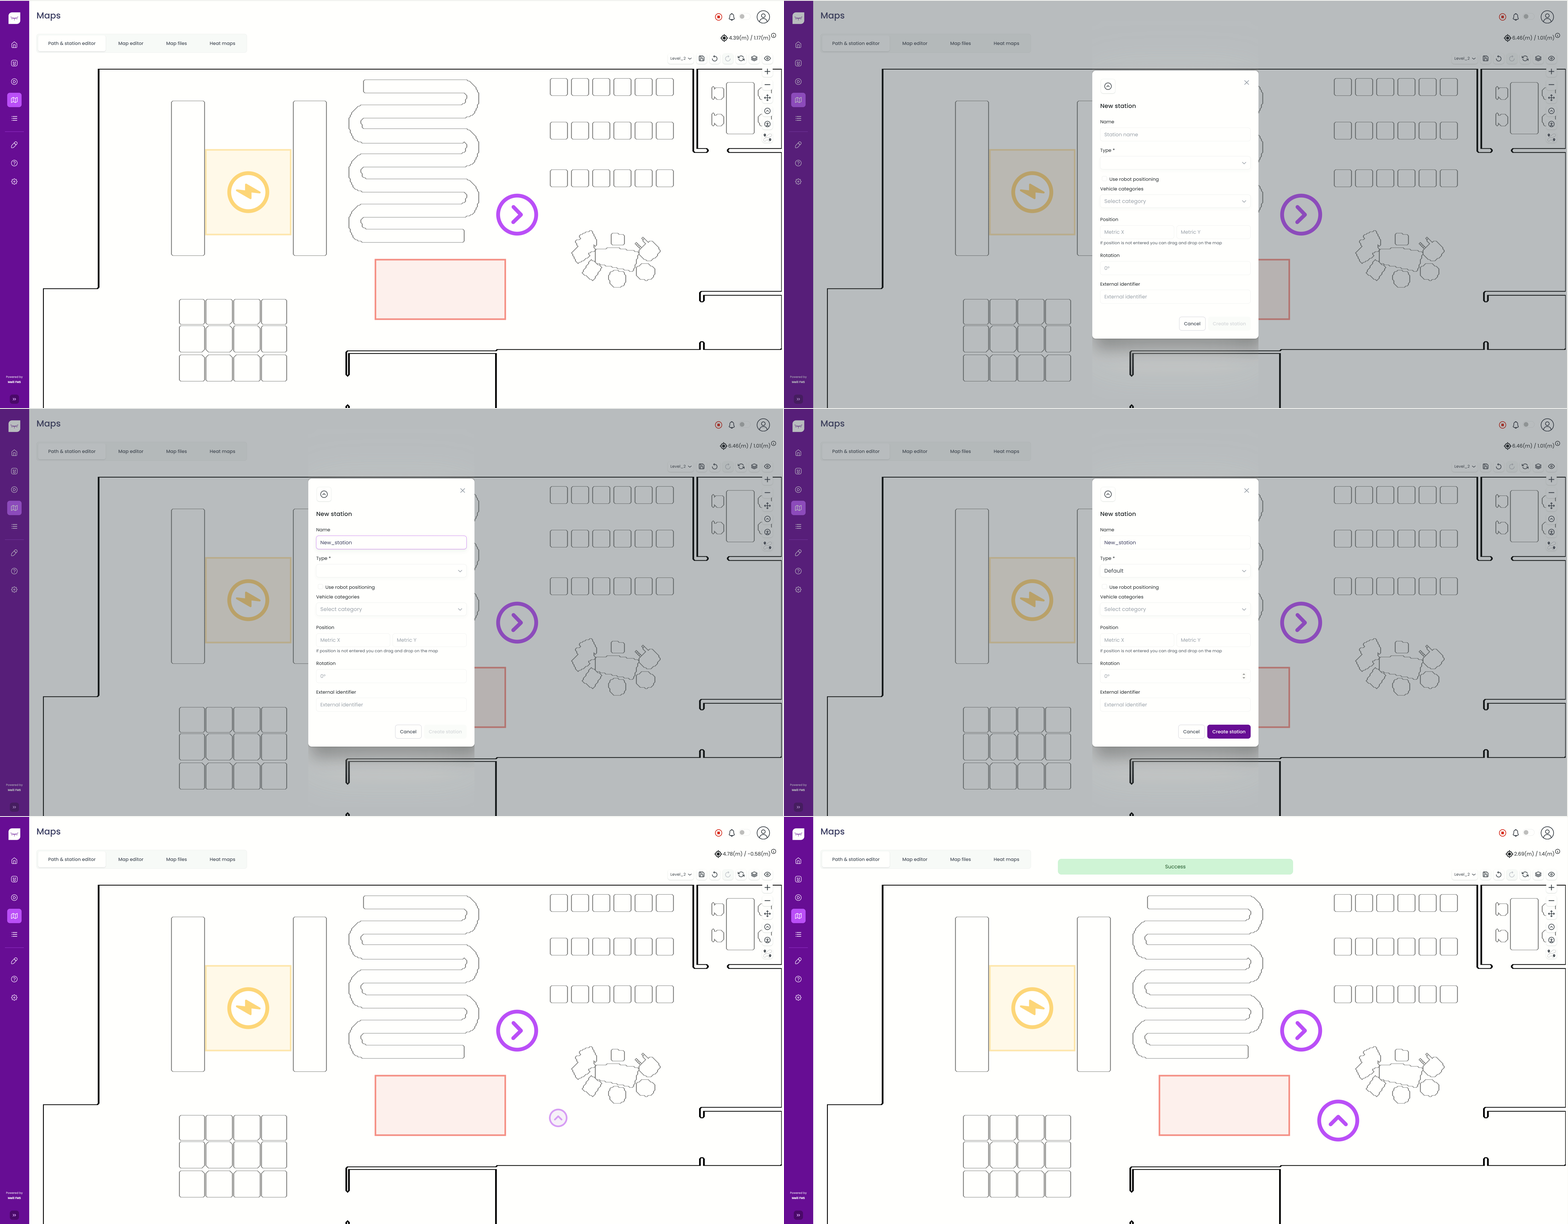
Select the Advanced Station button in the toolbar.
-
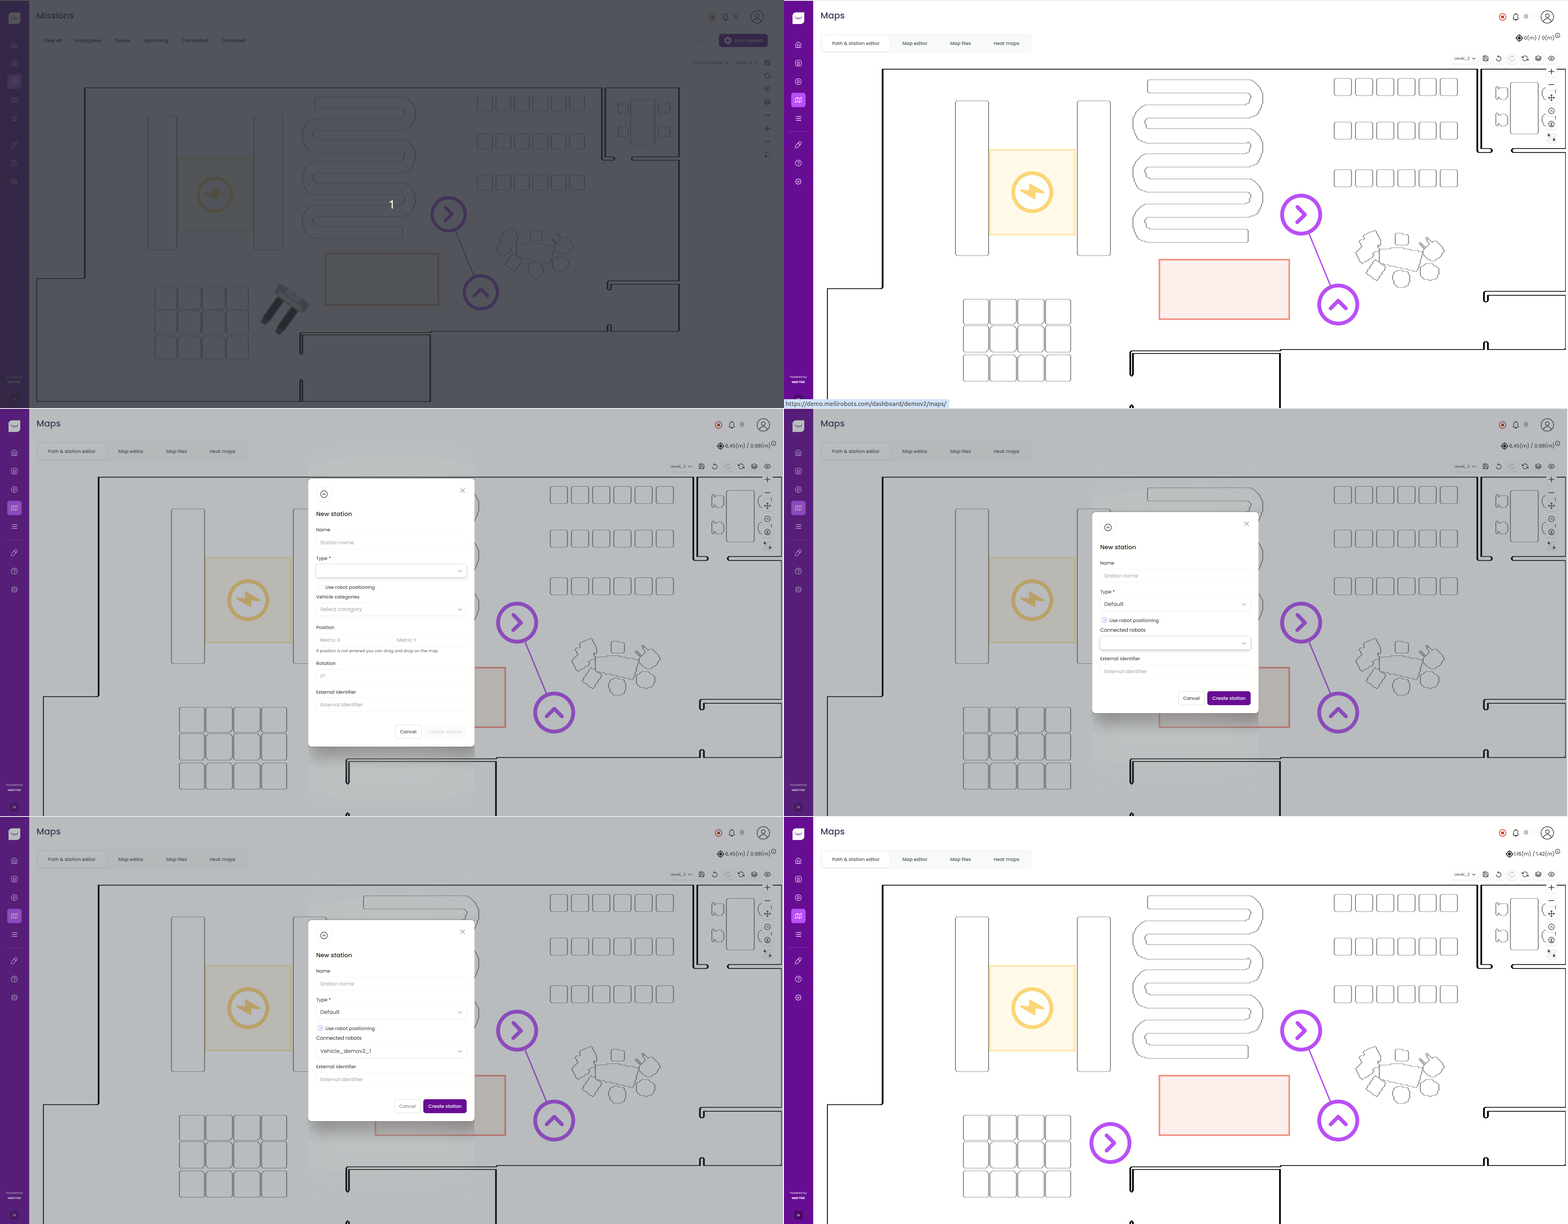
Enter the station name and select the station type (use Default).
-
To place the station on the map, you can either enter the position and rotation values and click Create Station, or simply click Create Station and then drag and drop the station to the desired location on the map.
Using the Robot Position (Robot Must Be Connected) #
-
Select Type → Default.
-
Make sure Use robot positioning is enabled.
-
Under Connected robots, select the robot whose current position you want to store.
-
Click Create Station to confirm.
-
The newly created station will appear at the current position of the selected robot.
Traversal Station (Creating a Junction Point on an Existing Path) #
- Enter the station name and select Traversal as the station type.
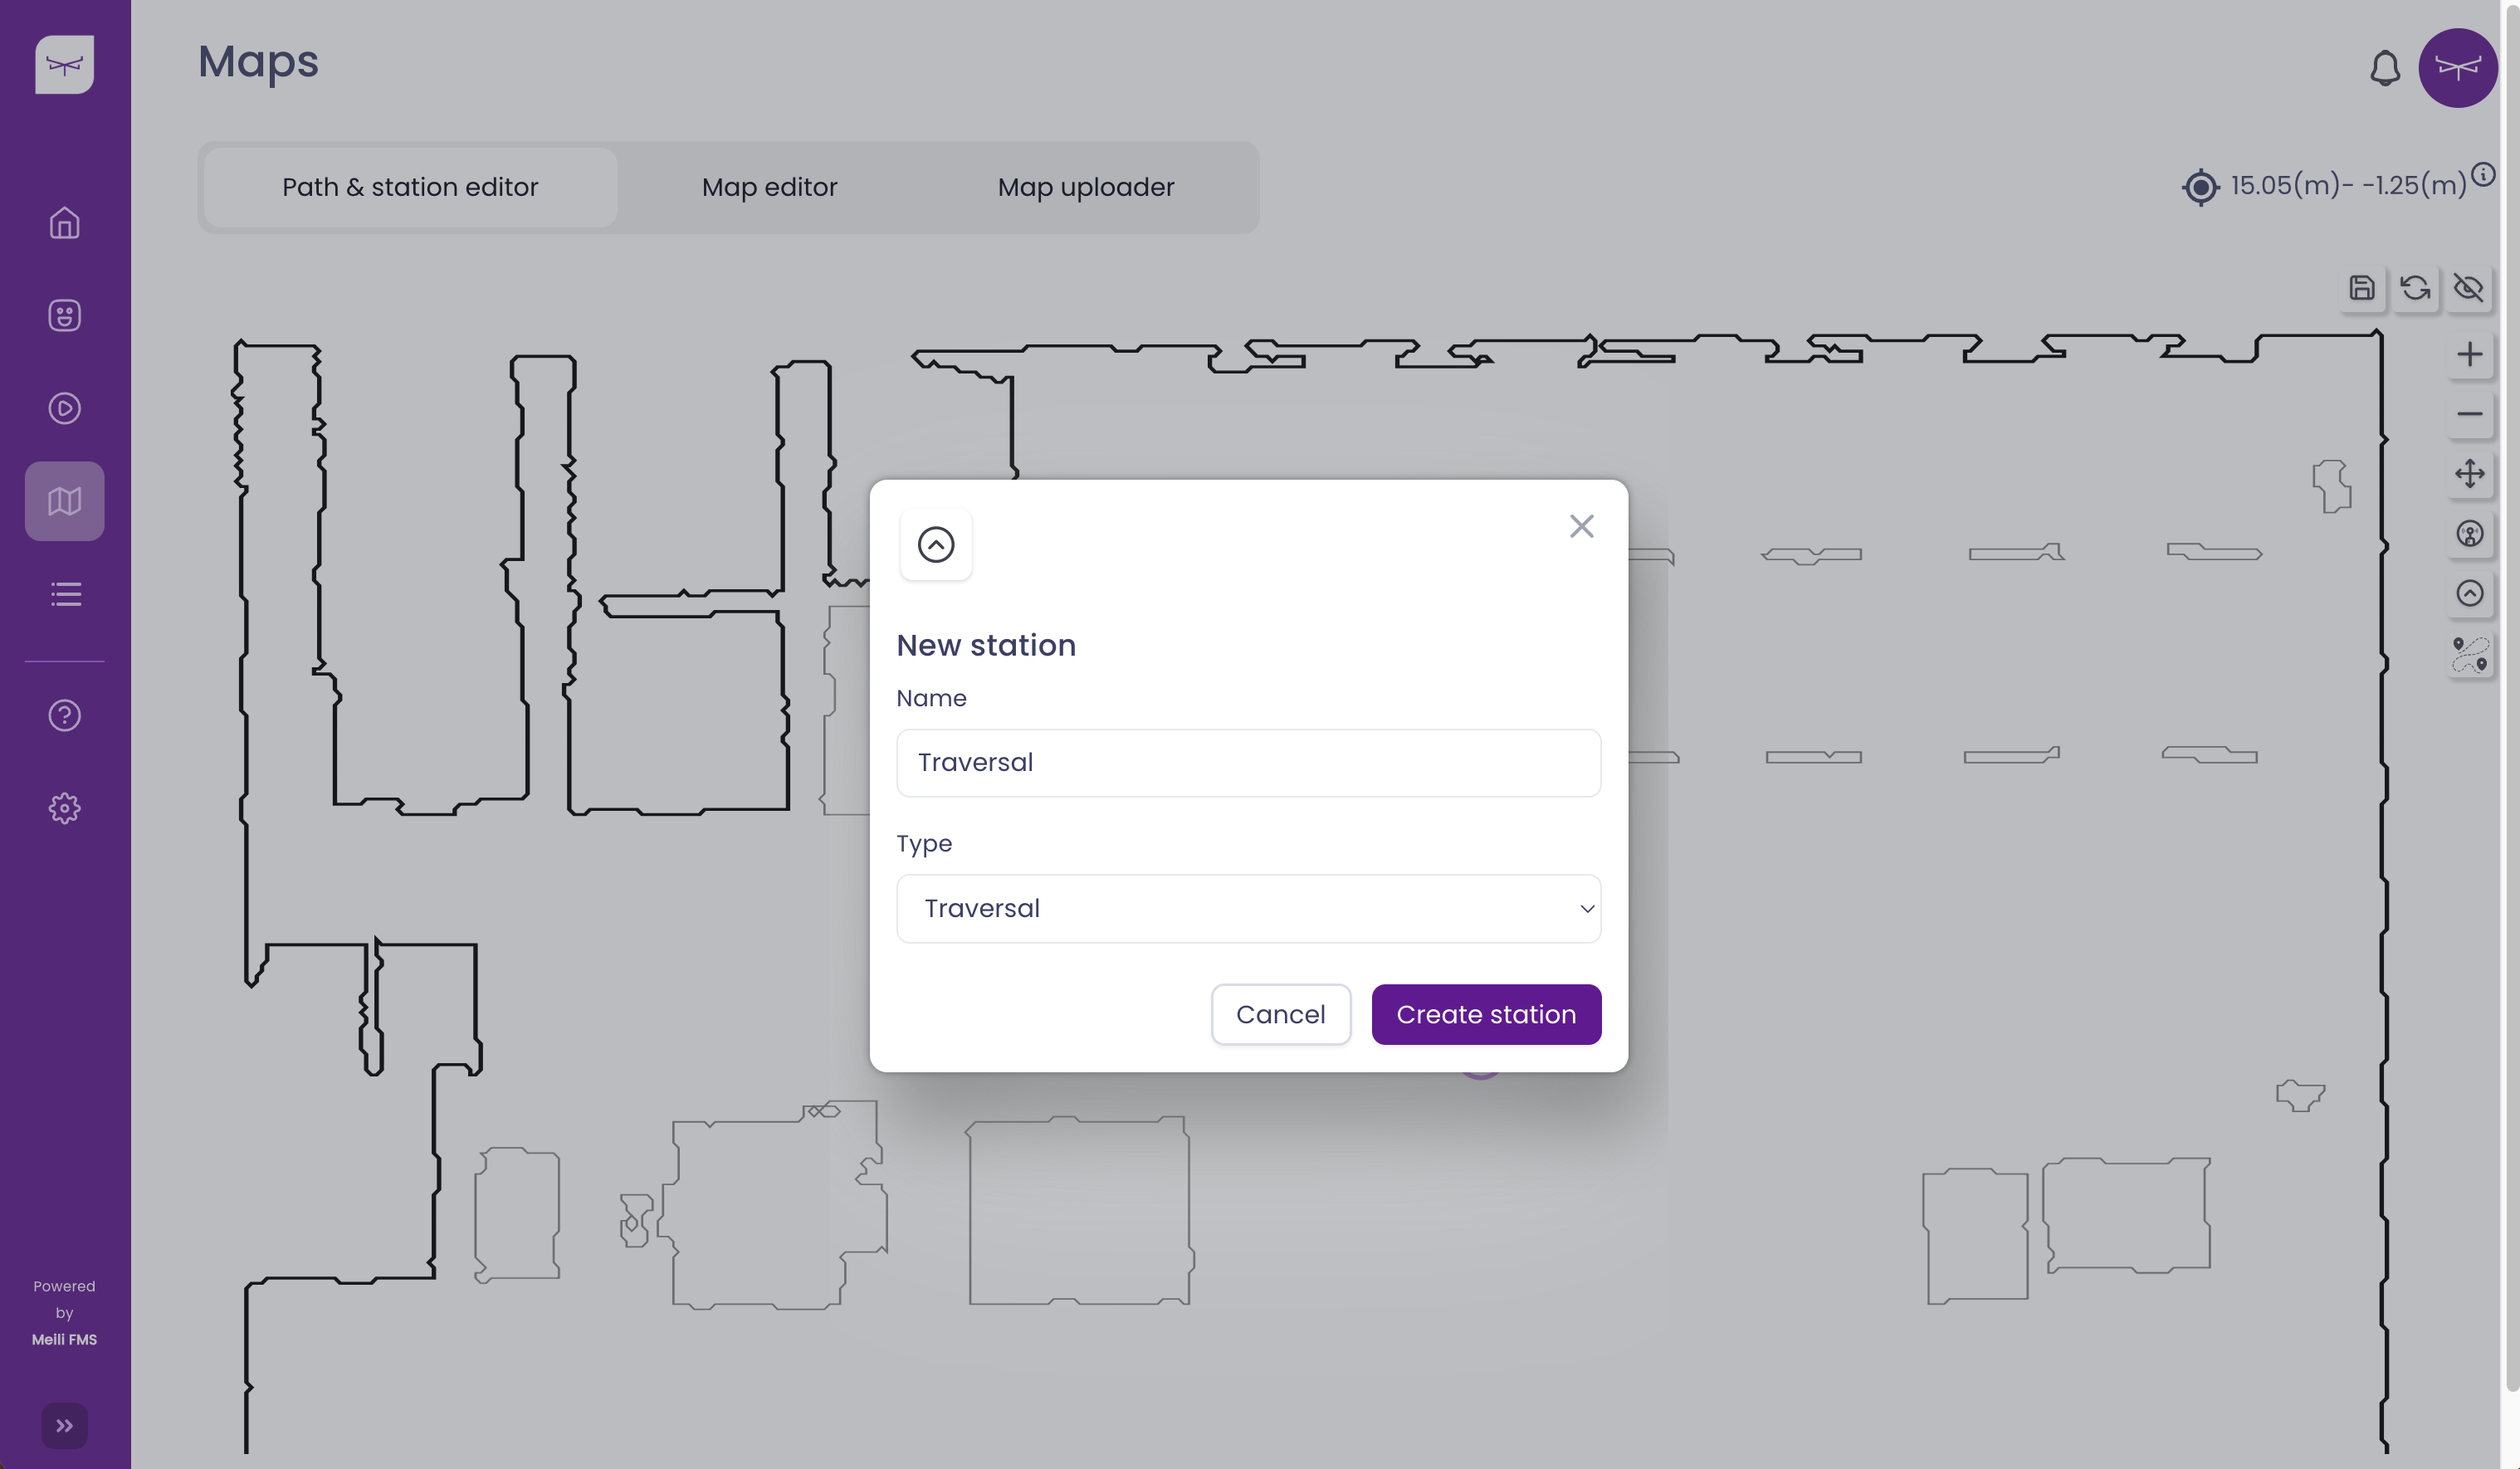
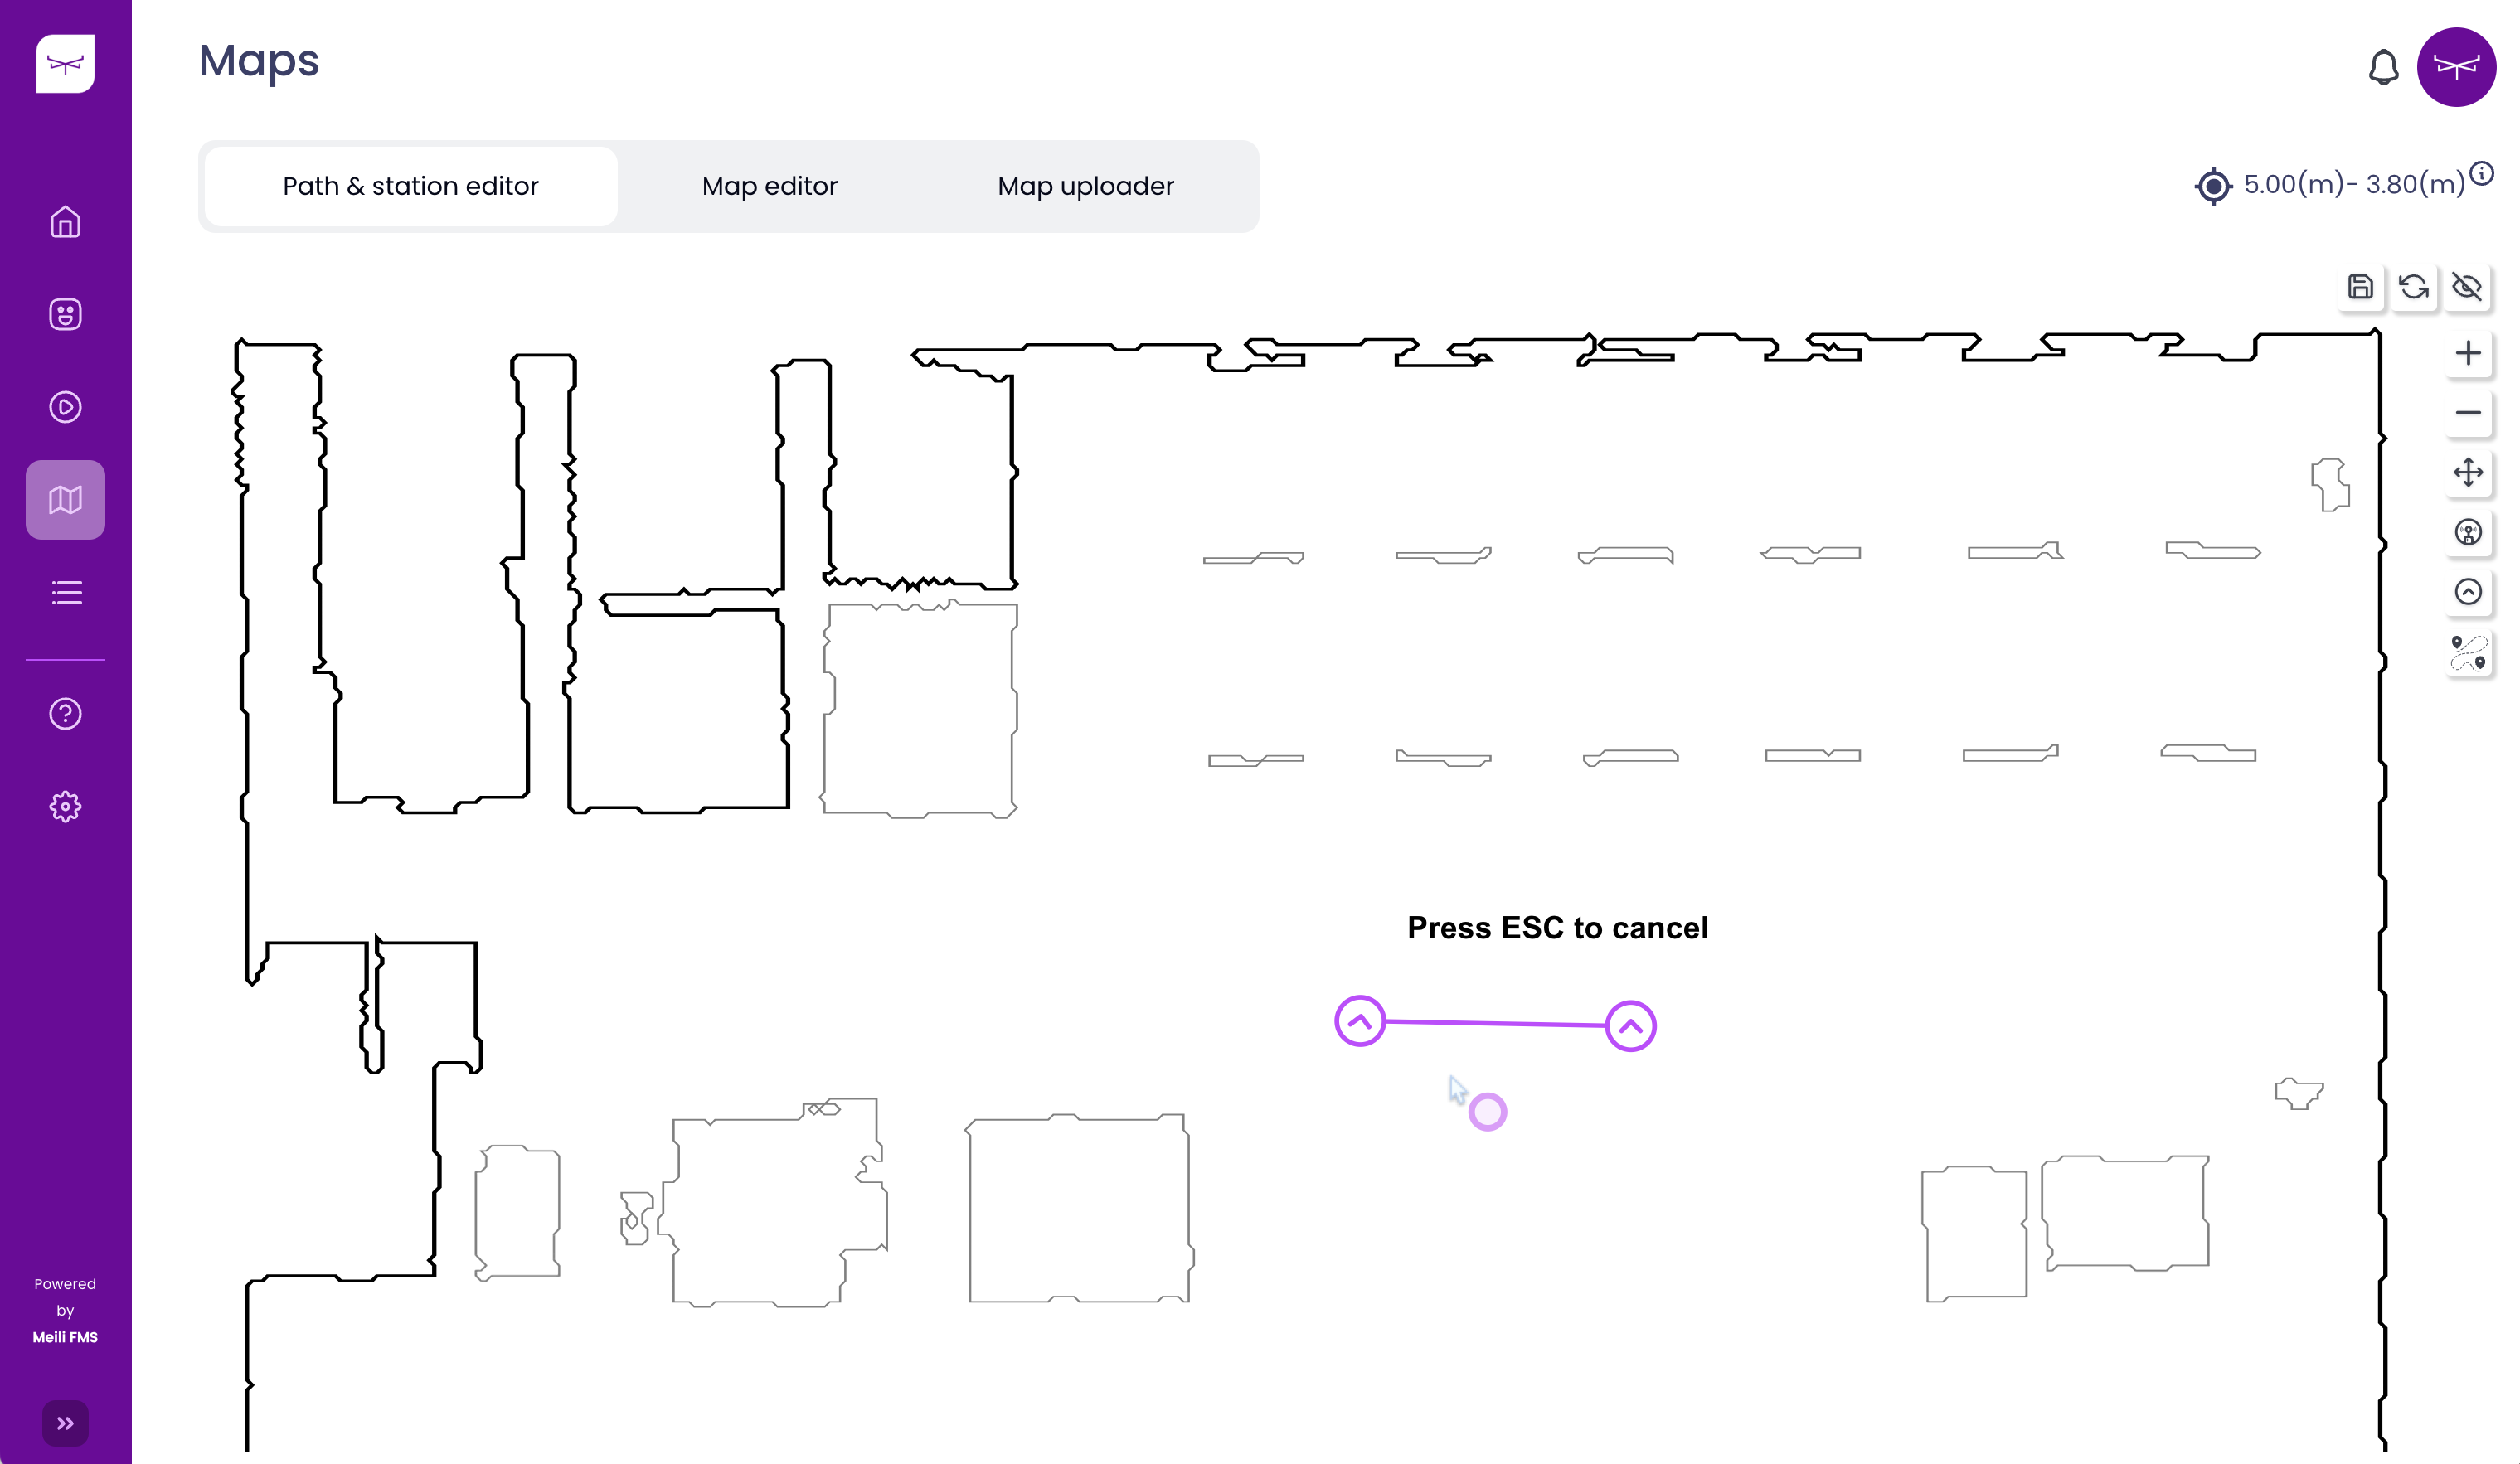
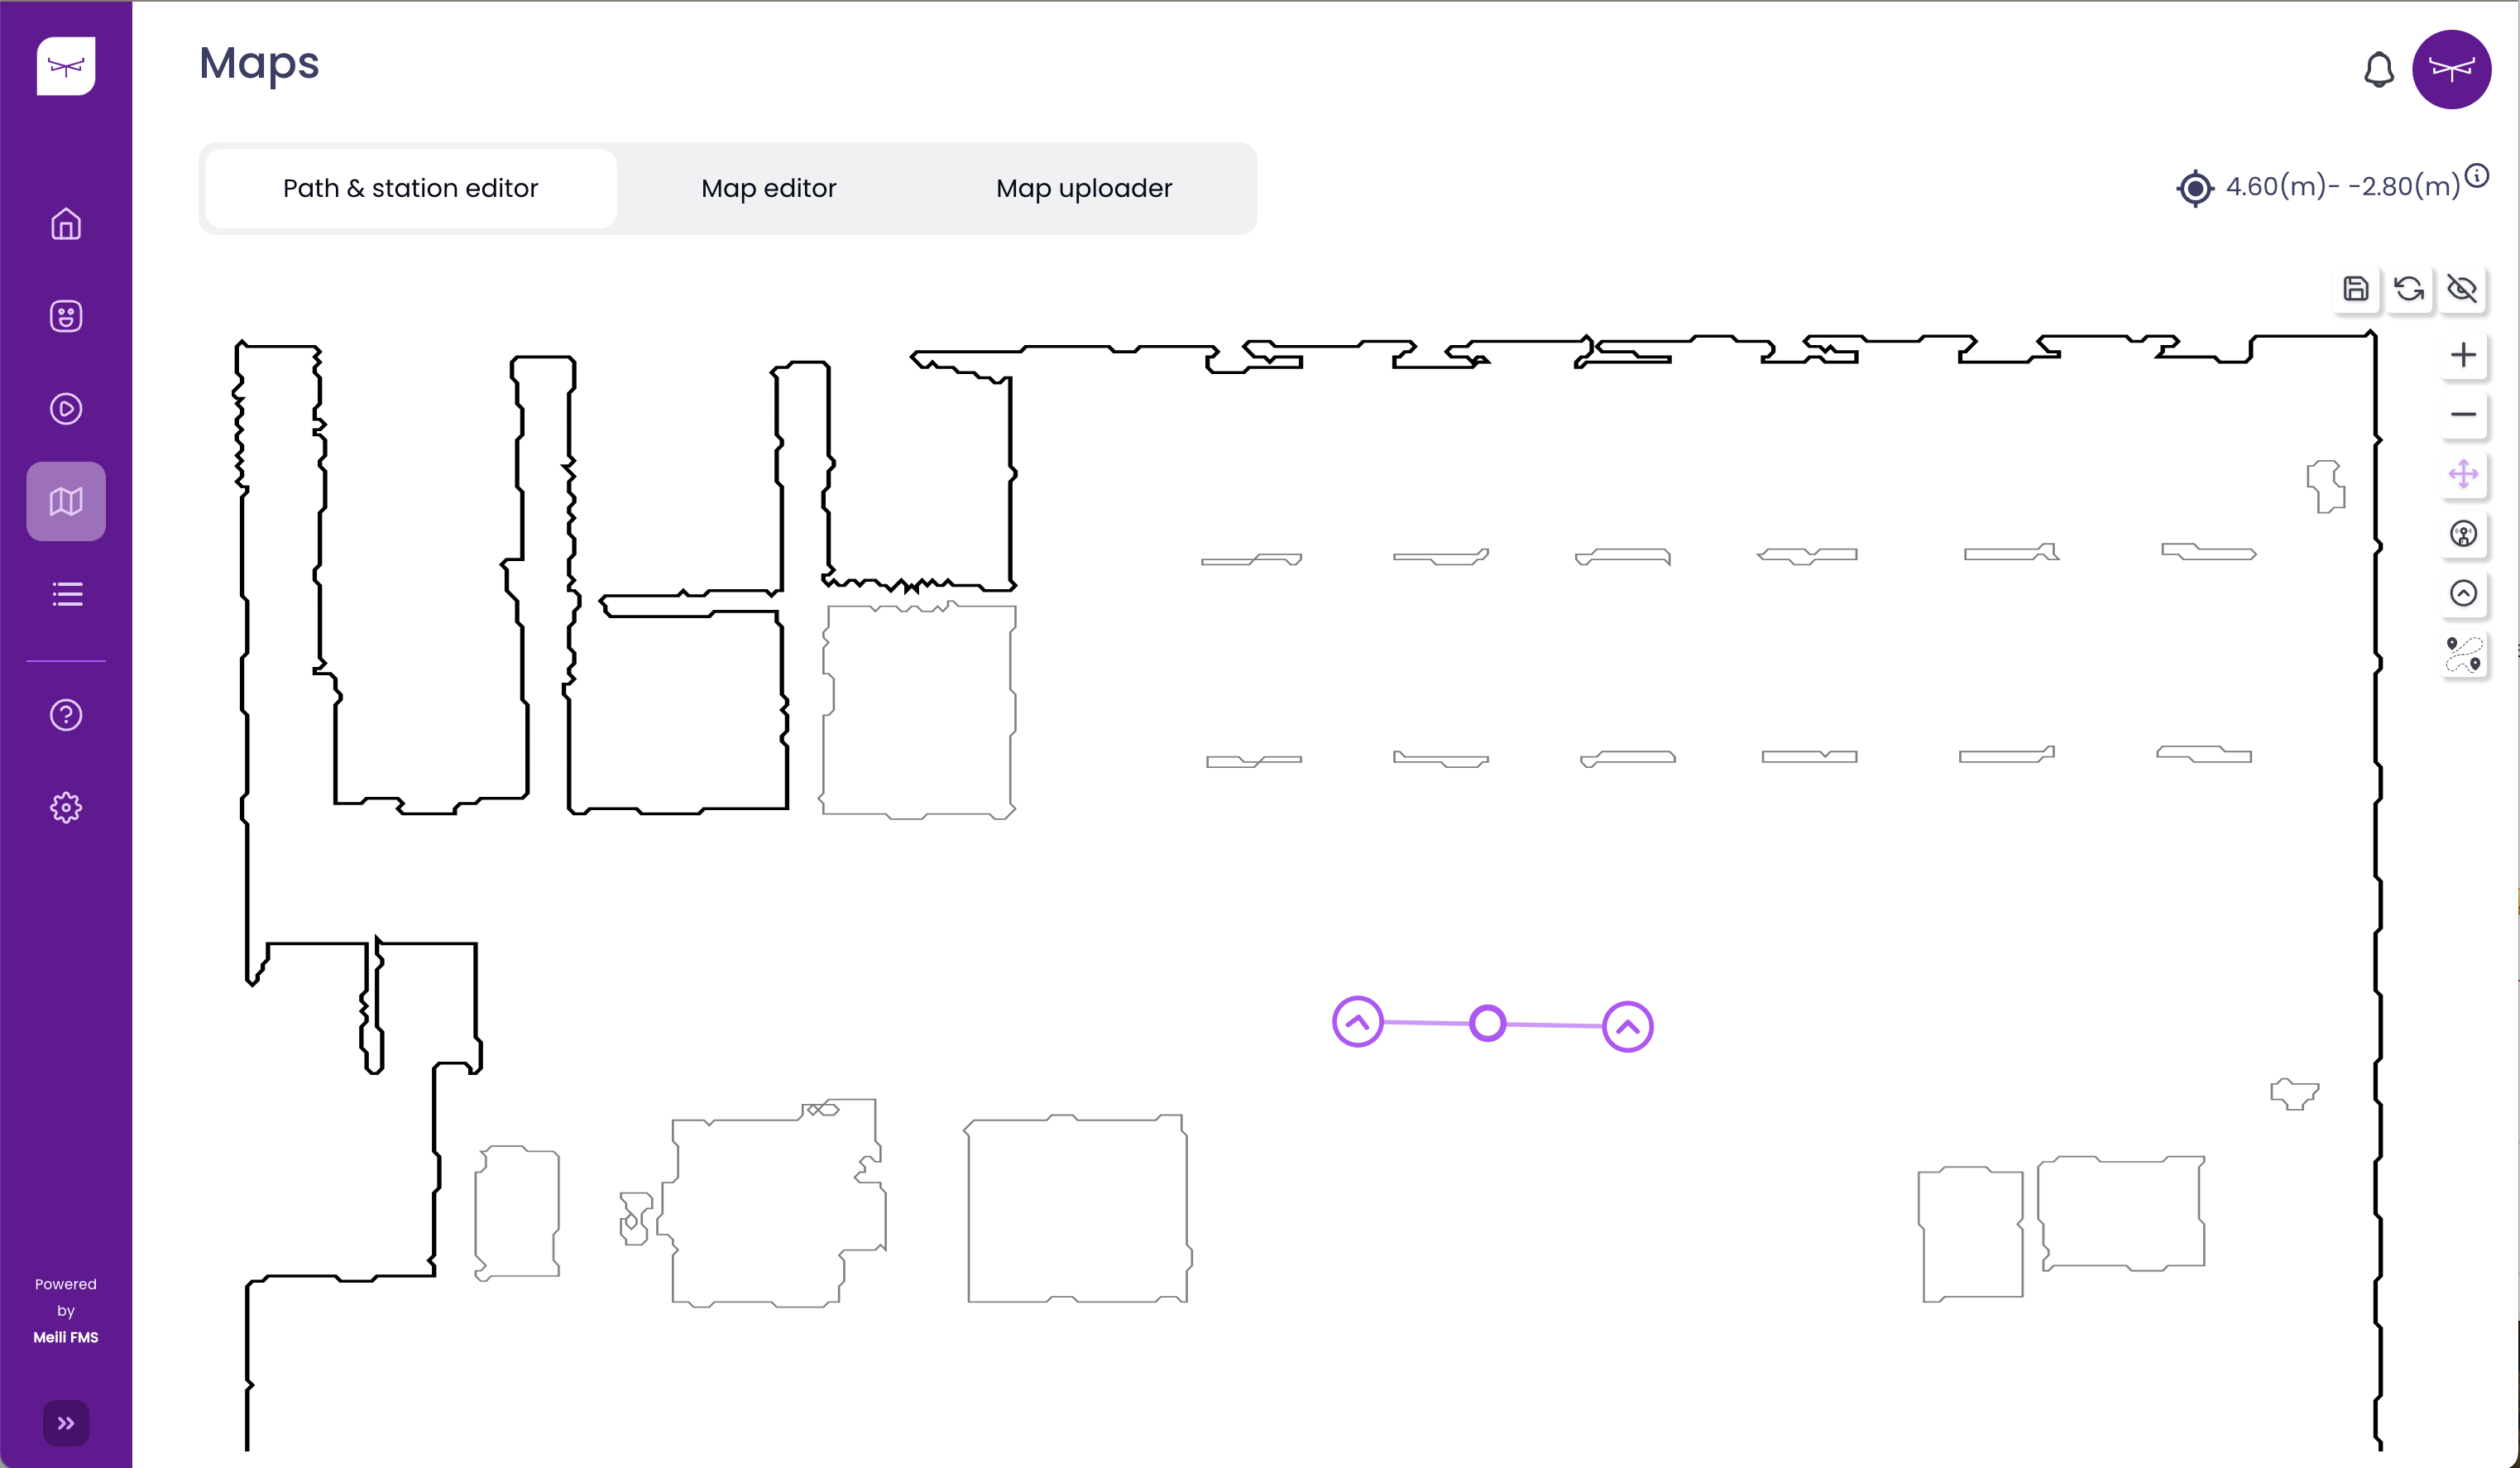
- Click Create Station, then select the existing path where you want to place the traversal station.
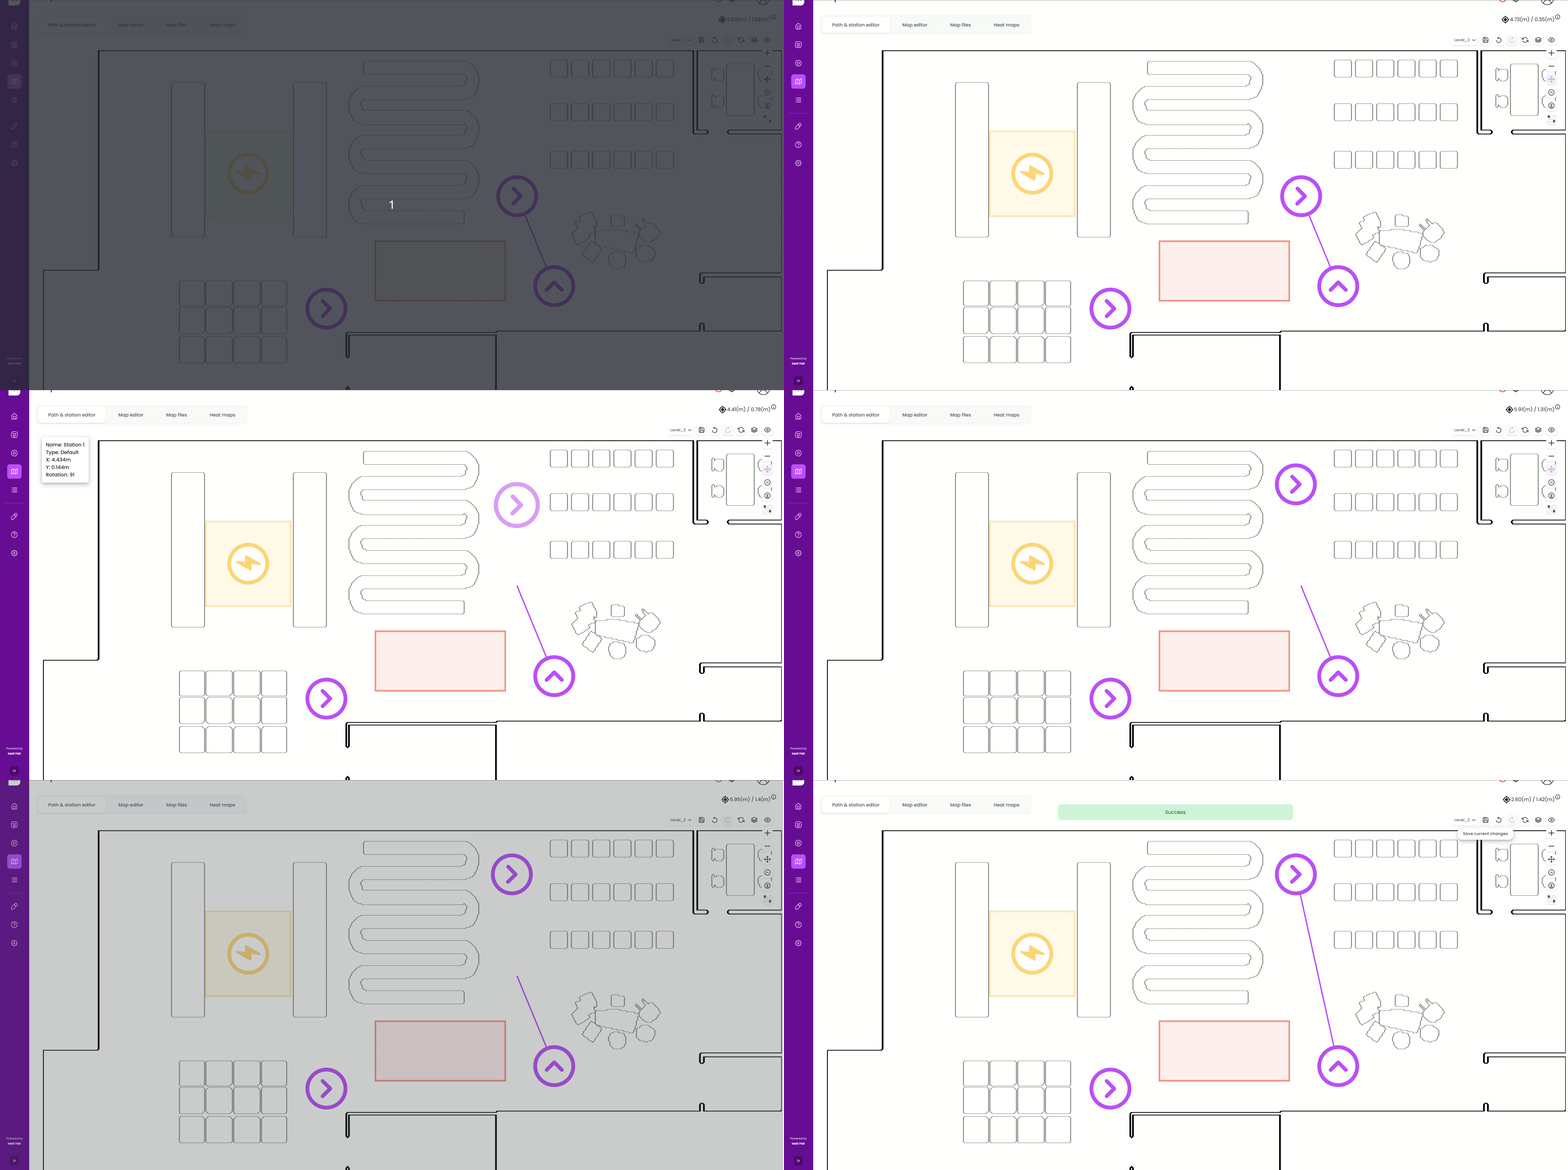
Station Editing (Draggable Points icon) #
-
To edit a station, enable the draggable points tool (shown below).
-
Drag the station to its new location.
-
Click Save to update the station position and connected paths.
Changing Station Appearance #
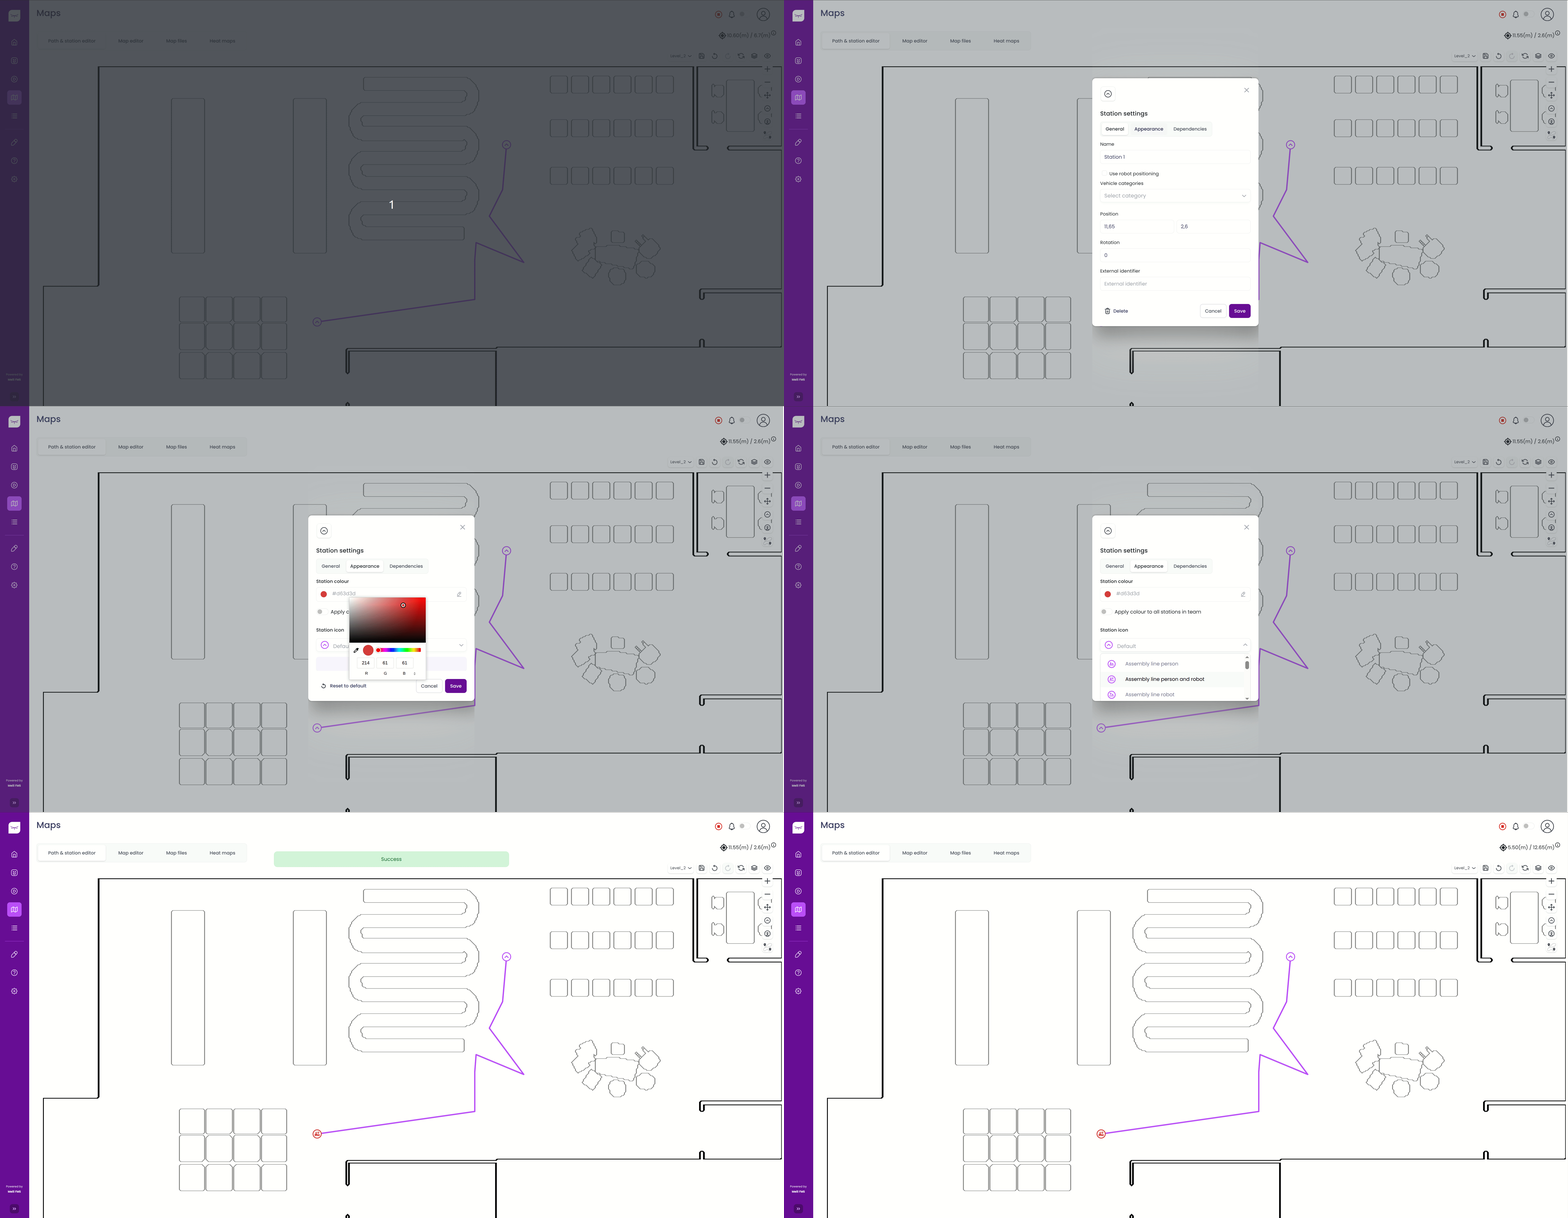
You can customize the station’s appearance, including its icon and color.
-
Click the station whose appearance you want to modify.
-
Go to the Appearance tab.
-
Modify the desired settings and click Save.
Path Creation (Path Creation icon) #
Quick Path (Clicking Two Stations on the Map) #
- Note
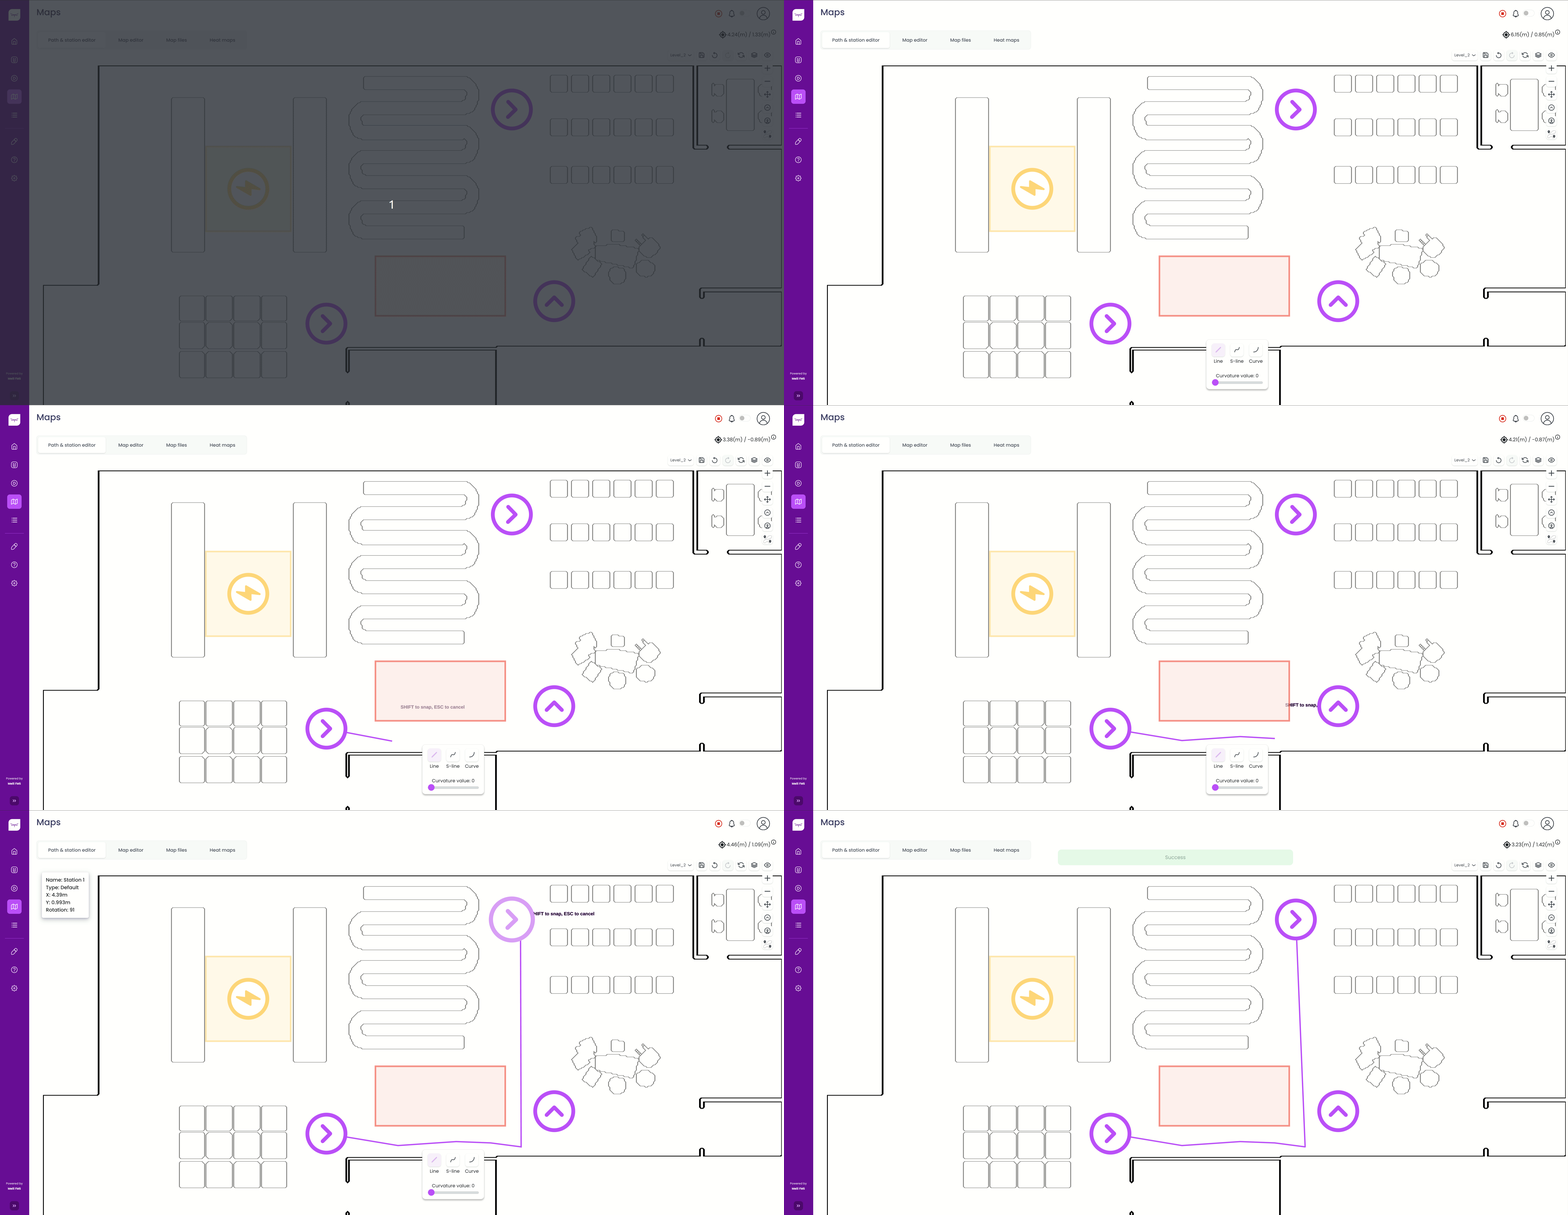
- With the Quick Path creation tool, the path is created automatically using the Meili Robots path planner to intelligently avoid obstacles. You can also add manual waypoints to customize the route (see Step 3).
- Note
- To configure the waypoint spacing or obstacle clearance, go to the Team Site Settings page.
-
Select the Quick Path button in the toolbar, then choose the desired path curvature.
-
Click the origin station.
-
(Optional) Click anywhere on the map to add one or more waypoints and manually define the route. If no waypoints are added, the path planner automatically generates an optimal path between the stations.
-
Click the destination station.
Advanced Path #
- Note
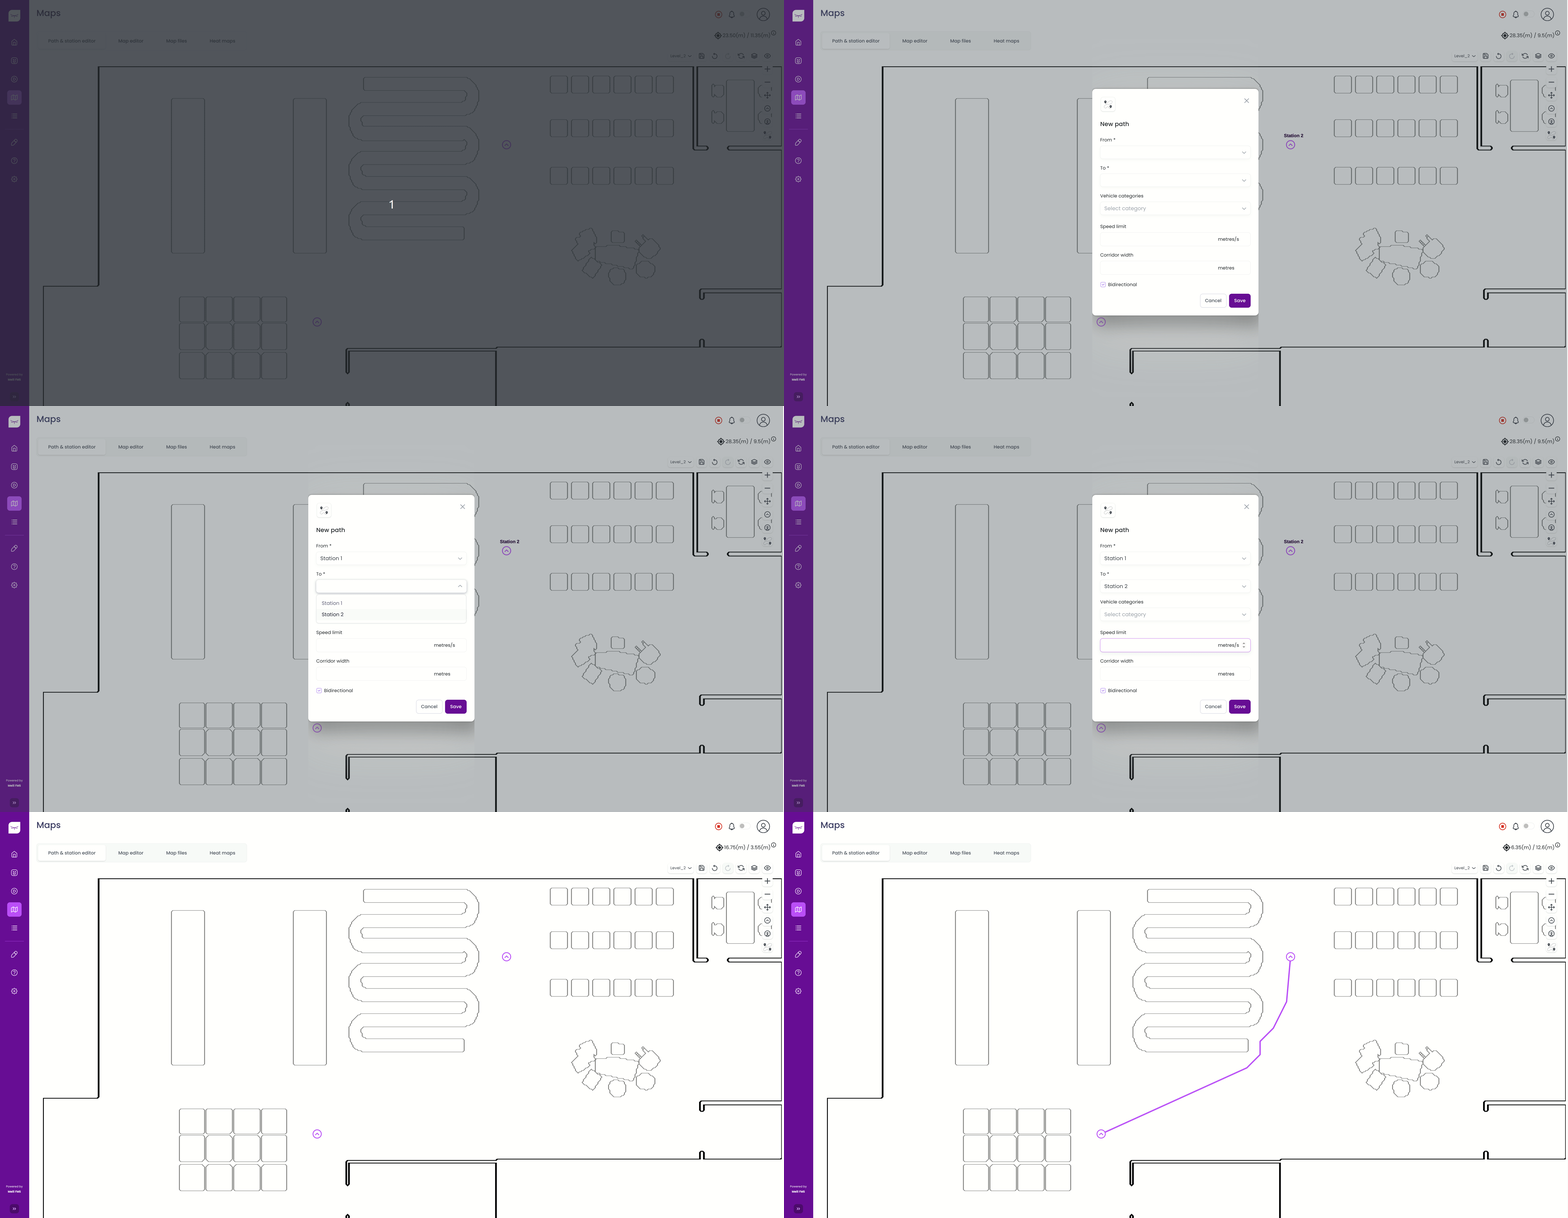
- With the Advanced Path creation tool, the path between the origin and destination is created automatically using the Meili path planner to avoid obstacles.
-
Select the Advanced Path button in the toolbar.
-
Select the origin and destination stations from the dropdown lists.
-
Choose whether the path should be bidirectional or unidirectional. You can change the direction later if needed. Optionally, configure the speed limit and corridor width.
-
The path is generated automatically using the Meili path planner.
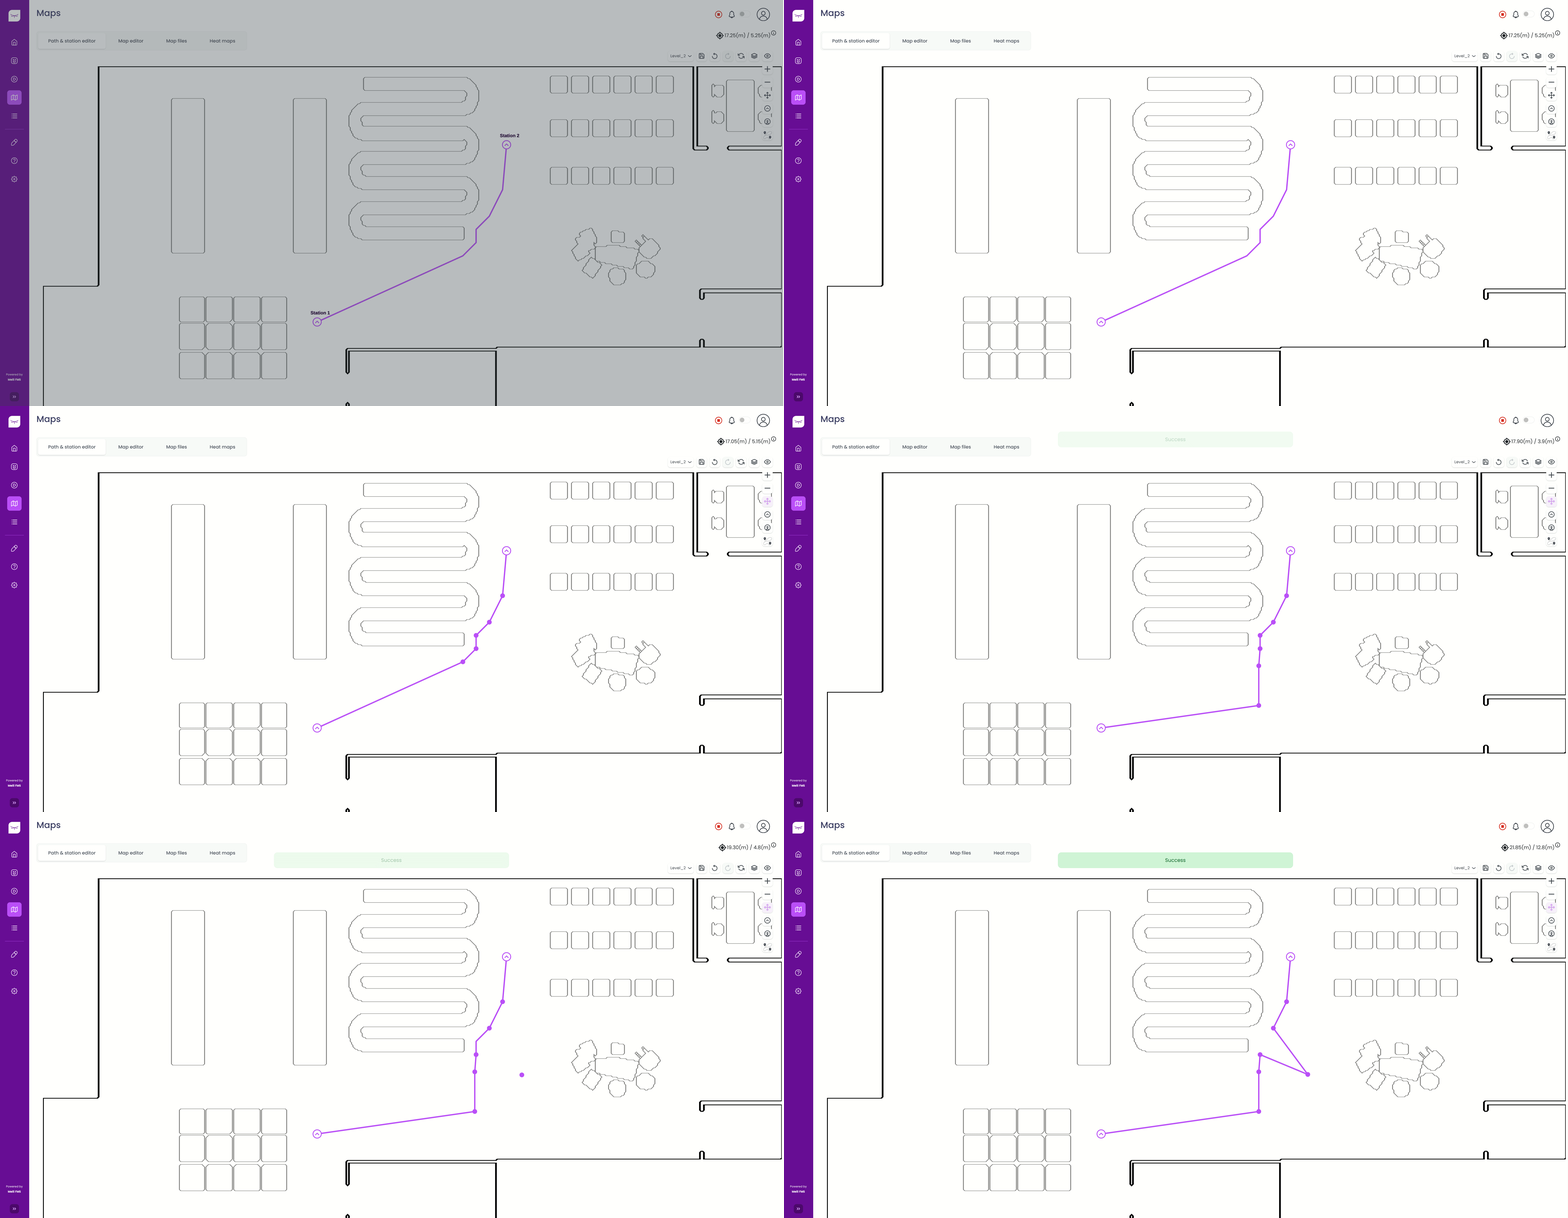
Path Editing (Draggable Points icon) #
-
Enable the draggable points tool (shown below).
-
Drag a waypoint on an existing path.
-
Release it at the desired location. The path will be recalculated automatically.
Changing the Direction of a Path #
To change a path’s direction, click the path and enable Switch direction.
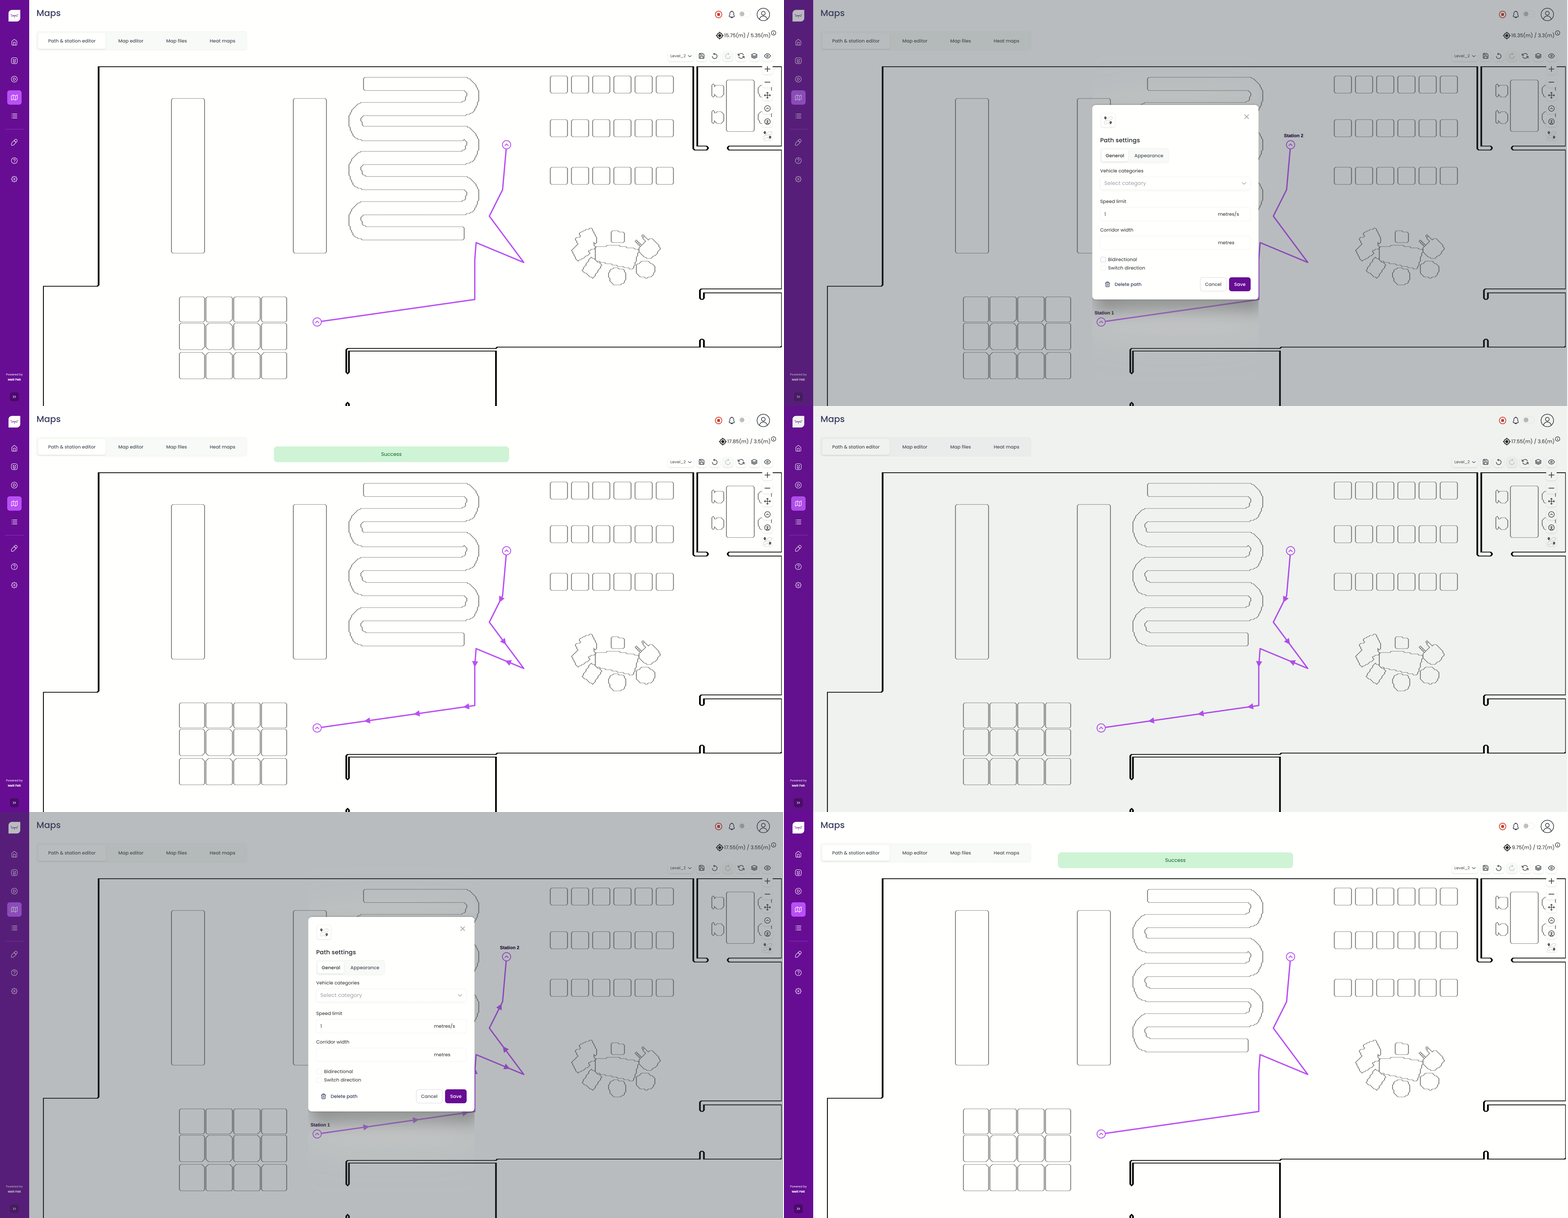
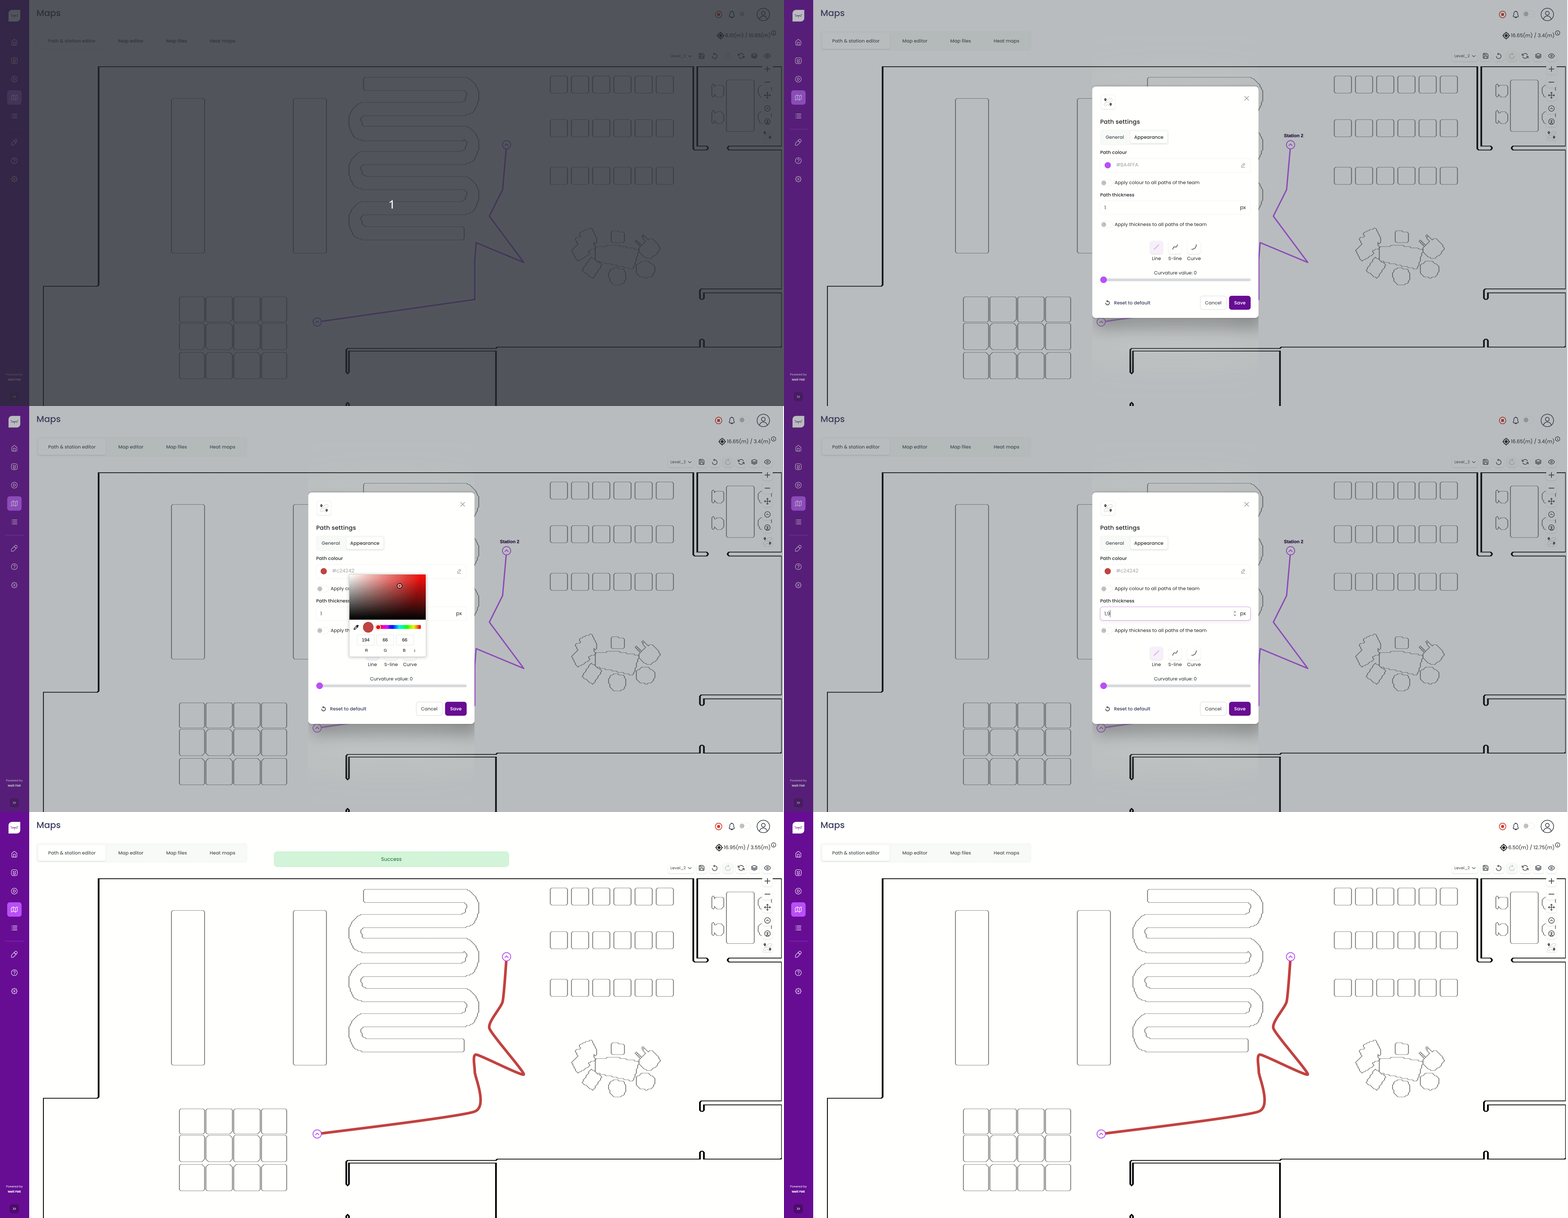
Changing Path Appearance #
You can customize the path’s appearance, including its color, width, and curvature.
-
Click the path whose appearance you want to modify.
-
Go to the Appearance tab.
-
Modify the desired settings and click Save.