Manage Organisation Vehicles #
Adding a New Vehicle #
This guide will walk you through adding a new vehicle to your fleet in the application.
Step 1:
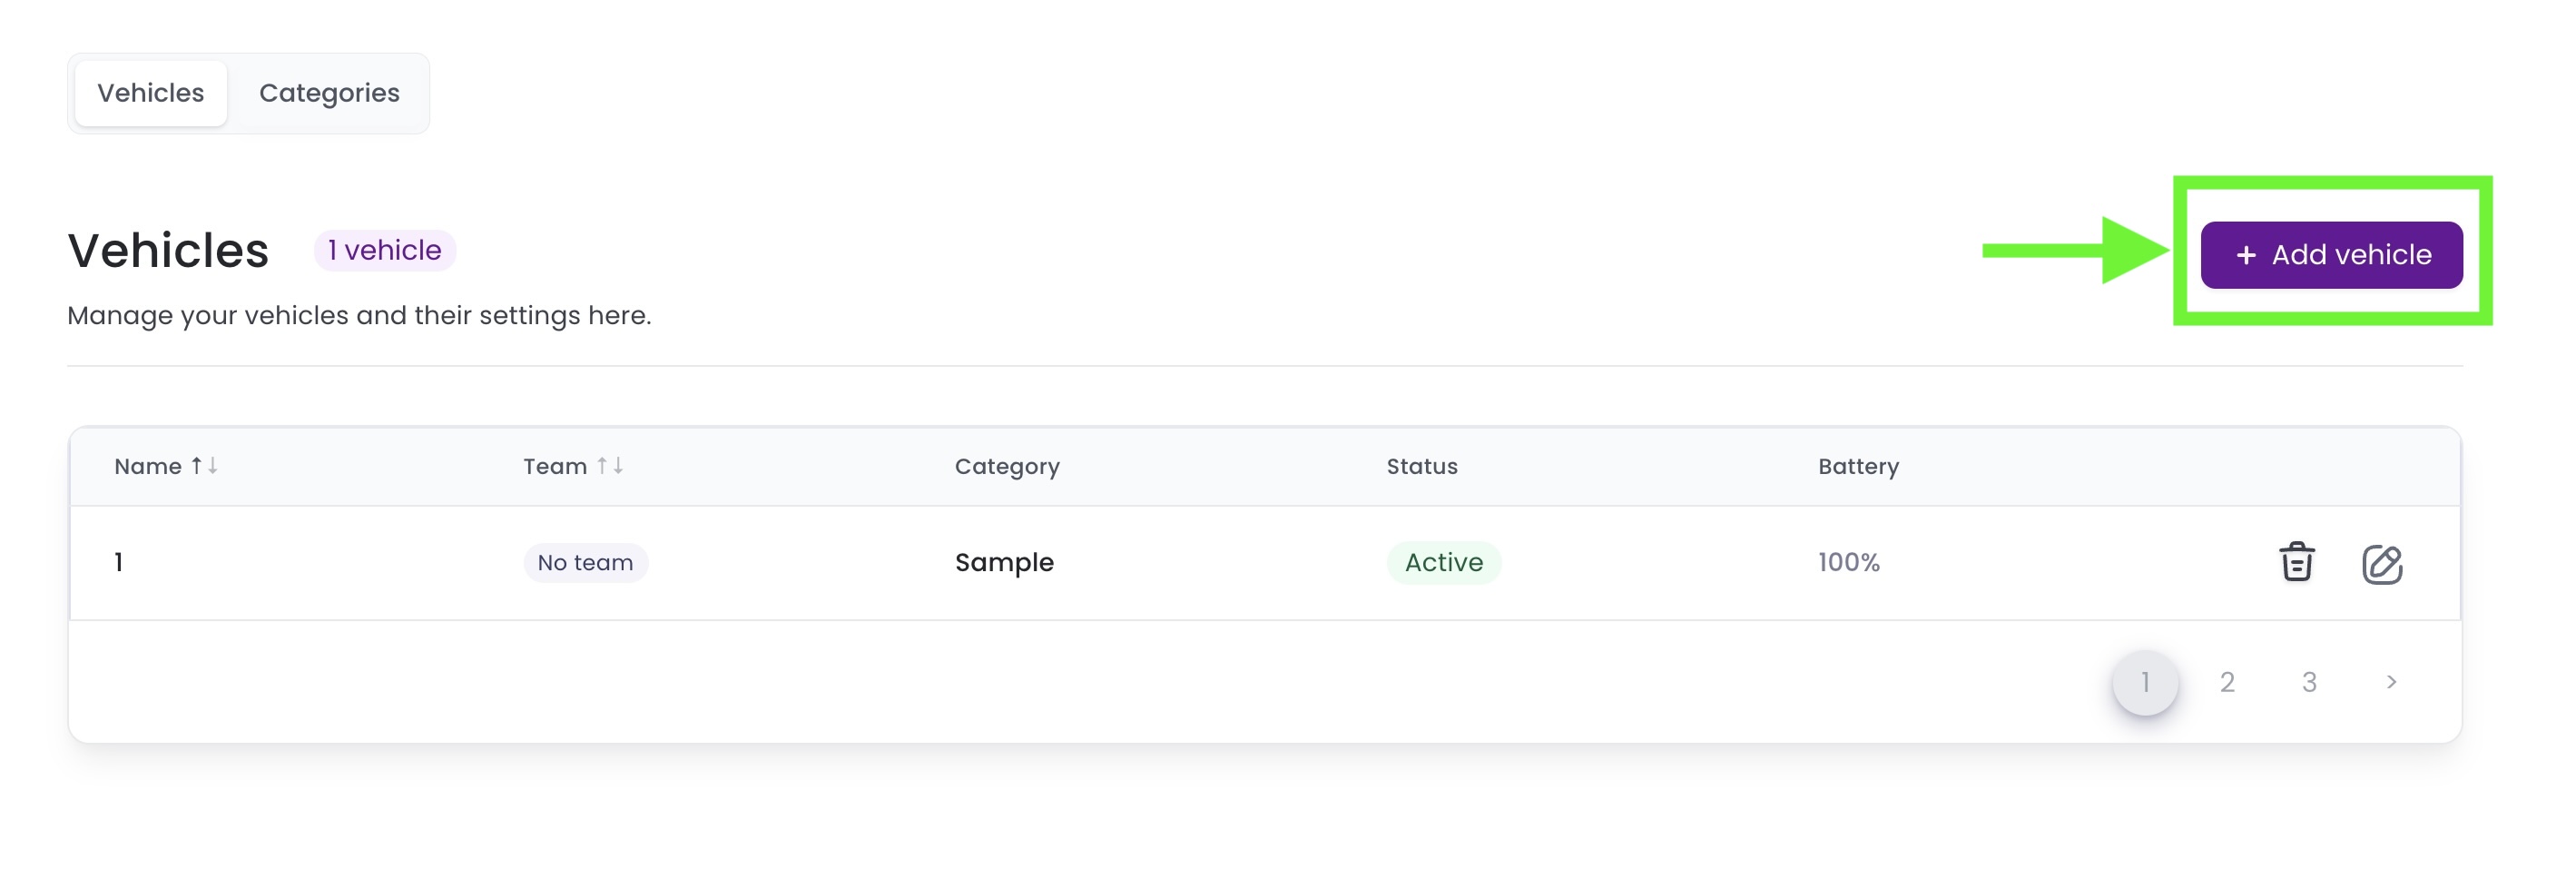
- Navigate to the ‘Vehicles’ tab on the main dashboard.
- Click on the ‘+ Add vehicle’ button to start adding a new vehicle.
Step 2

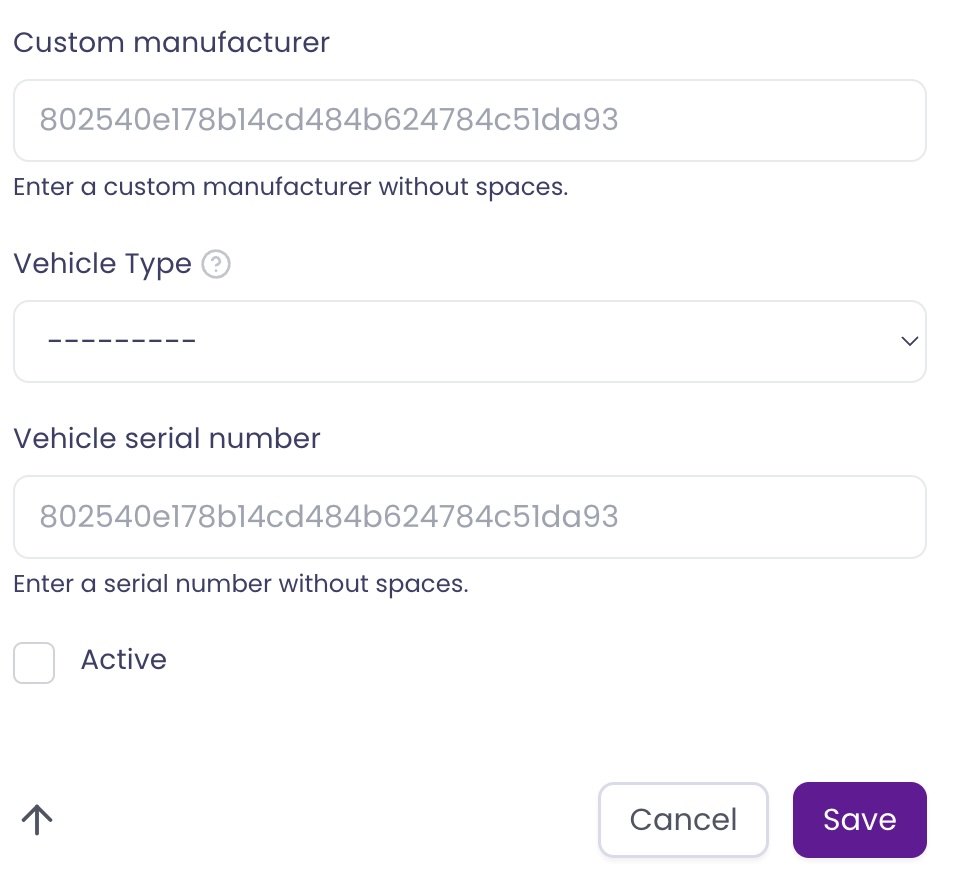
- In the ‘General’ tab fill in the vehicle’s Name, Team, and toggle the active status checkbox if needed.
- ‘Category’, ‘Custom Manufacturer’ and, “vehicle serial number are optional”
- Toggle the ‘Active’ switch if the vehicle should be active immediately.
Warning You can add a vehicle to your fleet at both organisation level and team level, meaning you do not need to Select a team before adding a new vehicle. But it is a must to assign the vehicles to a team to start assigning tasks to the robots
Step 3: (Optional)
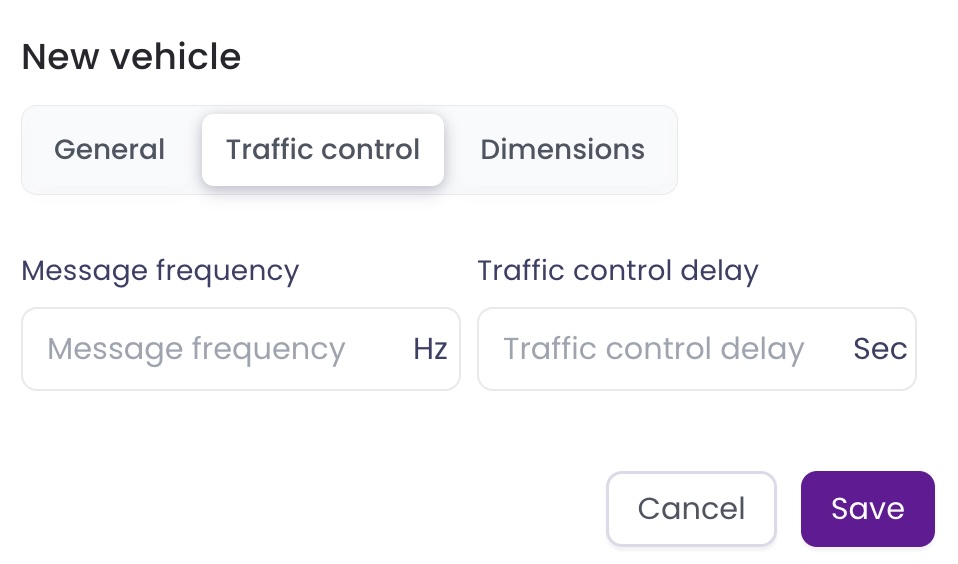
- Click on the ‘Traffic control’ tab.
- Set the ‘Message frequency’ and ‘Traffic control delay’ as required (If non are defined, the defauls for Frequency is 1Hz and for Delay is 0 Sec.)
Step 4: (Optional)
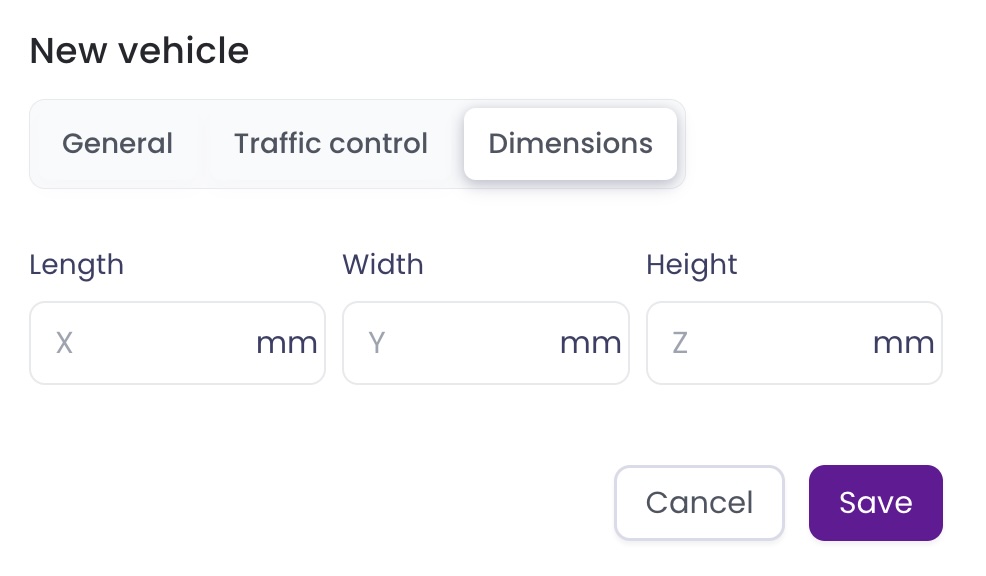
- Click on the ‘Dimensions’ Tab
- Set the dimensions of your vehicle. (If none are defined, the default values taken are 500mm x 500mm x 500mm x 500mm)
Step 5
- Confirm all information is correct.
- Click ‘Save’ to add the vehicle to your fleet.
Battery Settings #
To display the battery status on the vehicles main dashboard, you must set up the following parameters:
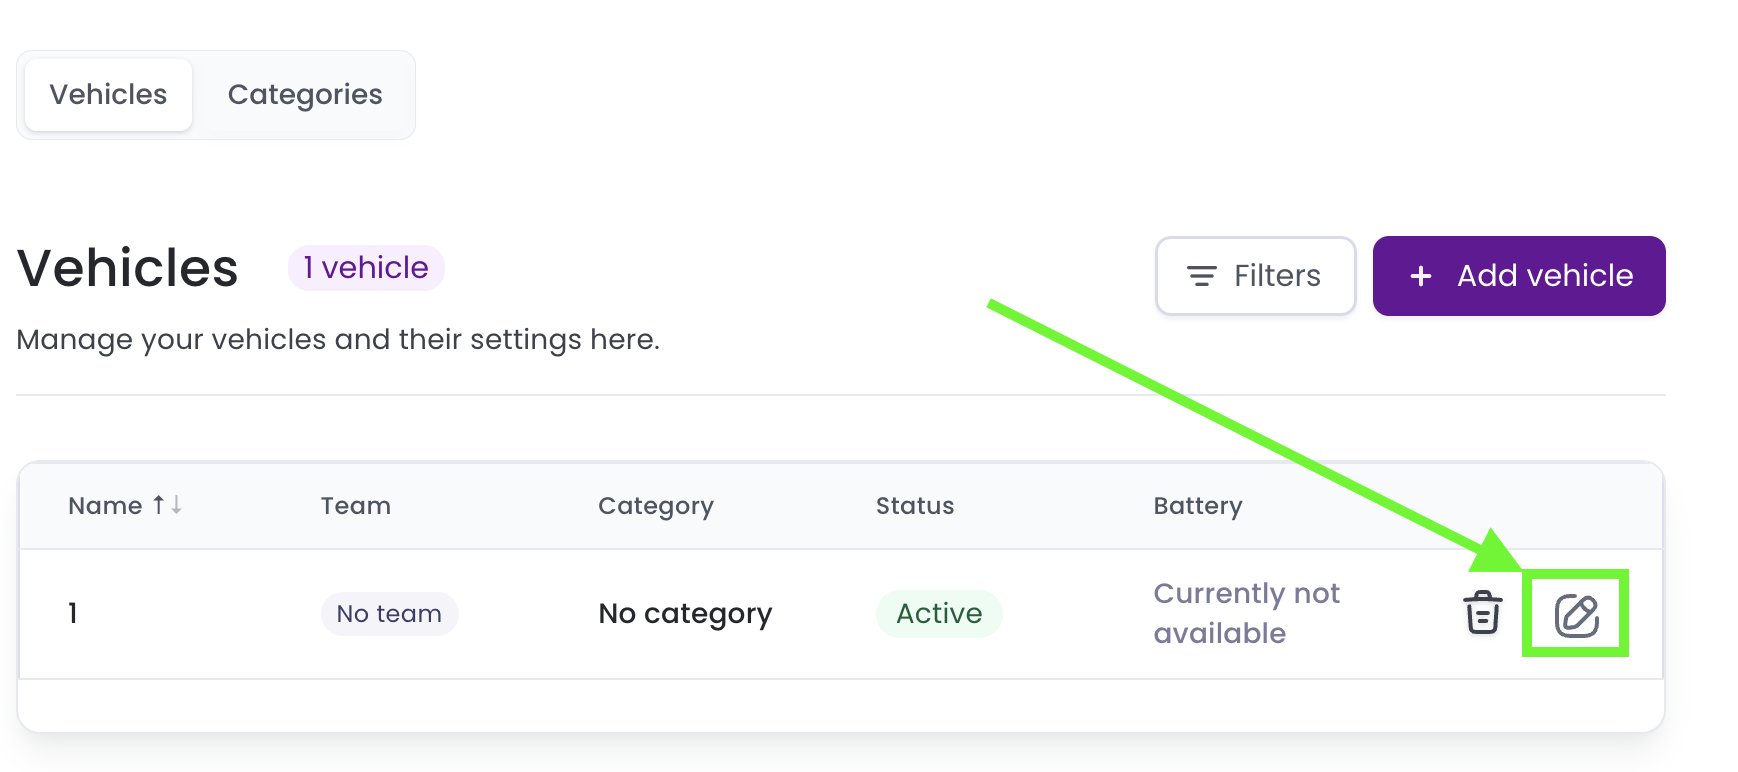
Step 1: Navigate to the Vehicles tab on the main dashboard.
Step 2: Click on the settings.
Step 3: Click on the battery tab.
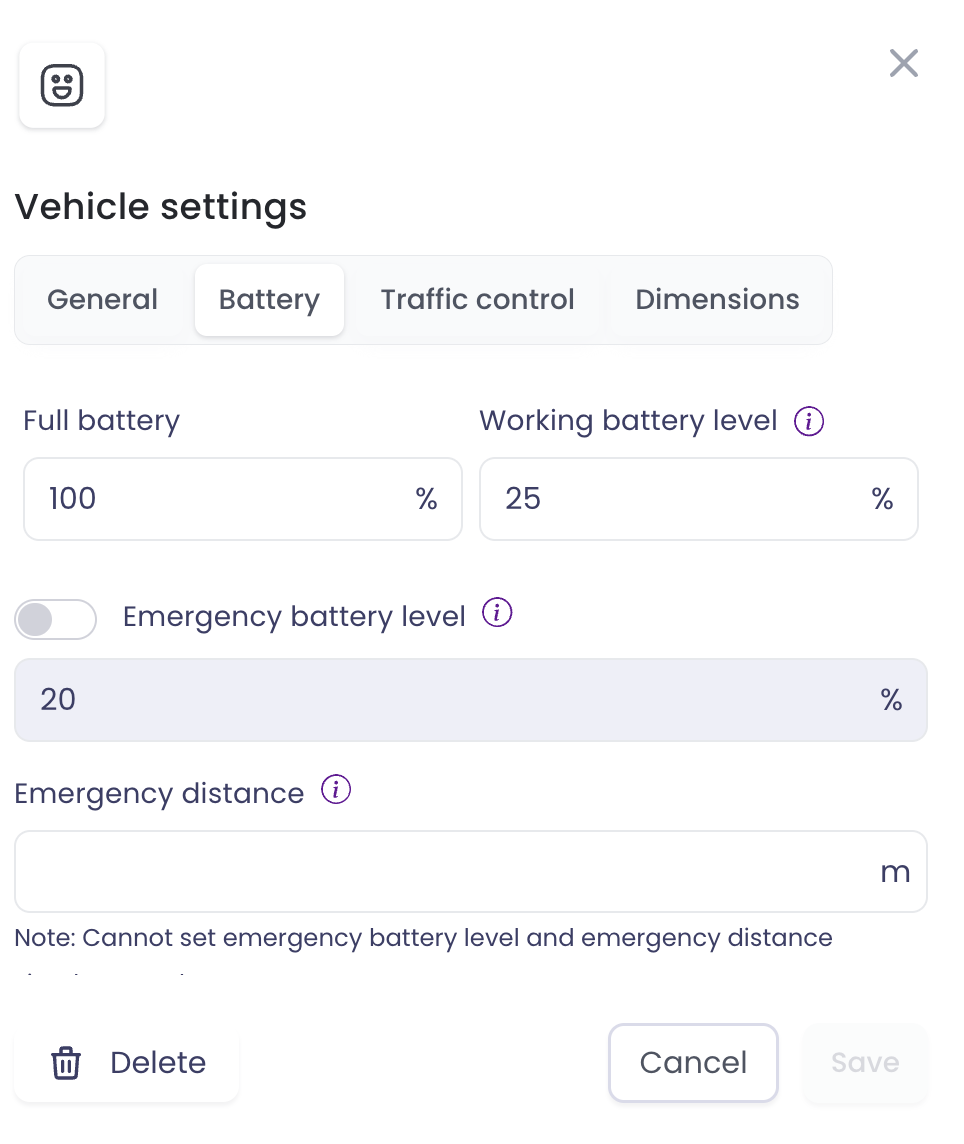
Definitions:
- Full Battery: It represents the maximum value of the robot’s battery when it is fully charged, i.e. 100%. The system automatically sets it to the maximum battery values that were initially read. This value can be modified using the API.
- Working Battery Level: It represents the battery level at which the robot can start carrying out tasks. This value can be modified using the API.
- Emergency Battery Level The ‘Emergency Battery Level’ indicates the battery level at which the robot is sent to the charging station.
- Emergency Distance: The distance that can be covered by the Emergency Battery level.
Setting up this values is required so the Vehicles tab in the main dashboard displays battery data.
When a robot’s battery level or distance is below the set emergency levels, the robot will automatically go to a charging station or a safe zone. At the same time, a notification will be sent to your dashboard.
Charging stations and safe zones can besignated via map editing.
Deleting a vehicle #
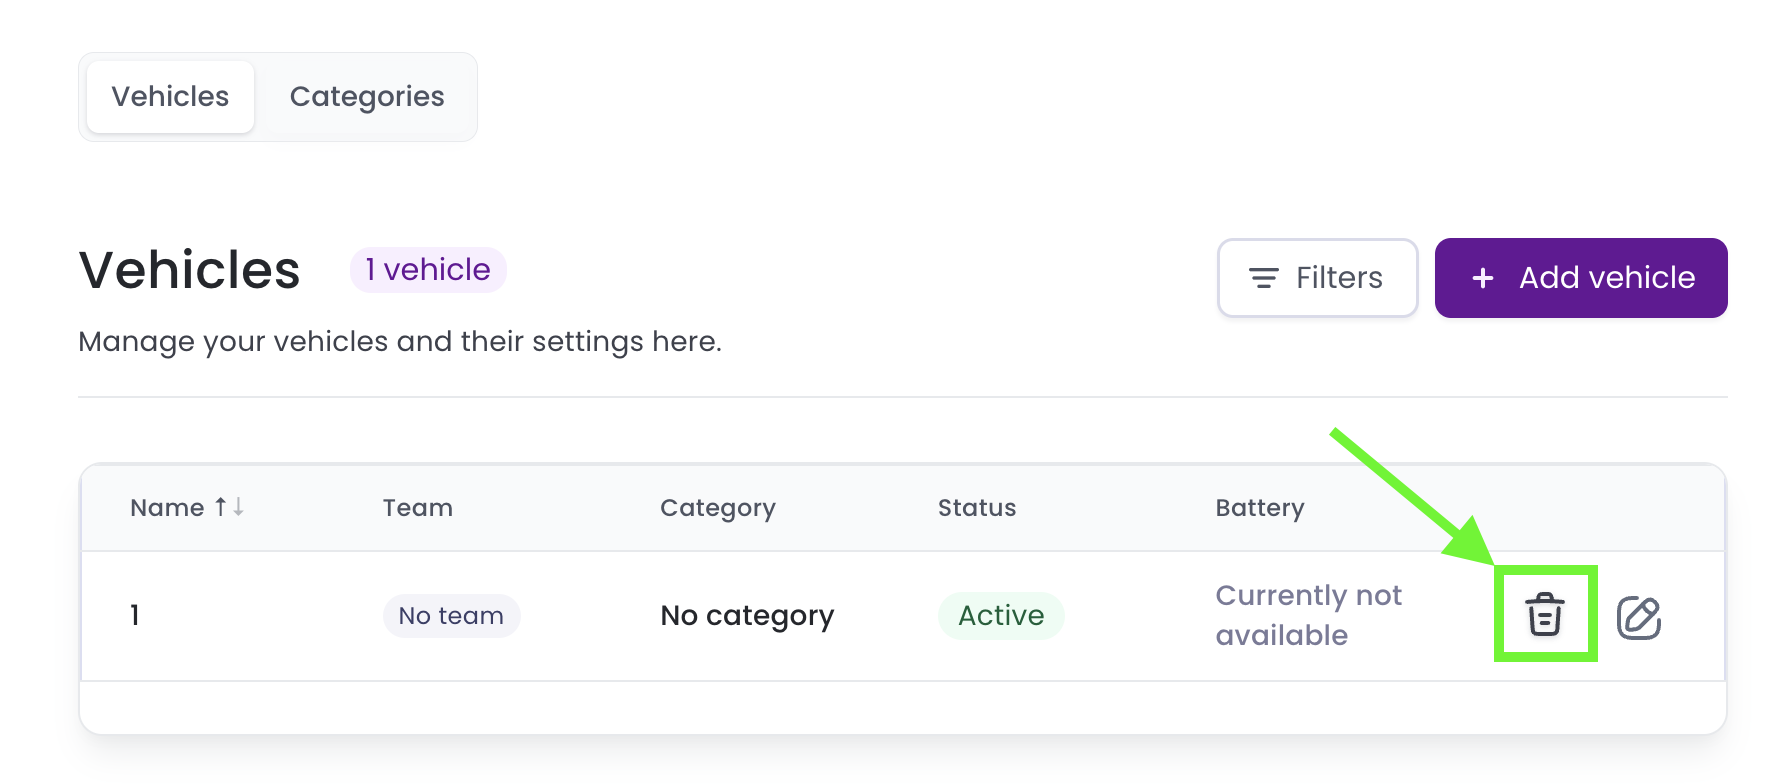
- Navigate to the ‘Vehicles’ tab on the main dashboard.
- Click on the bin icon.
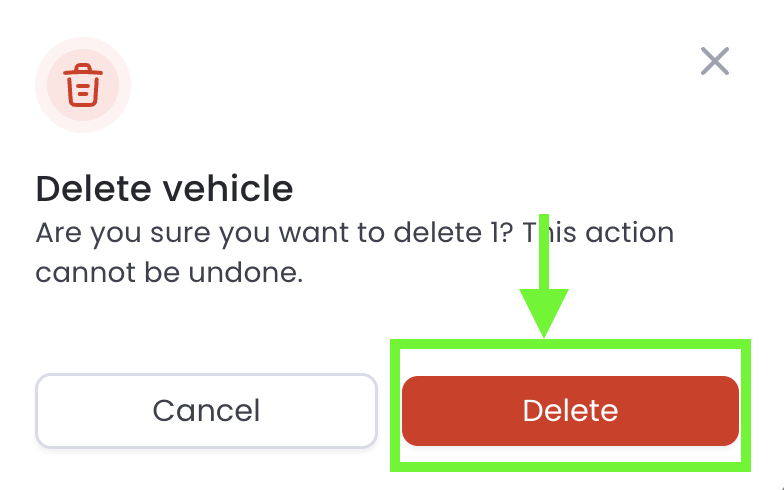
- Confirm the deletion