FRED Integration#
Installation#
First, make sure to have docker installed on your machine. If you don’t have docker installed, you can follow the instructions here.
Meili will send two files: fred_integration.tar and docker-compose.yaml. This files should be placed in the same folder.
To install the docker, open a terminal and run the following command, being in the same folder as the files:
docker load < fred_integration.tarRunning#
To launch the Docker container, follow these steps:
- Open a terminal window.
- Navigate to the meili folder located on your desktop.
- Run the following command:
docker compose up- After a few messages appear, the software will be ready, and you should be able to see the robots on the FMS.
Warning: If an error appears, the next sections should probably be performed.
Vehicle Configuration#
When adding new vehicles to the system, you need to update both the FMS and the Docker container. Follow these steps:
Adding Vehicles in FMS#
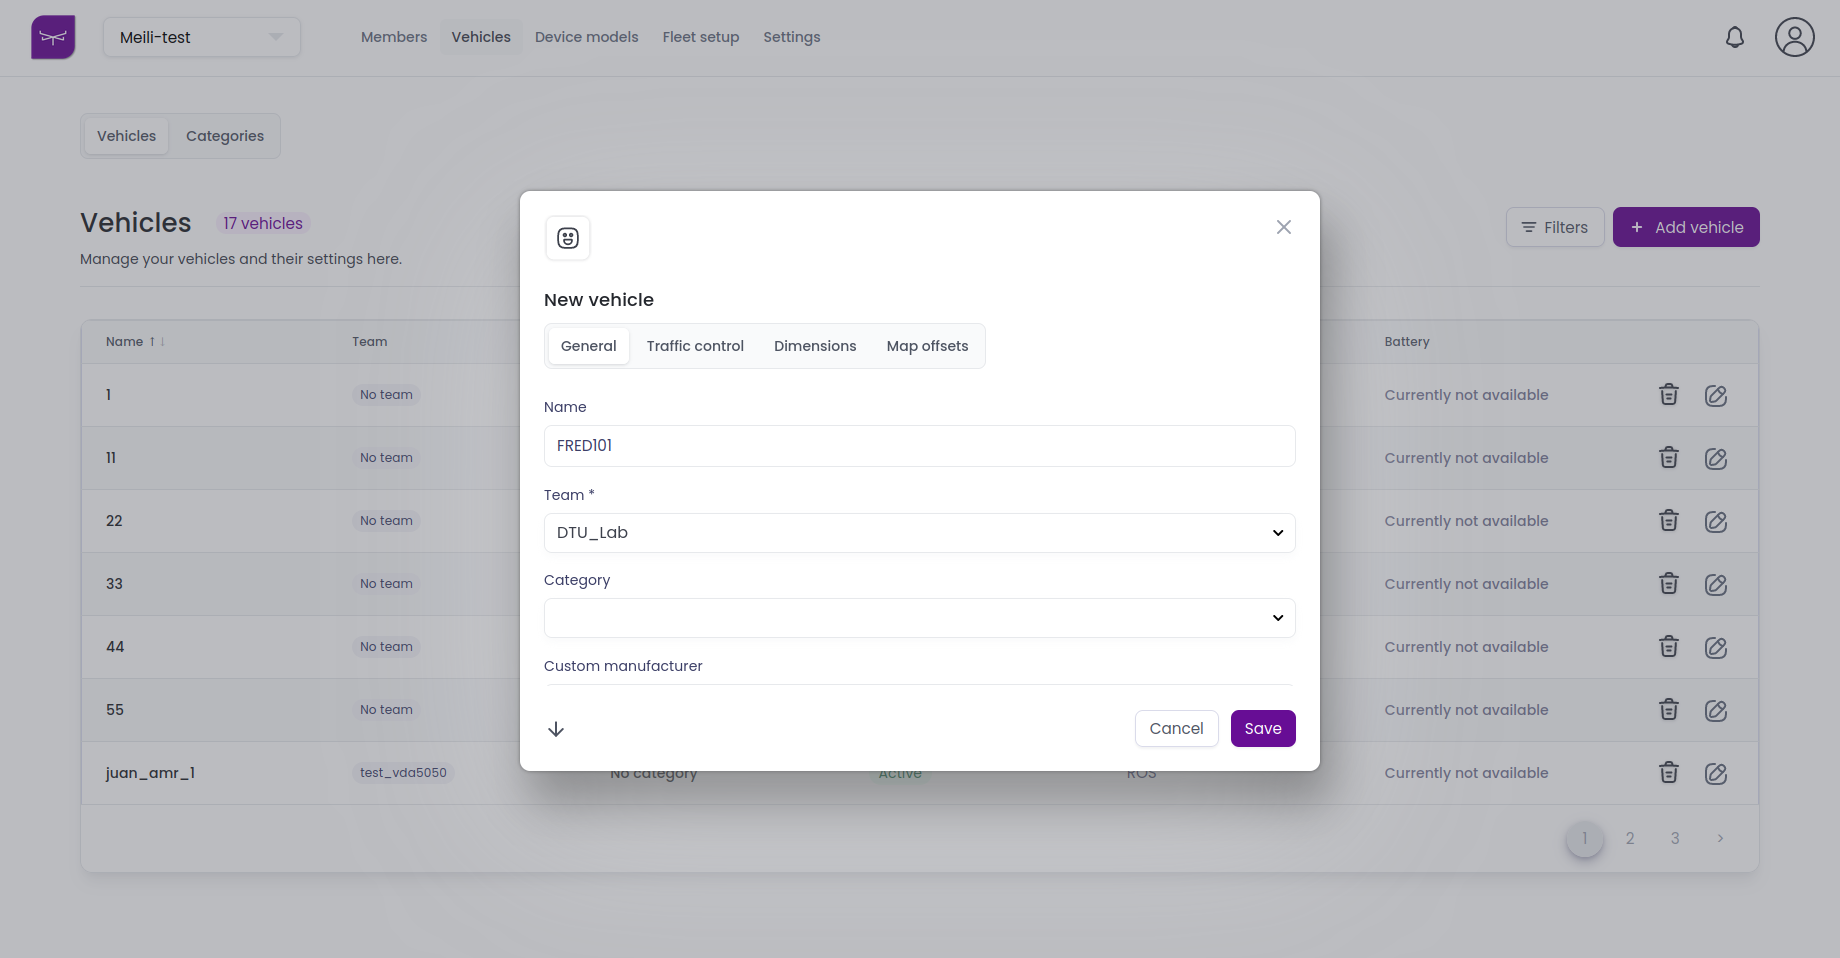
- Go to https://app.meilirobots.com/dashboard/organization/.
- Navigate to the
Vehiclespage and click theAdd Vehiclebutton. - A window will appear. Fill in the important fields:
- Name: FRED + serial number (e.g.,
FRED101) - Team: Select the team where the vehicle will be added
- Integration Type: Select
ROS - Vehicle Type: Select
AMR(Select AMR even if the robot is an AGV) - Active: Check this checkbox
- Name: FRED + serial number (e.g.,
- Leave the rest of the fields blank and press
Save. - Repeat this process to add as many vehicles as needed.

Setting Up the Fleet#
-
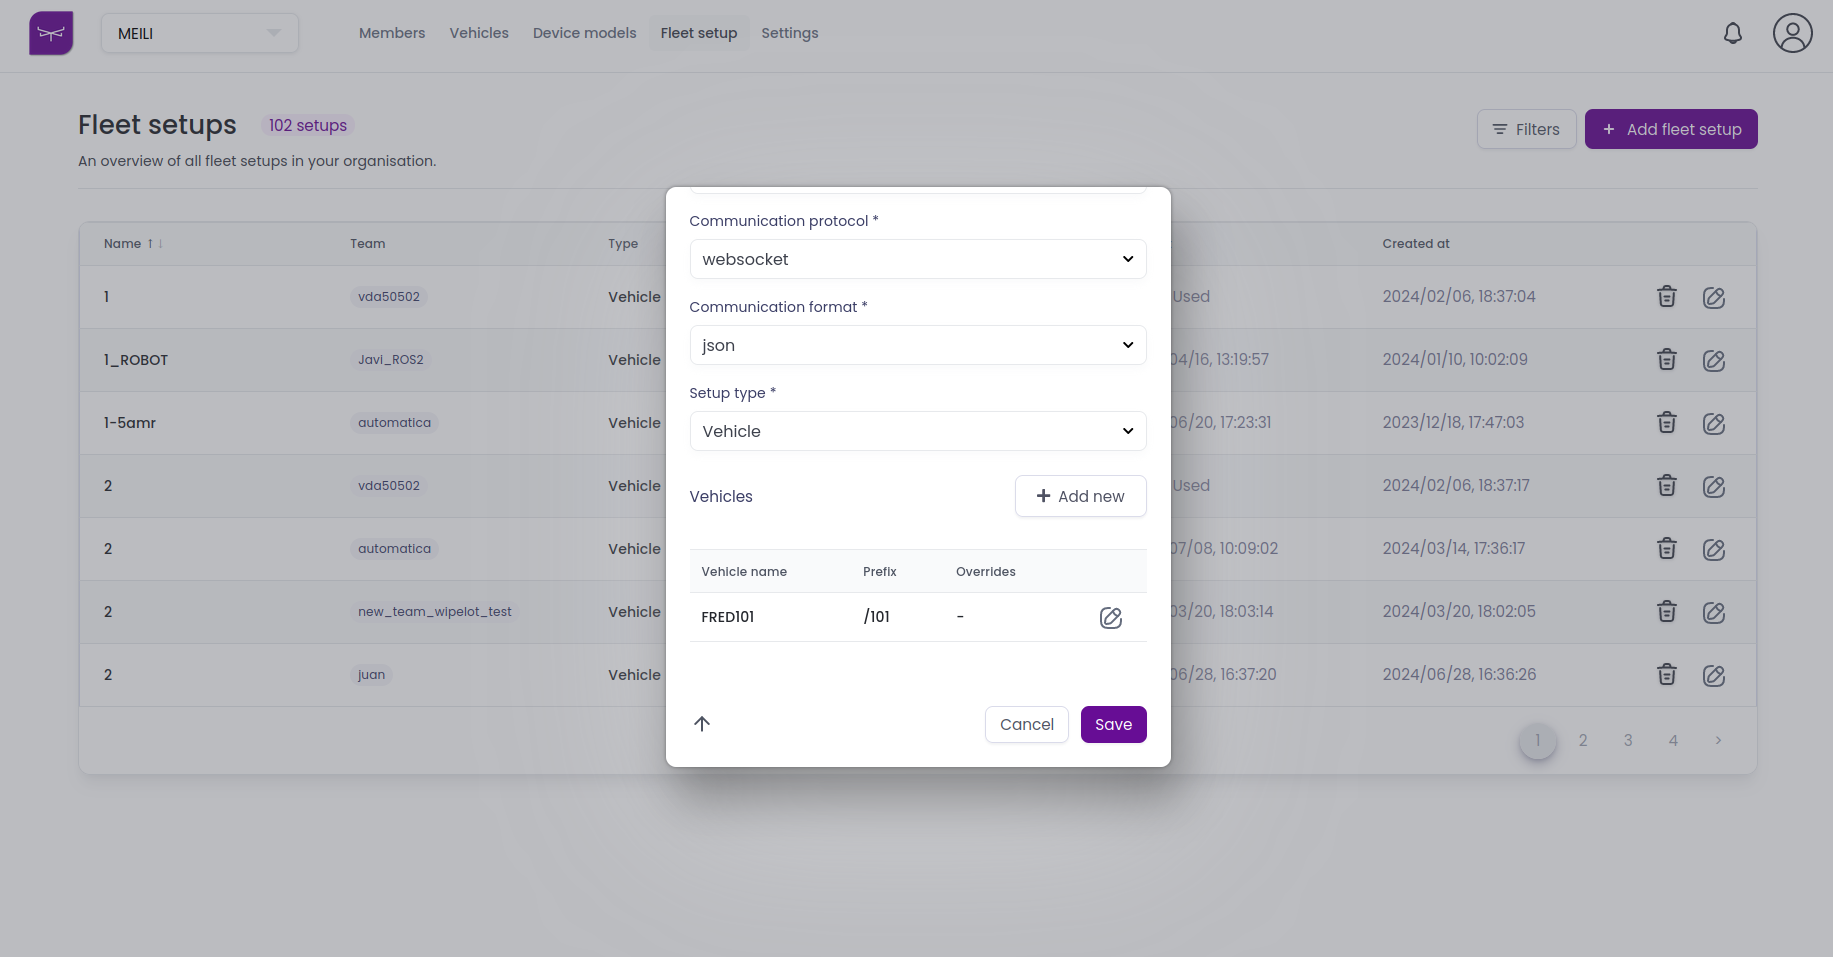
Go to the Fleet Setup page and click the Add Fleet Setup button.
-
Fill in the important fields:
- Name: Enter an easily identifiable name.
- Team: Select the team where the vehicles are located.
- Communication Protocol: Select
websocket - Communication Format: Select
json - Setup Type: Select
Vehicle
-
Click the
Add newbutton and select one vehicle. -
In the Prefix field, enter
/+ the serial number (e.g.,/101). This step is very important. -
Click
Add. Repeat this process to add all the vehicles. -
Finally, click
Save.

You should be able to see the new setup listed. Locate the 5-character PIN associated with the setup in the ”PIN” column, as you will need it for further configuration.
Updating the Docker#
In a terminal window, navigate to the meili folder and execute the following command:
docker compose run --rm fred_integration update_fleet $PINReplace $PIN with the previously mentioned PIN or any other PIN from the fleet you want to configure.
Press Enter to start the process, which will update the vehicles and launch the integration. If everything is successful, you should see the new vehicles on the FMS map.
Synchronize Tag List#
Previously make sure you have uploaded a map (Uploading a Map) and that a custom action definition has been created name
go_to_lineand with a variable namedlineof typestring(Action definitions).
If you update the tag list or receive the warning Tag {tag_name} is not synchronized. Send map updates to the robot (when the tag is not 0) during the integration process, it indicates that the tags are not stored in the database. To resolve this issue, follow these steps:
- Go to the FMS team, map tab, and map editor tab (https://app.meilirobots.com/dashboard/fred-corporate/maps/modify/).
- Click on the Send Map Updates to Robot button located at the top right corner, identified by a paper plane icon.
- Some messages will appear in the terminal. Do not worry if an error message appears stating that some number of stations were expected to be received.
- If everything went correctly, the robots will now appear on the map.
Updating Configuration Files#
To update the tag list, use the following command as an example:
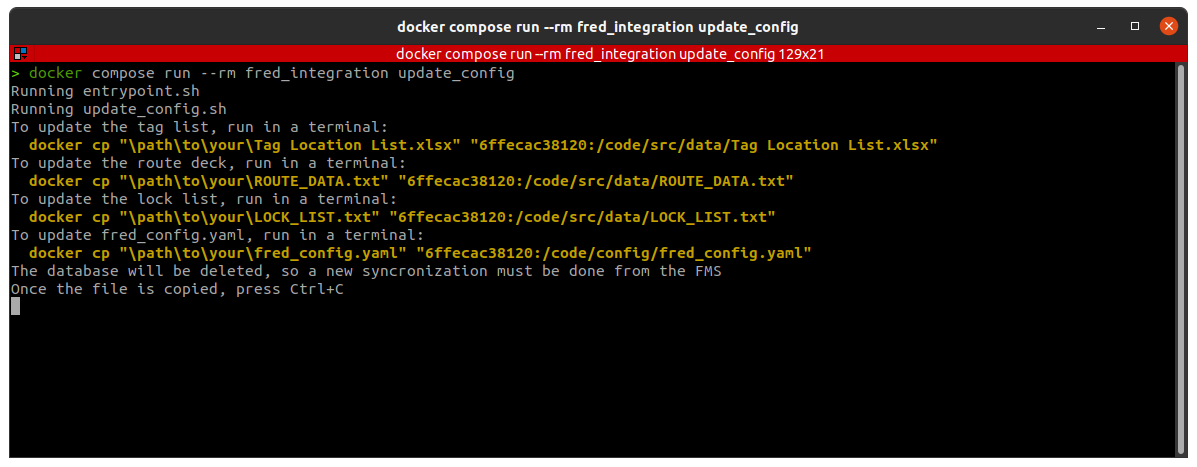
docker compose run --rm fred_integration update_configSome messages will appear on the terminal, which commands to update each of the possible configuration files. This commands should be executed in a new terminal.

In this documents, a placeholder $container_id is used for the Docker container ID. In the output terminal, this value will be substituted with the actual container ID, as seen in the image. It is recommended to copy and paste the command, then update the path to your file before executing.
Updating the Tag List#
Tag list is a file named Tag Location List.xlsx. This file contains three columns: POINT, X-Axis, and Y-Axis. POINT is the tag name, and X-Axis and Y-Axis are the coordinates of the tag.
To update the tag list, use the following command in a new terminal:
docker cp "\path\to\your\Tag Location List.xlsx" "$container_id:/code/src/data/Tag Location List.xlsx"Copy the command and substitute path/to/your/ with the actual path of the file. Ensure the file is named Tag Location List.xlsx.
Updating the Route Deck#
Route deck is a file named ROUTE_DATA.txt. The content of this file will be published into the MQTT broker when requested by the robot.
To update the route deck, use the following command in a terminal:
docker cp "\path\to\your\ROUTE_DATA.txt" "$container_id:/code/src/data/ROUTE_DATA.txt"Copy the command and substitute path/to/your/ with the actual path of the file. Ensure the file is named ROUTE_DATA.txt.
Updating the Lock List#
Lock list is a file named LOCK_LIST.txt. This file contains the list of critical tags where the robot should stop, and the list of tags that should be checked before moving. For example:
{
  "118": ["133", "137"],
  "140": ["141", "142", "143"]
}
To update the lock list, use the following command in a terminal:
docker cp "\path\to\your\LOCK_LIST.txt" "$container_id:/code/src/data/LOCK_LIST.txt"Copy the command and substitute path/to/your/ with the actual path of the file.
Ensure the file is named LOCK_LIST.txt.
Updating fred_config.yaml#
This file has the following structure:
mqtt_ip: 192.168.X.XX
app_name: APPNAME
robot_model: Fred
lines: ["ROUTE1", "ROUTE2", "ROUTE3"]
Here you can configure the MQTT broker IP, the app name, the robot model and the lines. Once updated, use the following command in a terminal to apply changes:
docker cp "\path\to\your\fred_config.yaml" "$container_id:/code/config/fred_config.yaml"Copy the command and substitute path/to/your/ with the actual path of the file.
Ensure the file is named fred_config.yaml.
Finishing the Update#
Once done, press Ctrl+C in the first terminal. You can now relaunch the integration code. You will need to follow the steps on the Running section to do so.